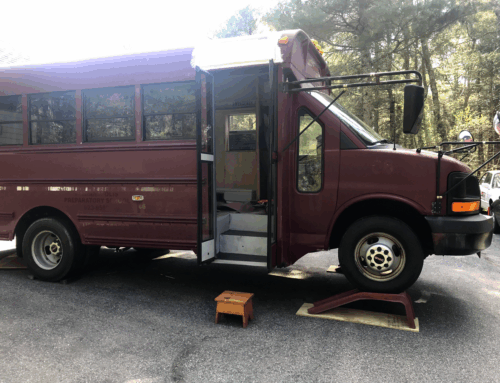
Every vehicle needs a good backbone and in this case, our rig has two: One for the truck itself, the factory frame, and two, the coach frame that supports the bus structure. The truck frame, though a little surface-rusty, is quite solid and probably heavier than my Miata. The bus frame, though, as we saw in the last post, was, well, not so much. Here’s how we replaced the rusty center beam in our bus.
While we managed to Tetris out the old and crusty beam, we still had to replace it with something. In this case, it was C-Channel, even though ours looked like C-, V-, U-, and L-Channel, where everything was rusted and bent halfway through the alphabet. I used one of the good beams to grab my measurements so I could then start calling around for the best prices. During those calls however, I discovered that no one around had that C-Channel in my specs. Oh, what to do.
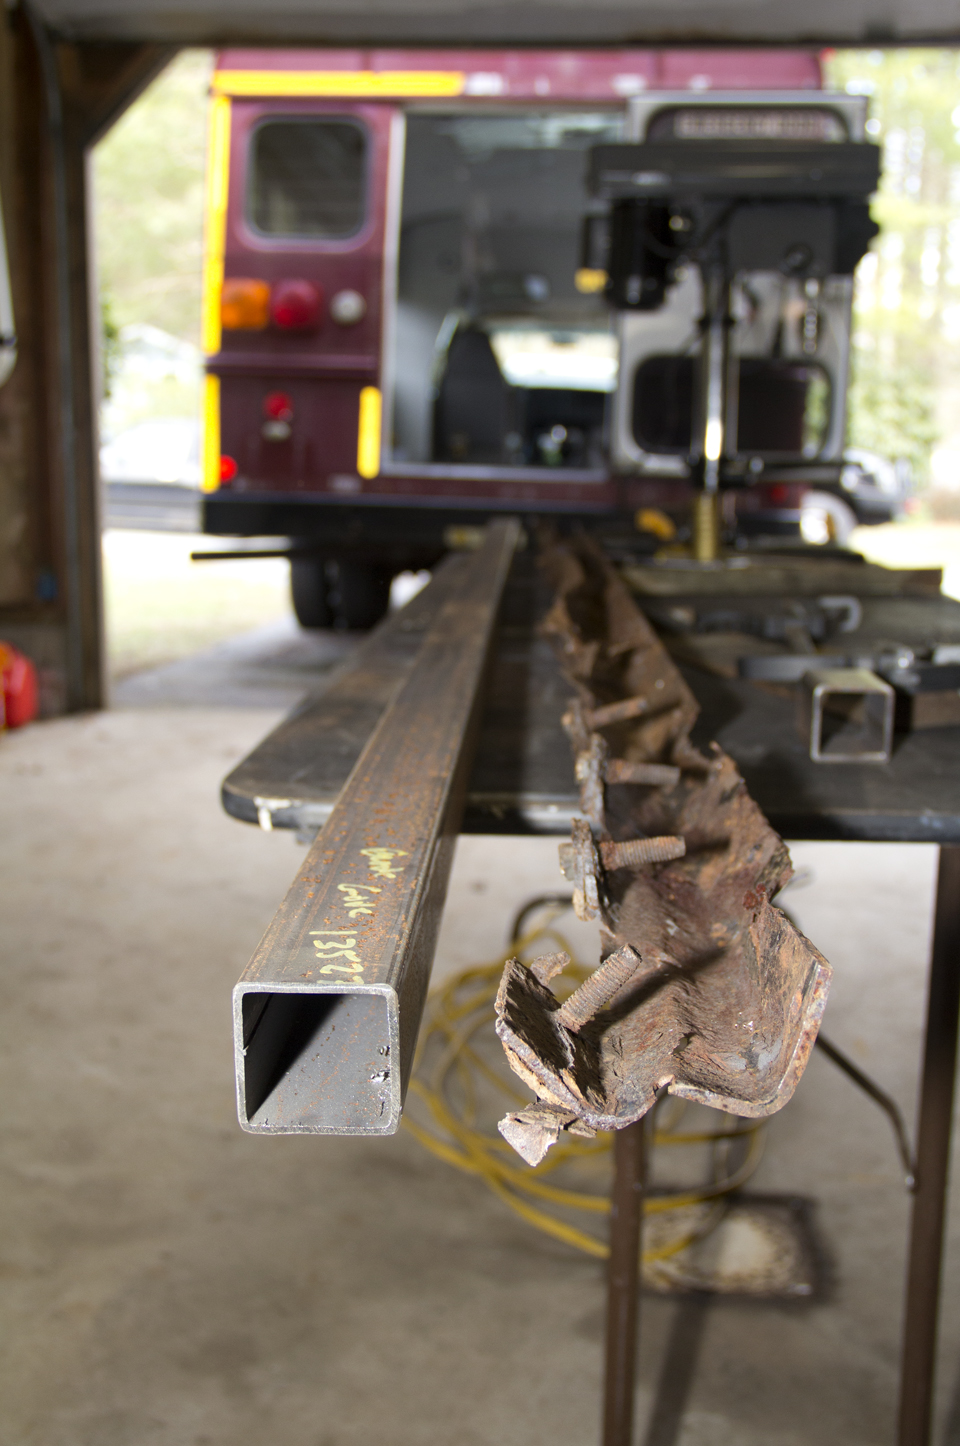
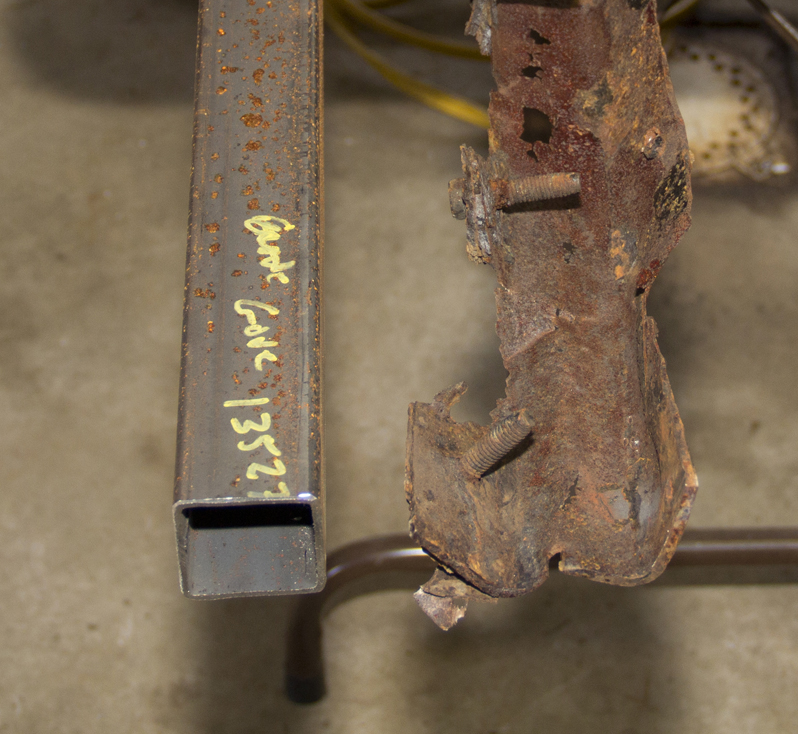
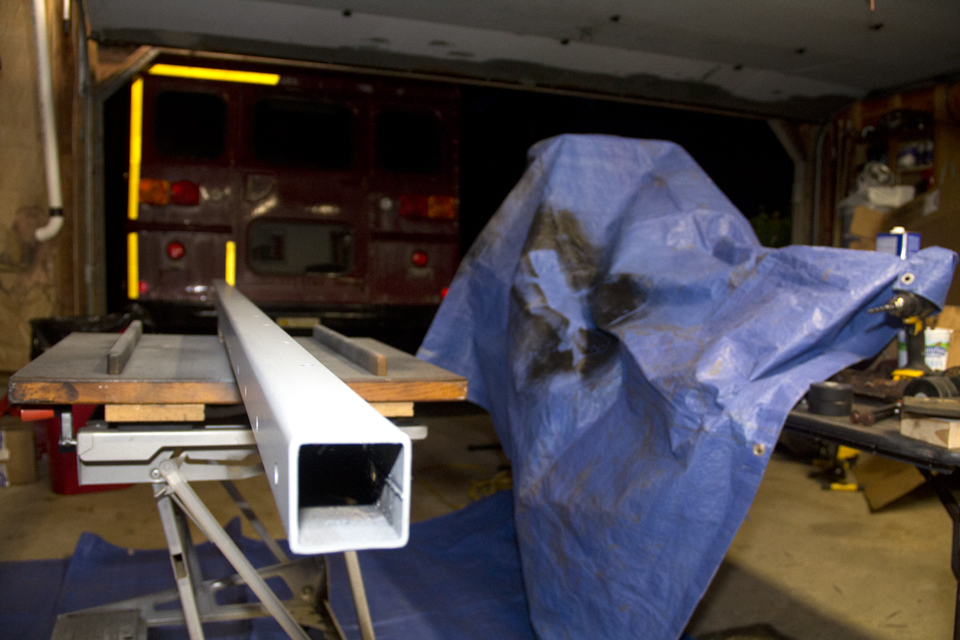
On the left is the new beam in all its square, non-rusted glory. On the right, is the old C-Channel beam, which is, umm, more like a W-Channel in this instance.
How in sweet heck do you make a beam for a bus? Here’s how we did it…
- Get a beam
- Cut it
- Punch it
- Slather it
- Drill it
- Deburr it
- De-schmutz it
- Prime it
- Paint it
- Cap it
- Install it
The old beam was connected to the bus chassis with nuts and bolts through the floor and the top part of the C. The bottom part of the C was connected to the truck chassis via nuts and bolts and a hard rubber bushing that had departed the earth right around when the aliens built the pyramids, so those had to be replaced as well.
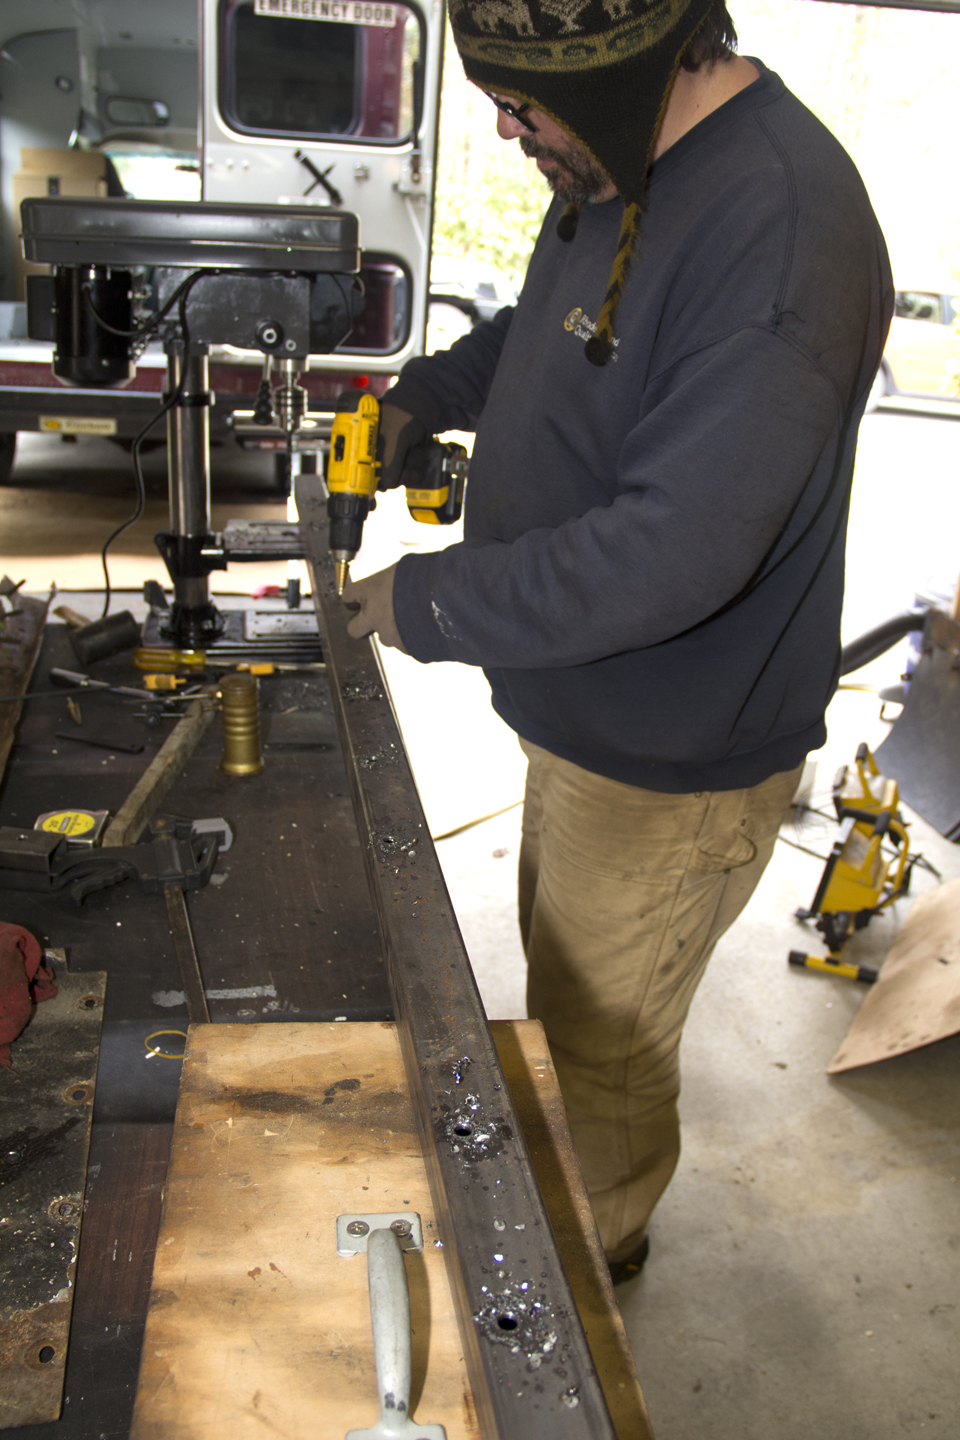
Still out of luck sourcing the C, on my way to work one day, it came to me that I could probably use square tubing instead, which would also make it even a little stronger. The only tough part was that I now had to drill twice as many holes in the beam so the ½-inch bolts would go all the way through. So that’s about 12 bolts and 24 holes. In theory, I could have done it with my drill. My fear though, sometimes my drilling goes wonky, especially when trying to match the holes from one side through to the other. Enter the Drill Press!
[Drill] Press on regardless…
Despite my PowerPoint and buy-in from the Board (the people in my head who make dumb ideas sound good), the drill press was a hard sell for Steph. At this point, it was yet another mechanical expense and setback, as we haven’t even gotten to do any of the fun, inside stuff yet. I was lucky enough to find a small, tabletop drill press at Harbor Freight for around $150. Part of the pitch was we were going to use it elsewhere in the bus as well, and on my rally car, when I get around to fixing that thing (at least the lichen is covering up those rust spots).
The drill press has been an on-and-off want from long before the bus, but now it was justifiable and we went for it and never looked back. That price to me, too, was cheaper than having to buy a pro-level piece that would have set us back four times that price. Knowing that I wouldn’t be using it every day as part of my job, I went the consumer-level Harbor Freight route. The higher end stuff I’ve bought there does work well and lasts a long time. Plus, I figured it was basically just a big motor and a steady metal clamp hand. I didn’t spare expense though, on the drill bits. While probably not also pro-level, I got the higher-end ones from Home Depot with good reviews – and those, along with the drill press, worked the business.
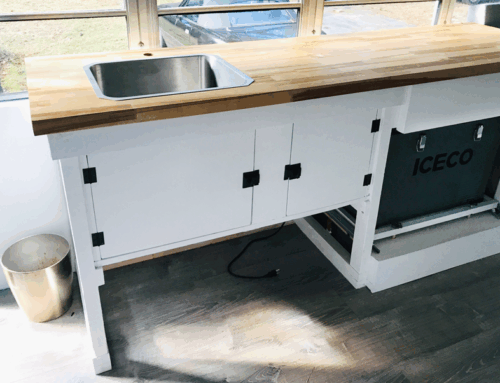
Despite coming up empty on the C-Channel, I did manage to find a 2” square, 10-foot long steel tube from a semi-local metal joint. It was more expensive than I wanted it to be of course, but I had already searched my local scrap place, Exeter Scrap, which is an excellent place to source all sorts of metal. This particular yard sells things too, like ladders, some car parts, lawnmowers, etc. I even scored our kitchen sink there. Anywho, I ordered a 10-footer so I had room to screw up trying to cut the thing with the grinder. Since we had just picked up the drill press, I assumed an industrial band saw would be an even tougher climb and I didn’t have time for another PowerPoint.
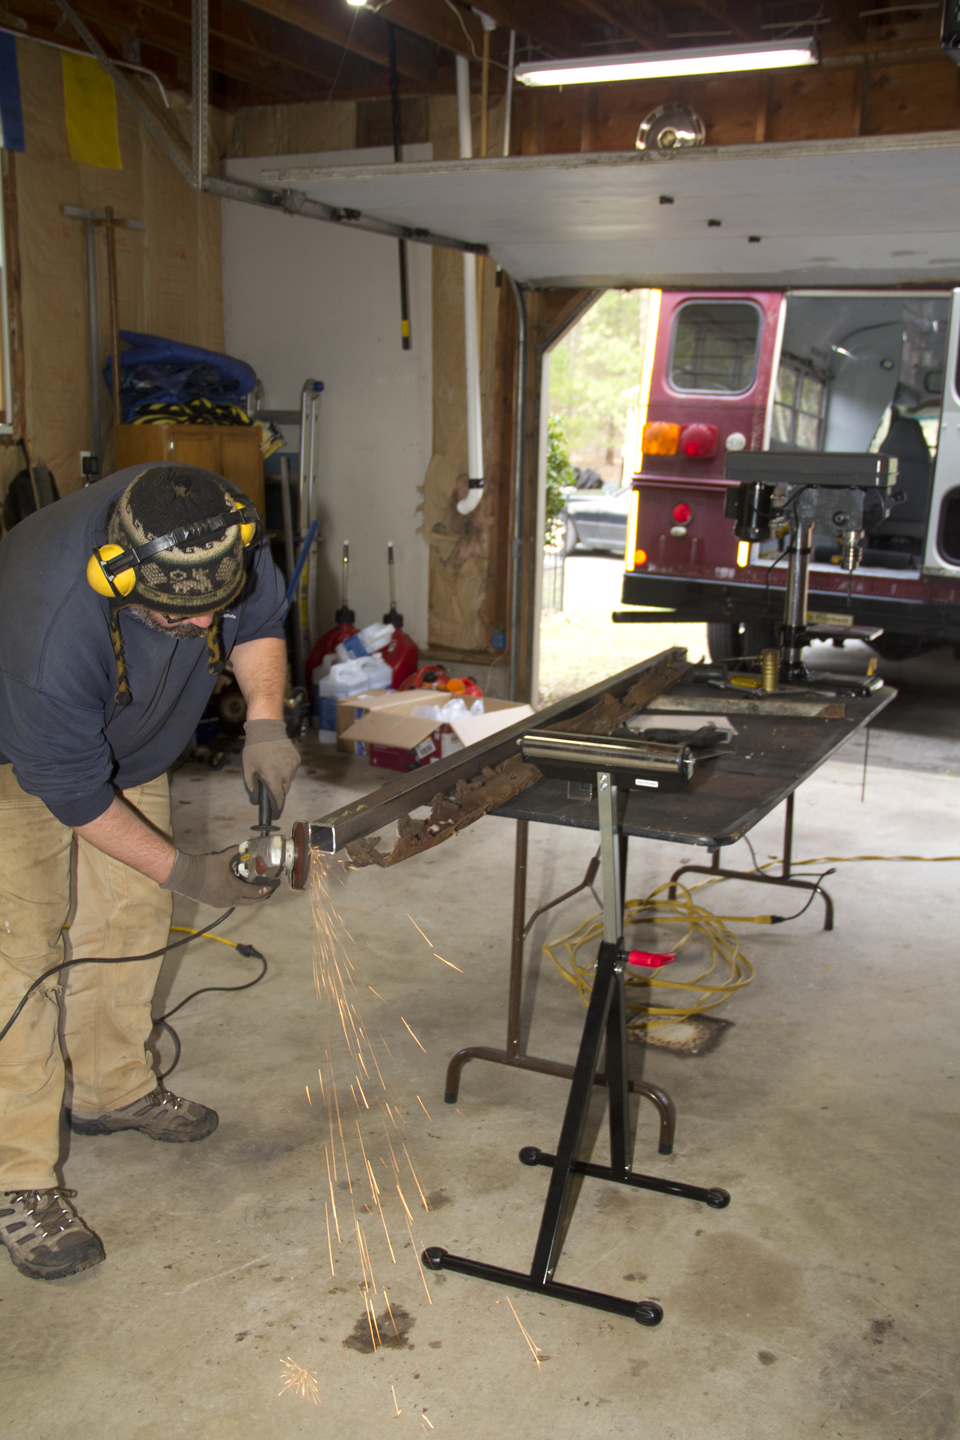
Grinding Glory: To make sparks, I used a 4-inch grinder with a cut-off wheel, cutting as straight as possible. I then used a different grinder wheel to square up a bit and round-over the edges slightly for handling.
Buying metal might be trickier than you think
If you’ve never ordered metal before, it can be tricky with type, like mild steel, cold rolled, hot rolled, etc. But the more basic things are outside diameter and inside diameter. Let’s take my 2-inch square tube for a moment. It’s 2 inches on the outside of the square, but about 1 3/4 inches on the inside of the square. The inside diameter, in this case, wasn’t as important to me as the outside, as the outside dimension is what I really worried about fitting in a certain spot. The inside diameter would be more important for like a radiator hose. You have to make sure the inside diameter will mate with the inlet on the radiator. The other thing is, if you plan on painting your metal, it usually comes smothered in this slippery, gooey, oily schmutz that keeps the rust off (mostly) until you get to use it on your project. The best way to get rid of that stuff is with straight acetone and a rag.

For my purpose, I left the oily schmutz on till the very end. When I cut my tube down to size, I sprayed a little primer on the freshly cut edge, so it wouldn’t flash rust, like brake discs. Since I knew I was going to be putting cutting oil on my tube anyway, I kept everything oily and gross whilst drilling all the holes. In all, we cut about 12 locations. I lined up the old C against the new beam and used a center punch in the in the same places the old bolt holes were frozen into for all eternity. You use a punch so the drill bit doesn’t wander all over your piece. This is less likely with a drill press, but it still happens.
After I made all the punches, I leveled the beam side to side so I wouldn’t drill at an angle. Since we used ½-inch bolts, I used a ½-inch drill bit. Normally, it would have to be a little wider hole than the bolt size, but I also used, after drilling, a step-drill bit. The step bit does a couple of fascinating things like cuts cleaner holes, but it also removes of lot of burrs, or metal splintery things that stay stuck to the piece and have a tendency to shred all of your fingertips. Normally, I wouldn’t have worried about burrs on this, as we’ll never see it again, but there was a lot of handling before installation, so I didn’t want to piranha our hands off. Why not just use the step bit from the jump? Step bits are really expensive compared to other bits. So I used the regular bit for the muscle, and the step bit for the finish. If this were a piece that people would be looking at and/or using, like to put in a peg or something, you can also buy a deburring tool, that makes everything nice and smooth.
During the main drilling process, I also drilled the four holes on the off sides to accommodate for the mud flaps and bolts. To measure those holes, I bought new mud flaps from a semi-truck supplier, which happened to have semi-precut holes. I just popped those out and marked them. For some panache, I rounded the corners of the bottom of the flaps with a razor knife. The factory flaps looked a little too stock with straight corners.
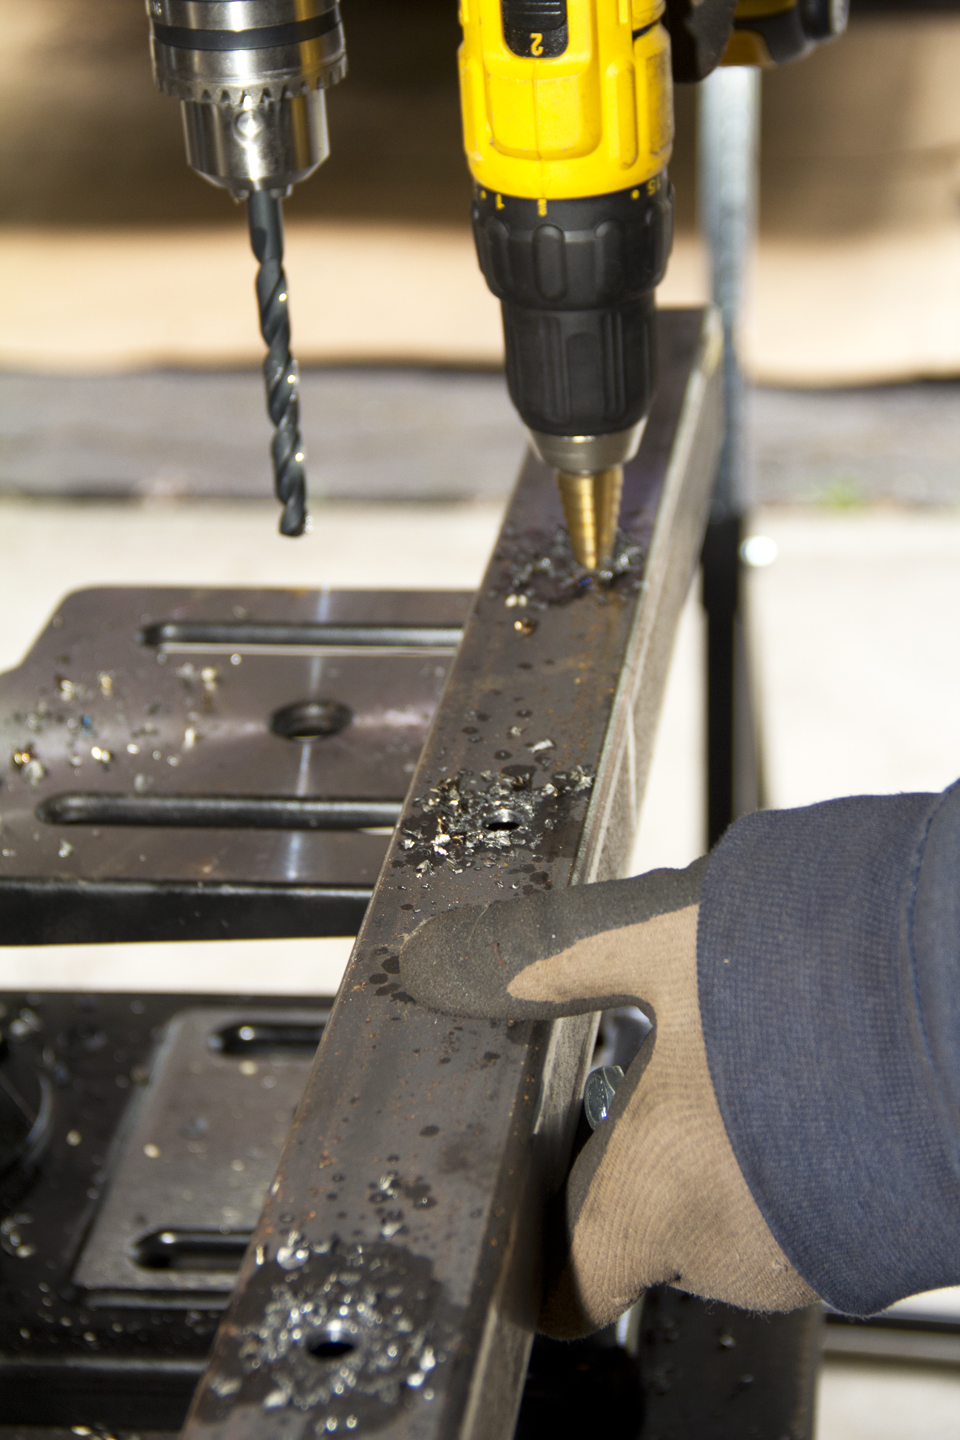
Schmutz & Mill Scale: We drilled the holes with a 1/2-inch drill bit, then finished-drilled with the step bit so we didn’t slice our fingers off when handling. I left all the oily shipping goo and mill scale on the piece until I was done making a huge mess.
Wonky Measuring? In this shot, you can see that the holes we drilled aren’t exactly NASA straight. But, this is an exact map of the bolt holes we pulled out of the bus. Our bus was made as Corbeil was going out of business, so perhaps the team had a 1970s Big Three approach to fit and finish. However, it only took a few nudges and adjustments to get it back in place.
Once all the cutting, drilling, and deburring was done, we were left with a big, oily, greasy, slippery, slathery mess, that now had super sharp micro bits all over the place, not just on the outside, but all on the inside as well. I ragged off most of the loose piranha teeth first, then used that straight acetone to get right down to the metal, essentially cleaning all the oil and mill scale off, so it was just a straight, dry metal surface that would accept paint well.
Paint it. Paint it. Paint it Black.
I chose to prime the beam first with some self-etching primer (no sanding required, usually) and a finish coat of Rustoleum Satin Black (paid link) so hopefully most of the dirt, snow, salt, mud, etc., would just slide right off. My intention was to seal this thing like a tomb, so we’ll never have to do it again. I don’t remember how many cans it took, but that link above is for a 6-pack of paint, which saves about $1 per can. You’ll go through a lot more than you think.
Optimus Primed: After drilling, step-drill-finishing, mill scale and oily schmutz removal with acetone and a few rags, I sprayed the beam with a couple of coats of self-etching primer.
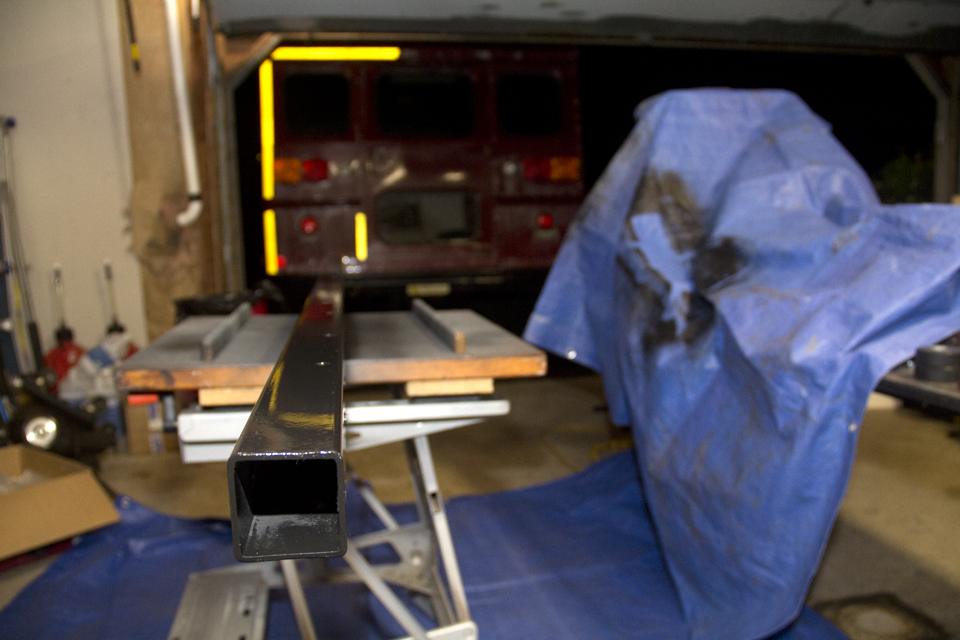
Shiny: After the primer dried per the instructions, I sprayed several coats of Rustoleum Satin Black paint to help keep all future rusties out. I capped the ends of the tube with press-fit plastic caps.
I capped it all off with 2-inch plastic caps on either end, that pop right in with the gentle assistance of a rubber mallet. My theory was to encapsulate it as much as possible. The nuts, bolts, and washers sealed the drilled holes (that were also primed/painted), the oil that dripped into the inside of the beam would soak in, creating a barrier, and the plastic caps would seal the ends and keep everything from getting into the inside of the beam.
When the beam was done, prepped, and dry, very gingerly to avoid scratching it, we slid the new beam right into the old location. Inside the bus, Steph slid the end bolts into their locations, and from under the bus, I put the nuts and washers on and while she held the bolt head with a wrench, I cinched up the nuts with an impact from below. We went bolt-by-bolt like that all the way down, nudging the beam, or making slightly wider holes in the floor if our measurements were off a little.
So, the beam was done and installed! More cheers were had following this process, as well as some interior testing by jumping up and down on the new beam from the inside. Solid as can be, we called it done. We were again structurally sound. To make it even more solid, and more ‘factory’, I replaced the worn out rubber bushings with two stacked Howies hockey pucks (paid link), which just happened to serendipitously fill the empty space. Hockey pucks are exactly one inch high and this was a great, cheap solution, rather than trying to find OEM bushings for a bus who’s manufacturer went out of business a decade ago. The pucks are through-bolted to the beam and rest on the truck frame. Hockey pucks are also used sometimes for bump-stops on overlanding trucks, so I know that’ll do the trick.
The next day, I installed the mud flaps in their pre-drilled holes to really finish off this project. So now we are structurally sound and street-legal once again.
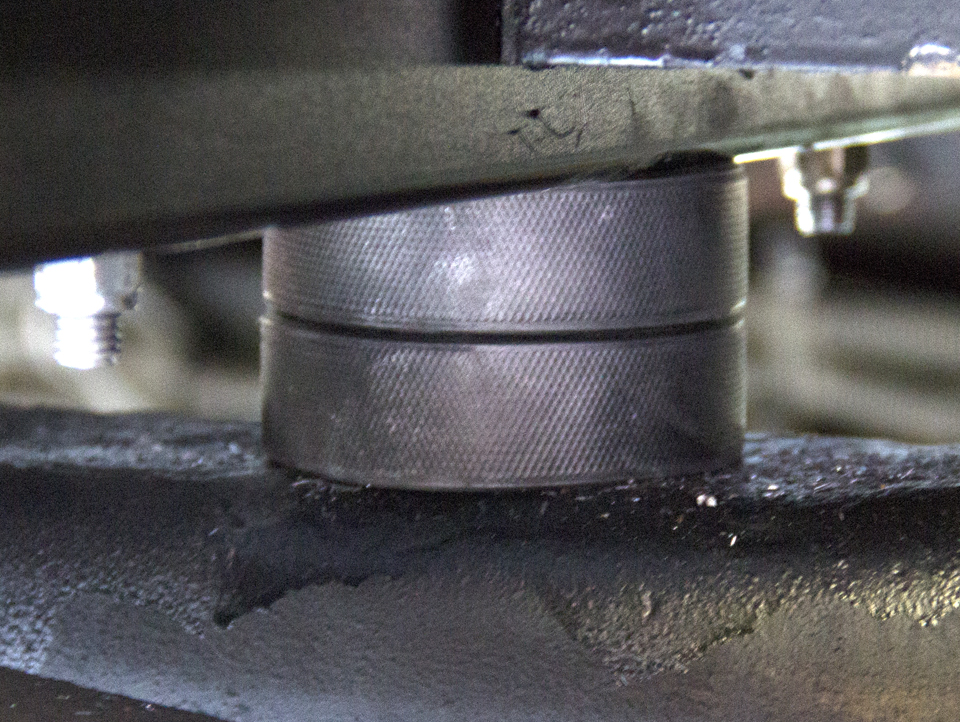
Stanley Cup Finish: Trying to chase down factory spacers from a bus company long extinct, I opted instead, using a little Xterra overlanding knowledge, to use double stacked hockey pucks bolted through the new beam. Some gentle persuasion with a rubber mallet seated them nicely in place.

Pucktastic: Here are the pucks in a wider shot, showing our Savana’s new spacer location bolted to the beam, sitting on top of the frame, just inside the rear suspension.
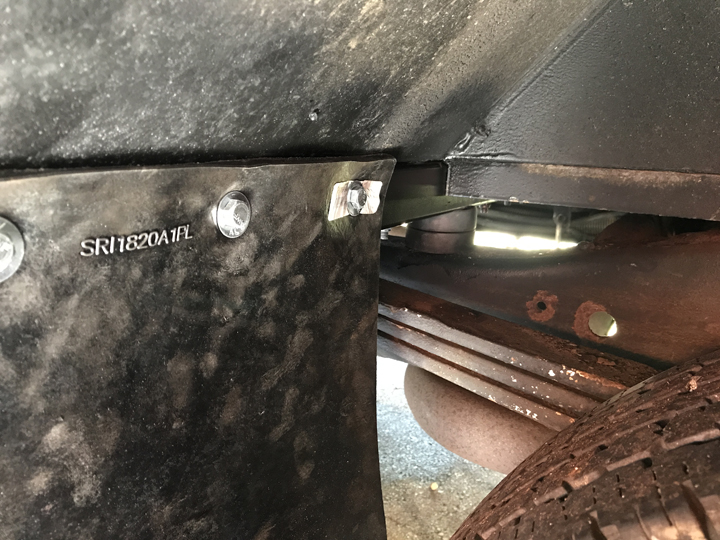
Mud Flapped: Semi-truck mud flaps can be had from just about any semi-truck dealer or supplier. We got these on the cheap and custom cut them to fit our needs. Here they are bolted in place, with the hockey puck bushings in place behind.
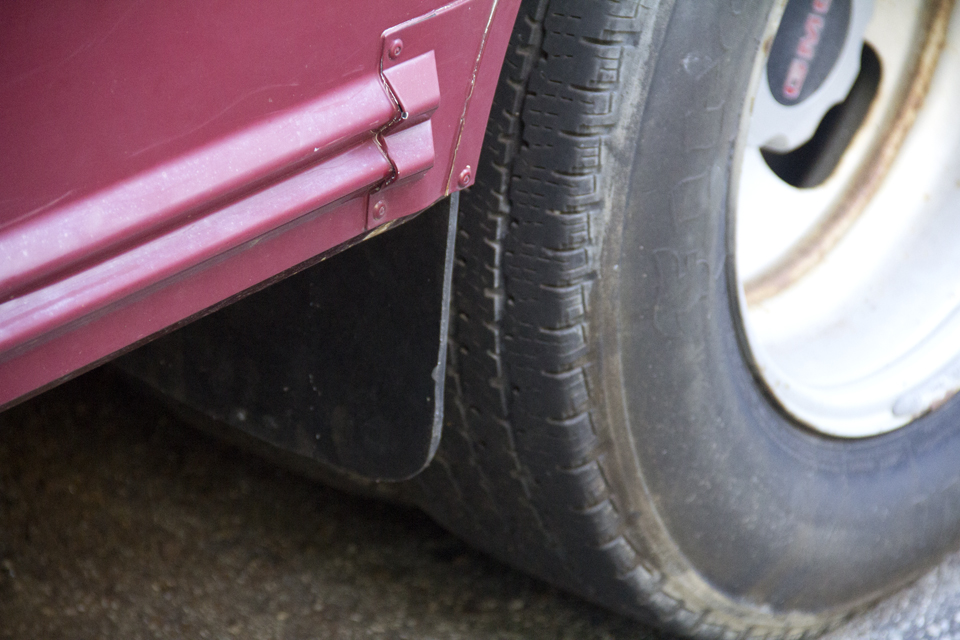
Factory Fun: From the outside of the bus, looking from rear to front, it almost looks like a factory flap.
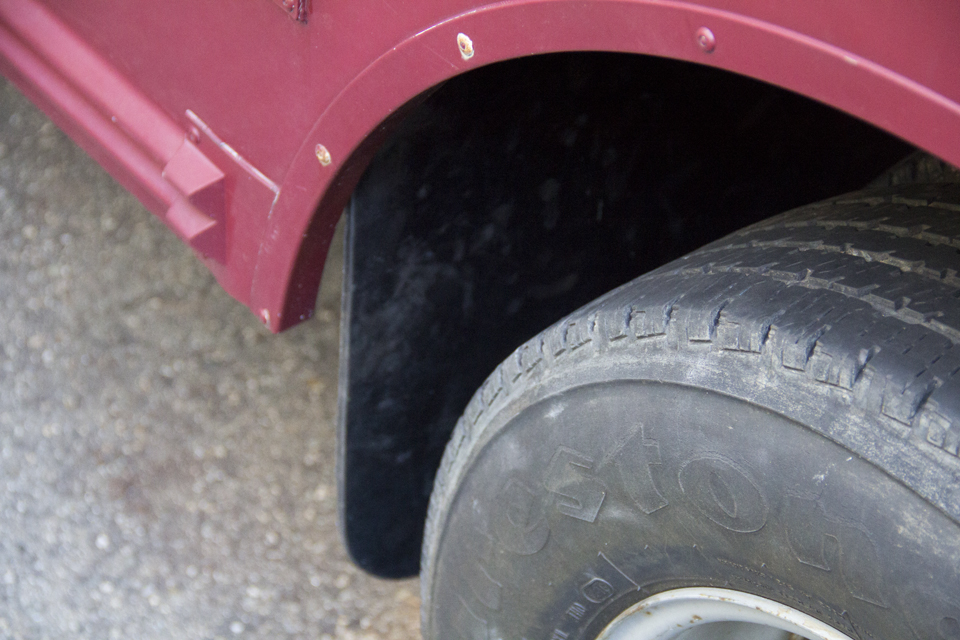
Here’s the new, installed mud flap. I got fancy and rounded the edges of the otherwise stock, square-cut flap.
This project, while time-consuming, was something that was relatively simple to do in practice, it just took a little noggin thinkin’ and some MacGyver workarounds for a few tricky spots.


Leave A Comment