Just because you can, does’t mean you should
So it turns out, I would rather paint living rooms and bedrooms in houses than the outsides of buses. I was always curious about painting a vehicle, after years and years of watching car restoration shows. Now that curiosity is quelled. I guess normal people start out with a small car, or a small part of a car, but we just kinda went full send and decided to paint a rolling building — with no experience. If you have the budget though, hire someone to do it!
If you’ve seen car restoration shows before, you know that the painting process is lengthy and expensive to get a fabulous shine on that old ‘Cuda or ’57. Body work comes first, then sanding, priming, sanding, more priming, more sanding, painting, sanding, painting, cutting, buffing, gleaming, cutting the orange peel, painting again and again and again until the thing shines with deep, deep, glorious color. That’s how the restoration people do it. I’ve seen some paint jobs where the DIYer essentially finds an old roller and goes to town with a bucket of off-brand Home Depot paint.
Theoretically, I wanted to go the way of the museum-piece, but I also understood that body work takes forever and this was an industrial box on wheels that already had some character, like a bent rear bumper, and some other dings and dents from years of hauling prep-schoolers back and forth to soccer games and mathlete competitions. So we ended up somewhere in the middle with some high-end automotive paint with a ’63 Volkswagen Bug color code for the body, and that bucket of paint from Home Depot (Rust-oleum 242256 Gloss White oil paint) and a ratty roller for the roof. We weren’t going to do a rooftop deck, as nobody would see it anyway, and painting the body was going to be a ‘best effort’.
We started by power washing the roof, since that was Phase 1, but also the rest of the bus to see what was lurking beneath some of the accumulated schmutz from living in the woods. The roof itself was kind of a mess with some old caulking, a few gaps and cracks around the vent. To get paint to stick, the surface needs to be as clean as possible. Most car people have environmentally controlled dustless paint booths with fans and natural light looking bulbs and all that good stuff. Our paint booth was outside under a pine tree in the Fall. Close enough, I guess.
Paint doesn’t stick to silicone, or most kinds of caulk. In that case, we used denatured alcohol to clean the surface first, then automotive seam sealer, which was designed to stick to paint, to fill cracks and holes like you would use spackle in the living room. The unfortunate part was that we had to do all this up on the roof.
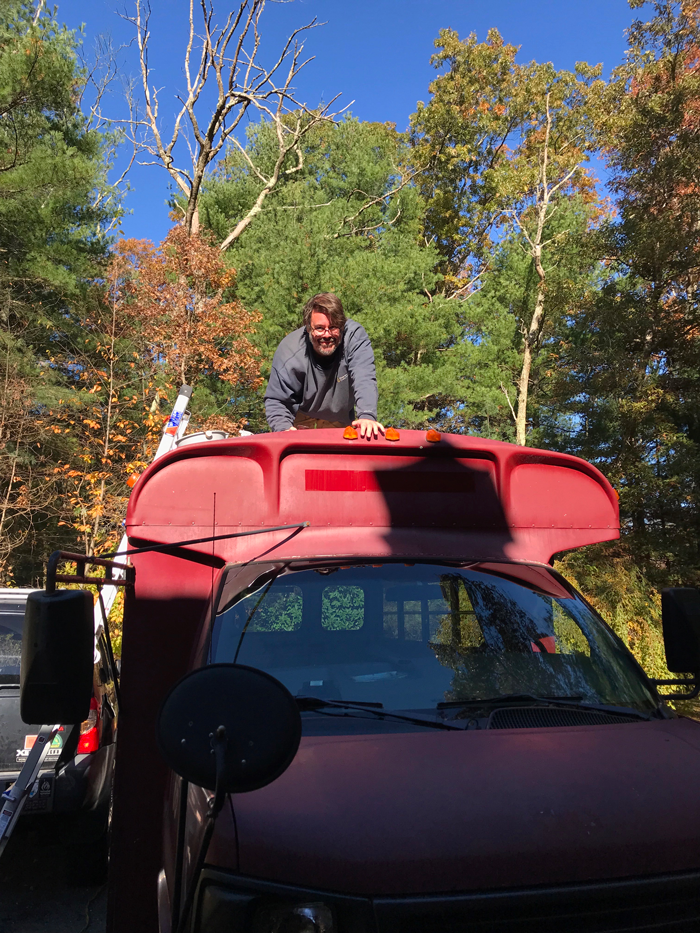
This is me having a full pucker moment holding on to the scraper for dear life.
Let’s back up a skosh
Somewhere between age 10 and being however old I am now, I developed a near-debilitating and progressive fear of heights. Naturally, bus roofs are higher than car roofs, so that was a thing. I knew I had an issue with flying since my first commercial flight in the late 90s when I followed Steph to Cleveland, as she had a work convention. I had some time off, and the Indy Car Series had a race that same weekend! Some of the teams even stayed in our hotel. So she had to work and I got to watch race cars all week! Anyway, I had been on a single engine Cessna when I was a kid and I loved it, but this was my first big-boy plane. Let’s just say we loved flying so much that we drove home from Cleveland after the convention, like from CLE to PVD. We rented the only car left, a brand-new Lincoln Continental with Georgia plates, and listened to Barry White through 13 hours of the storm we would have flown out of in 15 minutes and landed at home an hour later.
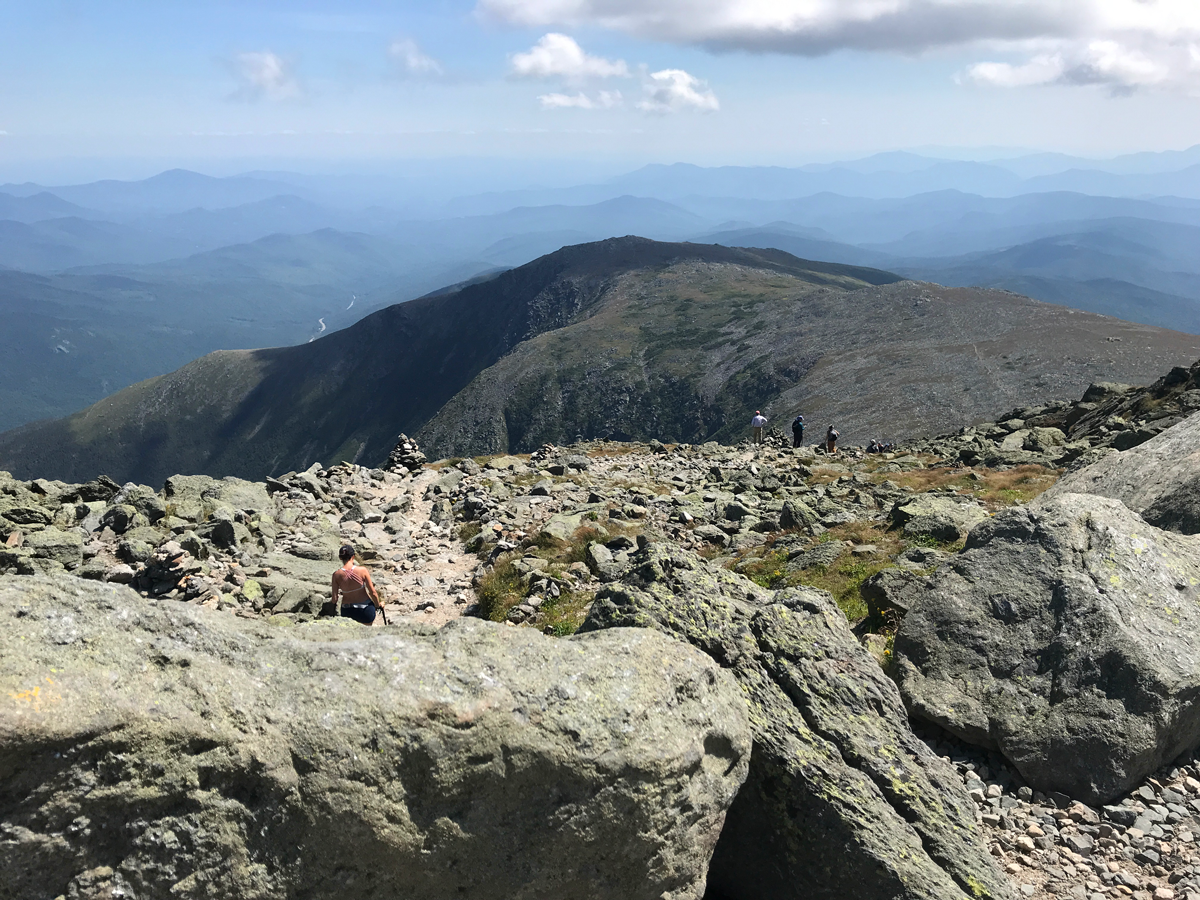
I recovered from that slightly, then when I started covering the Quonset air shows for the paper, I forced myself to go up in stunt planes to shake this height thing. Perhaps stunt plans and helicopters that just float in the air wasn’t the best way to shake the fear. I knew this height thing was really bad a few years ago when I crewed for my friend Bill, the guy who built our Silly Seat, who was in the rally class of Climb to the Clouds, a race up Mt. Washington. Knowing that I wouldn’t co-drive after crashing with Bill years ago at International Rallye New York, I still wanted to help out. Well that help came with a free drive-yourself-up-Mt.-Washington ticket to get one of those bumper stickers deals. Y’know, This Car Climbed Mt. Washington, the New England-famous one. So cool I thought, I’ll take myself up there in my Xterra when we had some down time. It wasn’t flying after all and it surely wasn’t racing. This was my first time up and the first mile or so was great. Super cool, nice trees, 90-degree temps, mountain-y type stuff. When I went above the tree line though, and the world opened up, it felt like I was flying and all my guts wanted to leave through the back door post haste. However, there is no real place to turn around, so to the top I was going whether I liked it or not — and guess what? The answer was not. When I finally reached the top, drenched in flop sweat on a now 57-degree peak, and realized my guts were staying attached to my insides (for the moment), I did get to enjoy the view — briefly. Then, I very acutely became aware that I would have to drive my truck back down this 6,000-foot death trap. Alone. Y’know, with my eyes open.
At the top, I dripped out of the Xterra like a flat cartoon guy going down stairs and stayed as close to the ground as possible so I wouldn’t fall off the mountain, which I now realize couldn’t happen unless I walked across the parking lot, climbed over a fence, rocks, ran through some grass, then slipped on a banana peel. Hey, it could happen. It gets quite breezy up there at times. So then the dilemma was who was I gonna call to come get my truck and drive it back down, while I belly-crawled down the middle of road with my eyes closed.
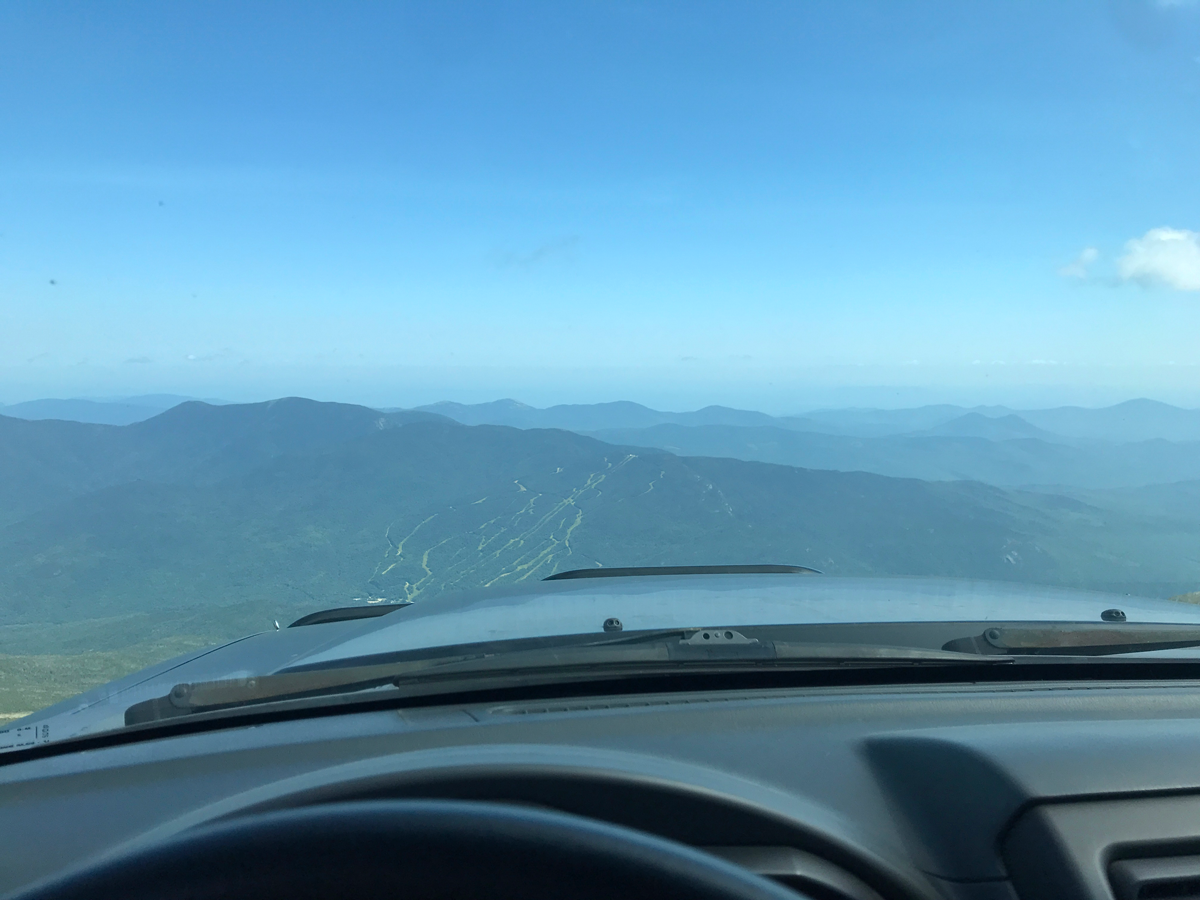
This view is fabulous. From home. At my desk. On the ground. The real ground.
Why do I do these things? Why?
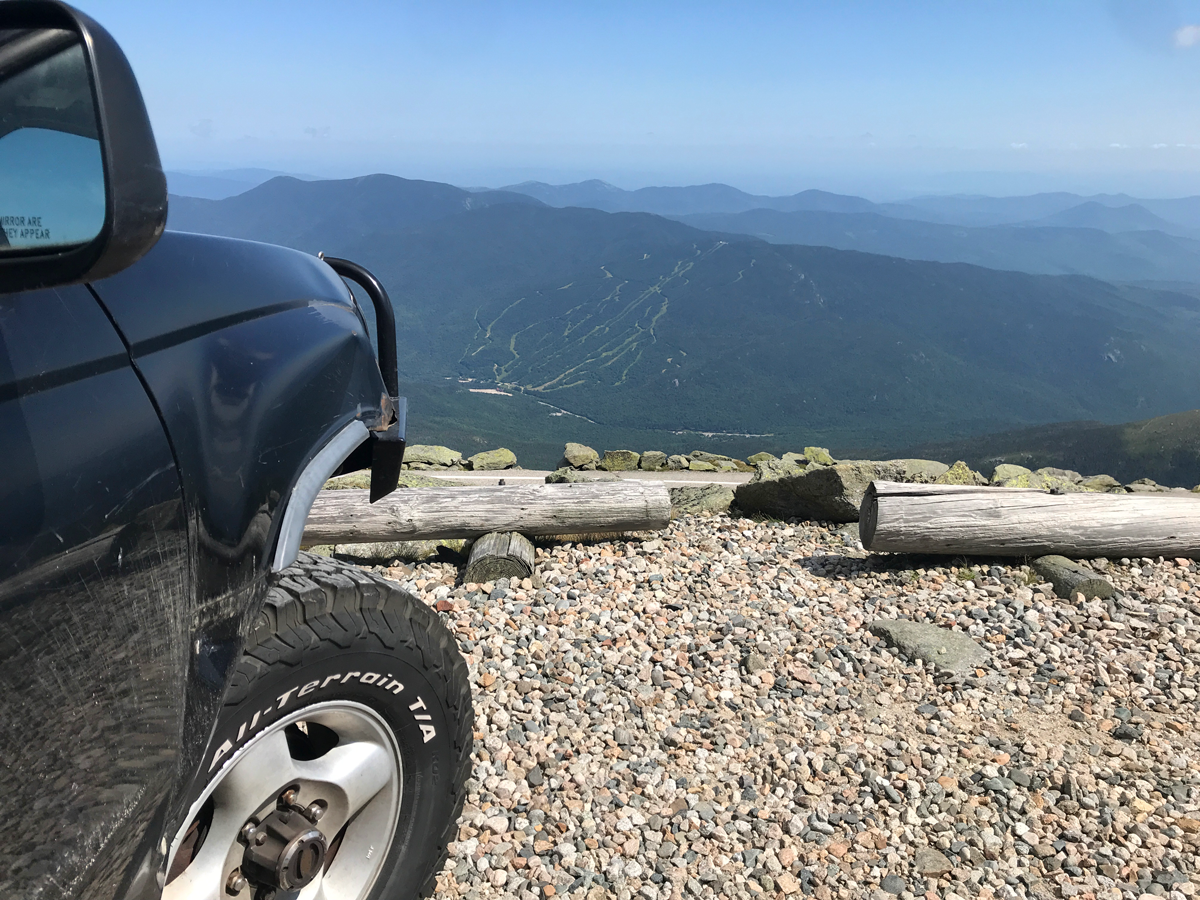
I’m short of breath just looking at this. But I love those KO2s.
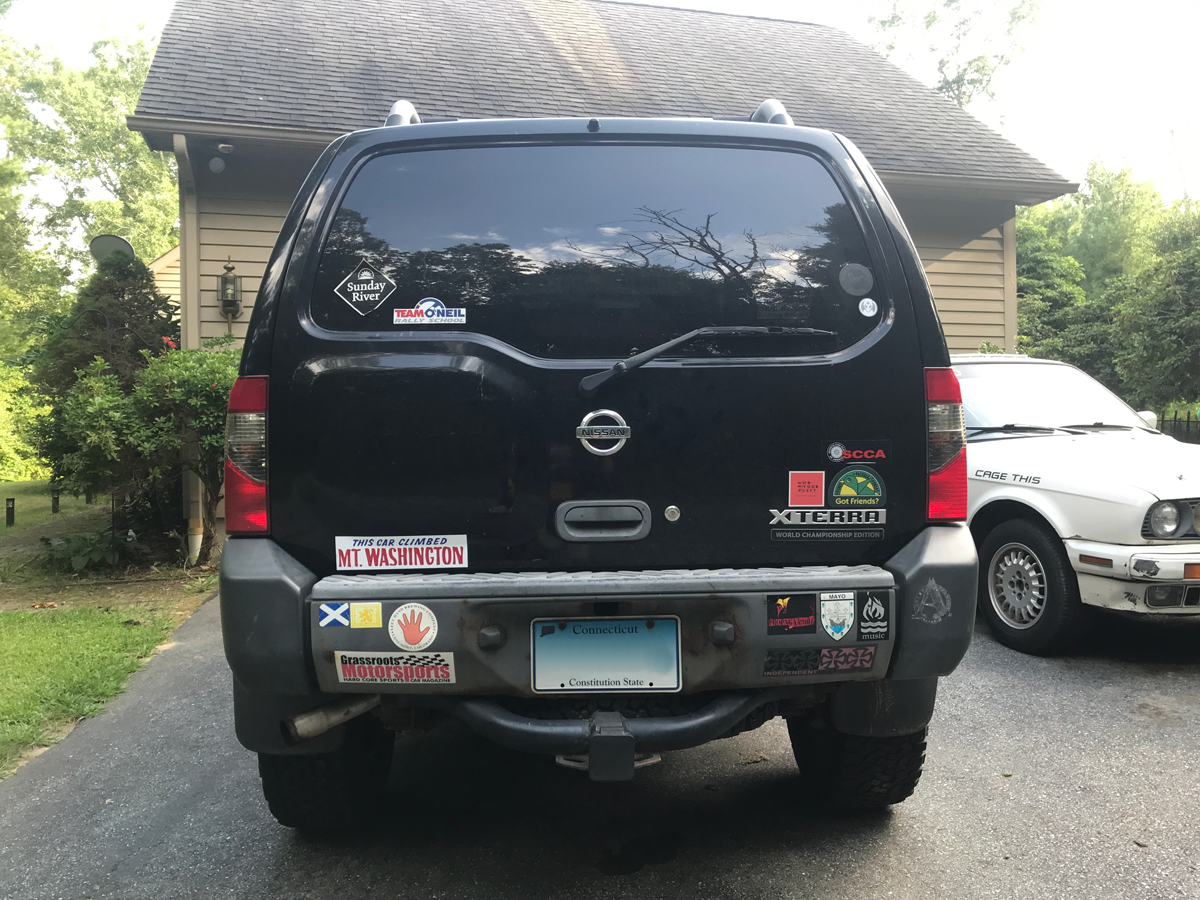
There it is in all it’s kitschy gory: The This Car Climbed Mt. Washington bumpah stickah.
…and back in Drive
OK, so that was a long way of saying I have a fear of heights, but the roof of our 10-foot tall bus, to me, feels like the top of Mt. Washington. And the frickin’ thing moves and sways with every step. So after that initial cleaning, Steph did all the high roof stuff. She’d be up there walking around like she was in the middle of a sea-level soccer field with extra gravity, rolling on the paint like she was boogeyin’ down at Studio 54, while I got queasy just climbing the stepladder to do the sides. This latter piece came to a joyous conclusion when I was painting the low bits and dropped a full bucket of paint right in the middle of the driveway. The joy of painting? In the end though, we had a nice, gleaming white shell of a roof that reflects 10 percent of the sun’s heat and keeps the inside just that much cooler. Well, we had that for about three hours.
As we were in the Fall Times, and light was getting more scarce, we were butted up against the night and all its dewy goodness. On a Friday after work, Steph rolled on that gleaming paint with about an hour to spare. As the sun sprinted for the horizon, I even felt the paint and it was nice and dry and ready to rock. Only it wasn’t. When we woke up on Saturday, the roof paint had drizzled into the driveway. All of it. So apparently, it really wasn’t dry. The dew had settled upon the paint and sometime in the night, there was also a smattering of rain. Luckily, the bus had those little gutters, otherwise the whole bottom half would have been a streaky white mess, windows and all. So guess what we did Saturday? Had a bucket for breakfast. The good news was that that particular Saturday was Sahara dry and the paint sealed up into a nice hard shell of protective color.
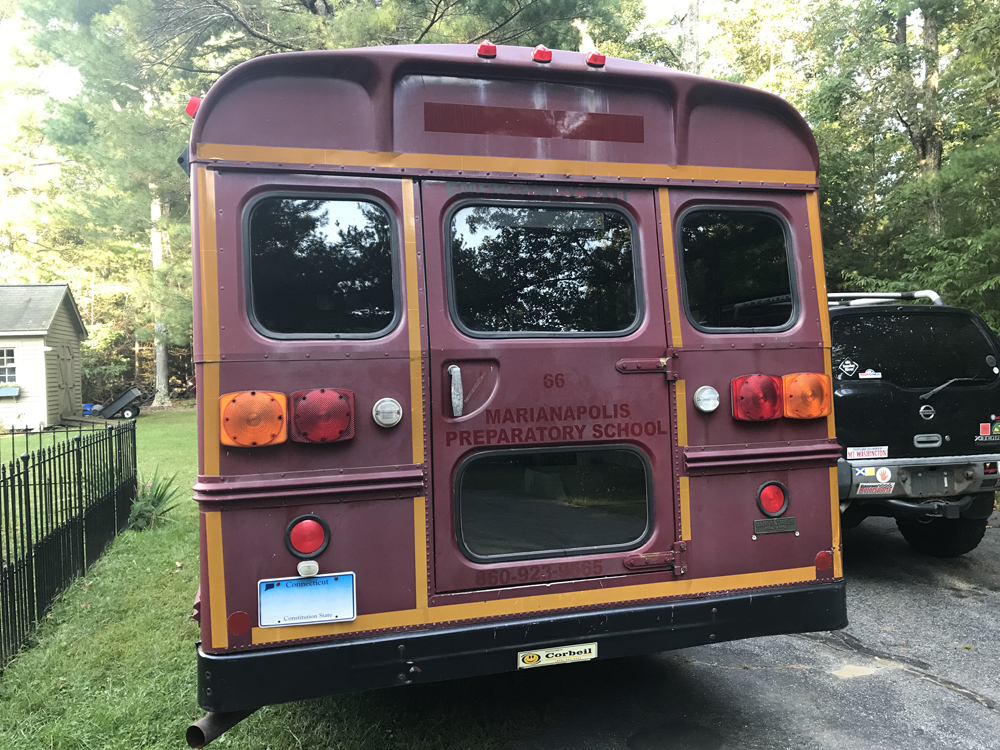
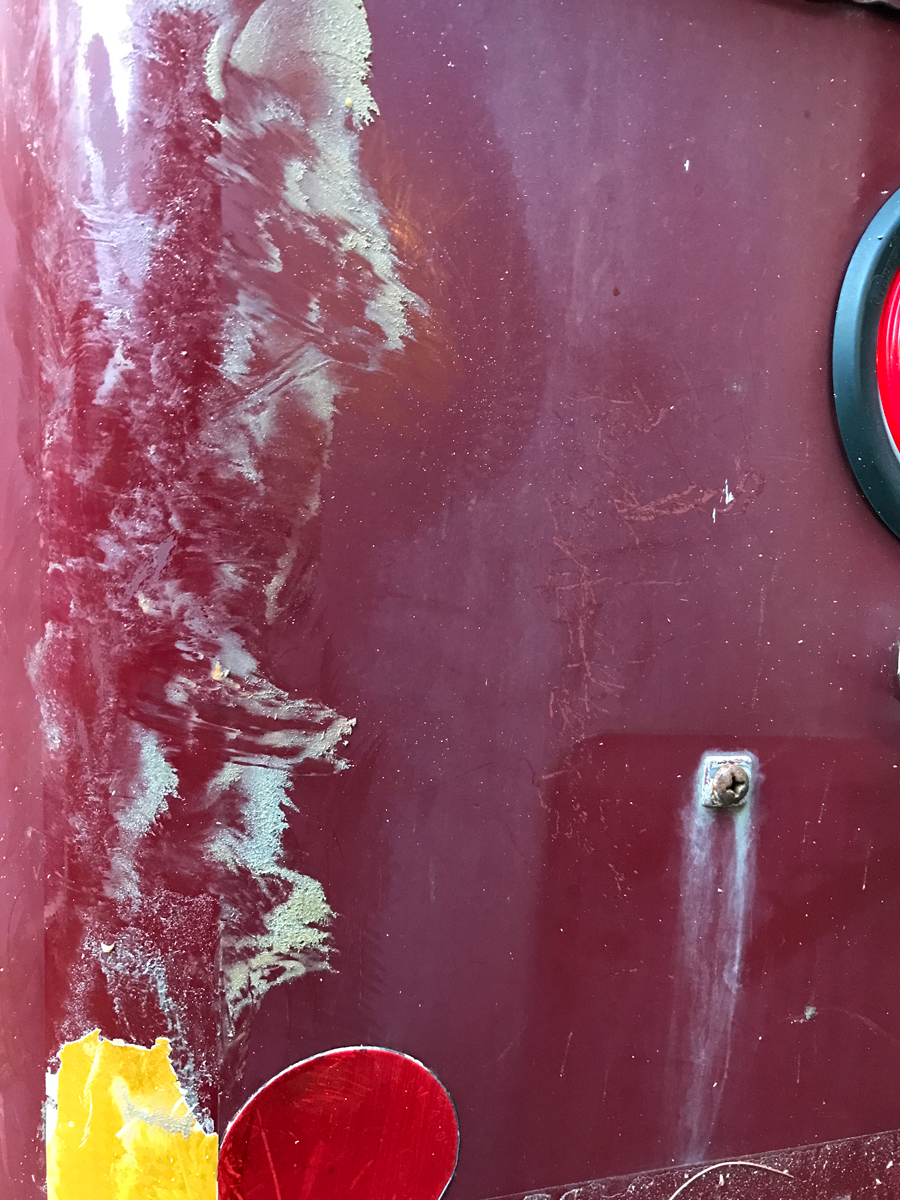
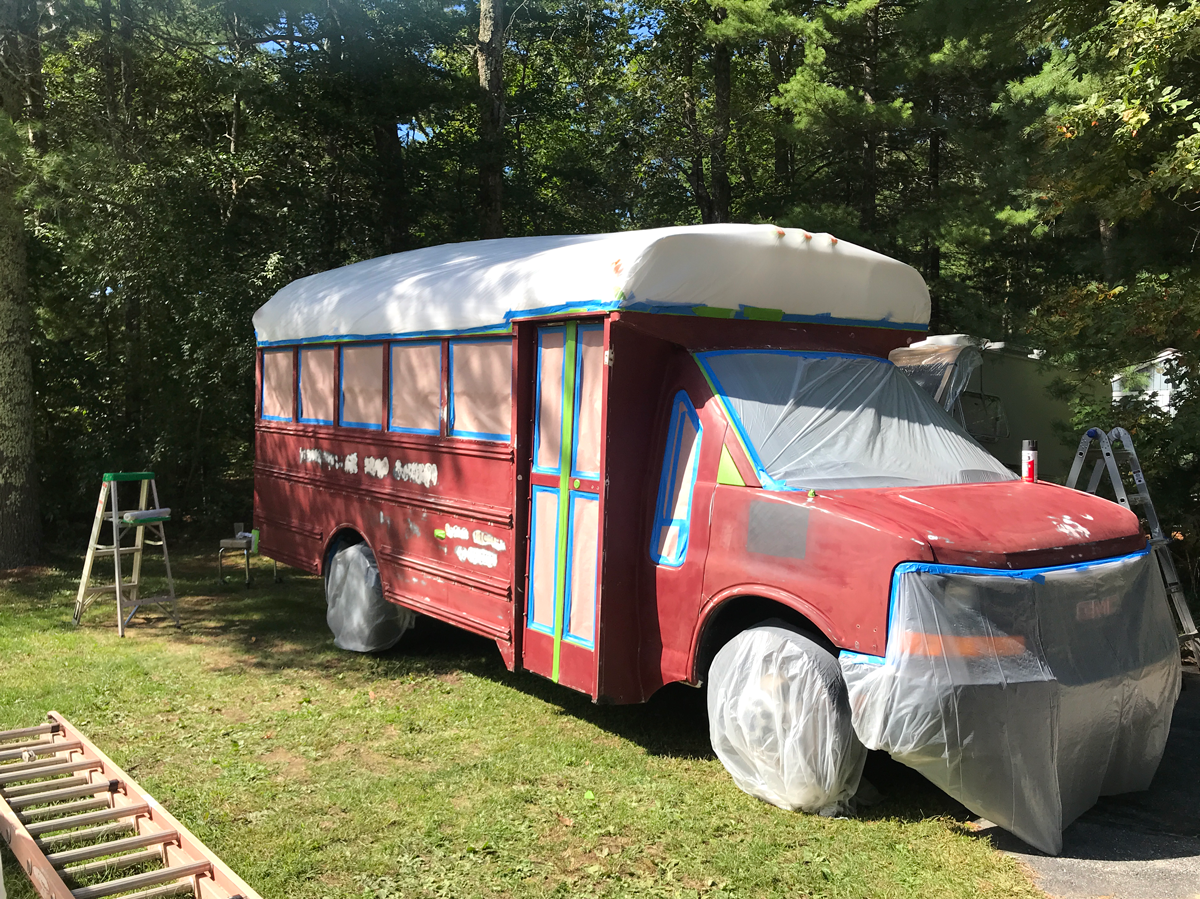
Painting the body was similar to painting the roof but a tad more technical. The first step on that process of was washing the bus again. Then we had to remove all the stickers from the bus, including what was left of the school name, which were black vinyl decals applied to the side with a whisper of slightly tacky glue. Then there was the reflective yellow tape on the back and around the emergency windows that was held on by nuclear fusion. While I was doing some inside stuff (and by inside stuff, I mean hiding under the counter so I didn’t have to peel stickers), Steph was in the chem lab developing some science and trying to find ways to get this stuff off so we could paint the thing. If we painted over the stickers, they would crack and bubble under heat and cold cycles and generally look terrible, and we would still be able to see the name of the school and the reflective tape outline. So off they had to come.
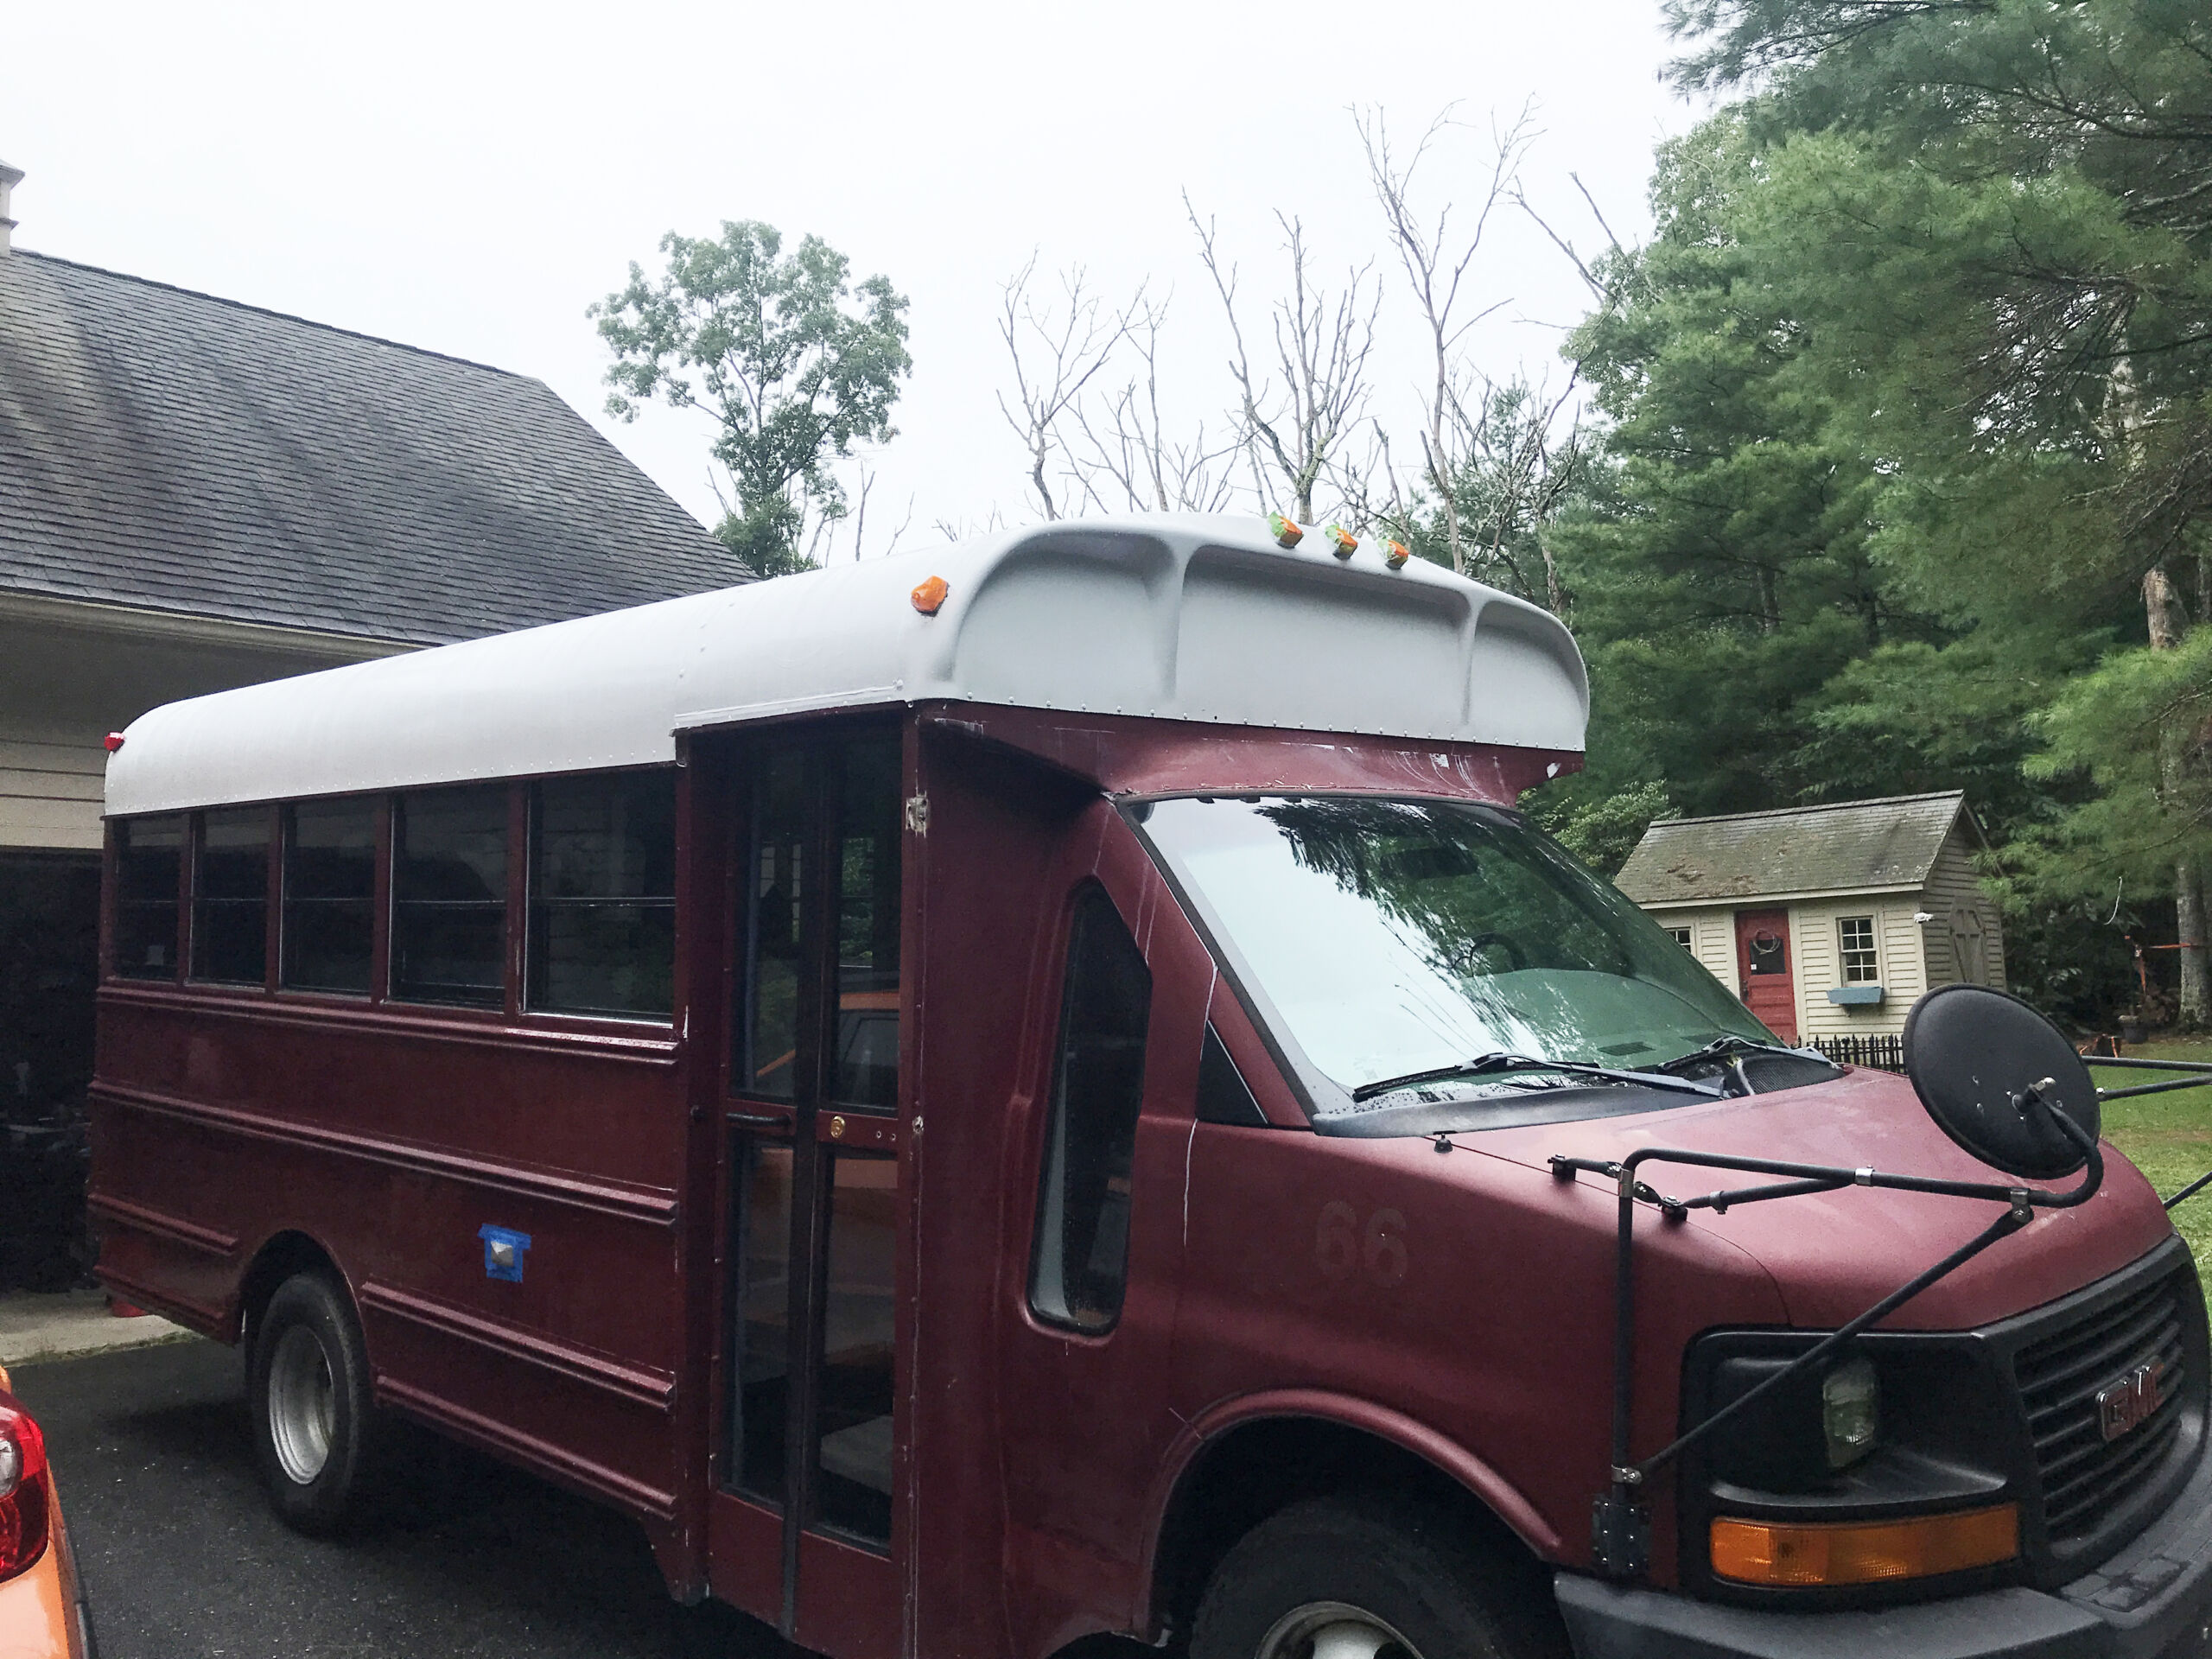
Here’s the finished-finished roof, complete with residual drizzle.
The contrast is quite amazing from new paint to 21-year-old paint.
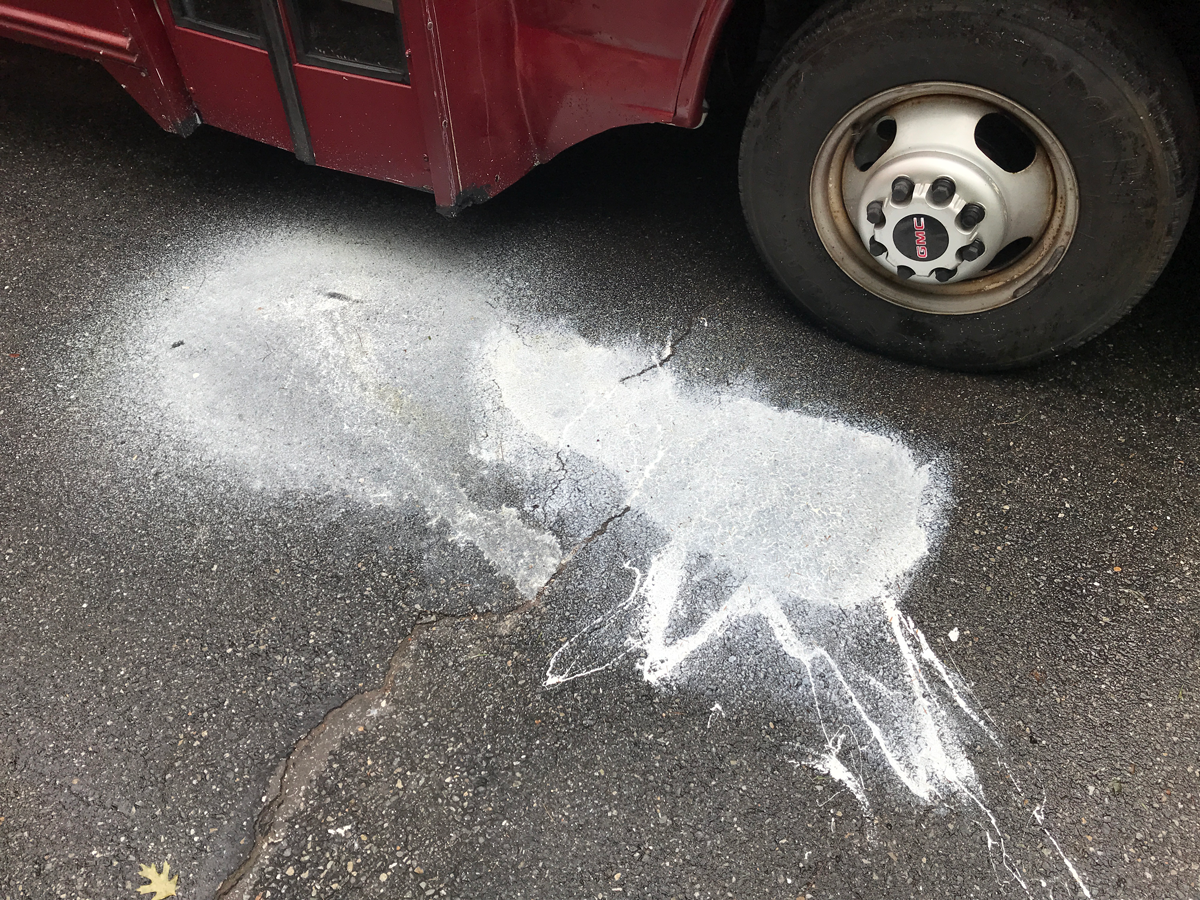
Some doofus left a paint bucket hanging on a swinging door and wondered why this happened.
Jiminy Crickets and Sticky Wickets
The first thing Steph tried was the cold peel, just by grabbing a corner and trying to pull it off. That worked fine for some of my rally car decals, but these were so old, they just cracked, chipped, and didn’t peel for squat. So out came the heat gun, which looks like a V8-powered hair dryer. She said that worked a little better for the school name, but nothing for the reflective stuff. The heat would make the vinyl letters a little looser and soften the glue. She used automotive interior panel removal tools from Harbor Freight, which are basically fun-shaped plastic spatulas that don’t damage metal. That combo worked fairly well for the black vinyl letters, but the ‘light’ glue underneath was still a wee fiddly to pull off. Back in the lab, she tried various versions of commercially available stuff, like Goo-Gone, Goof Off! (which is what I usually do), rubbing alcohol of varying percentages, acetone, and WD-40. None of that worked and that was for the ‘easy’ stuff.
I suggested gas and matches, but she didn’t really like that idea for some reason. After some dissertation-level research, Steph ordered a whirly wheel thing from the ‘zon. We watched a video of a real person doing a similar thing and it worked great, slipped right off like mercury on glass heading downhill with a tailwind, but when we got it and she tried it, it literally just smeared the glue further and made everything even stickier. Hmmm.
Frustrated, Steph disappeared into the bunker lab this time, for three to seven weeks, and came out with an award winner. So get this: No gasoline, no diesel, no face melting concoctions that needed rubber gloves and goggles, and no high-cost commercially branded stuff. The long and short of it, it’s a 50 percent mix of coconut oil and baking soda. Yep. That was the ticket to a decal-free bus and a smooth surface on which to bring the bus a-new. She mixed up the CocoPowTM in a jar, schmeared it on the sticky bits, let it stew for about 15 minutes, then used the plastic scrapers at a steep angle, and the goo slid right off into a sticky pile of slop. Bananas. And it smelled great to boot! The nuclear bonded reflective stickers took a little more stew time, and a little harder scraping, but with that and the heat gun, that also turned into a pile of schmutz. Most importantly, that pile was OFF of the bus. Forever. Speaking of forever, that’s about how long it took Steph to get rid of all those stickers and decals. Days and days and days. The only thing more we had to do after that was acetone the body again to remove the coconut oil residue so the paint would stick. It’s kind of funny how she took all this time to remove sticky stuff only to have to set it up to make the new sticky stuff stick. Know what I mean?
Miles and miles of reflective paint held on via nuclear fusion.
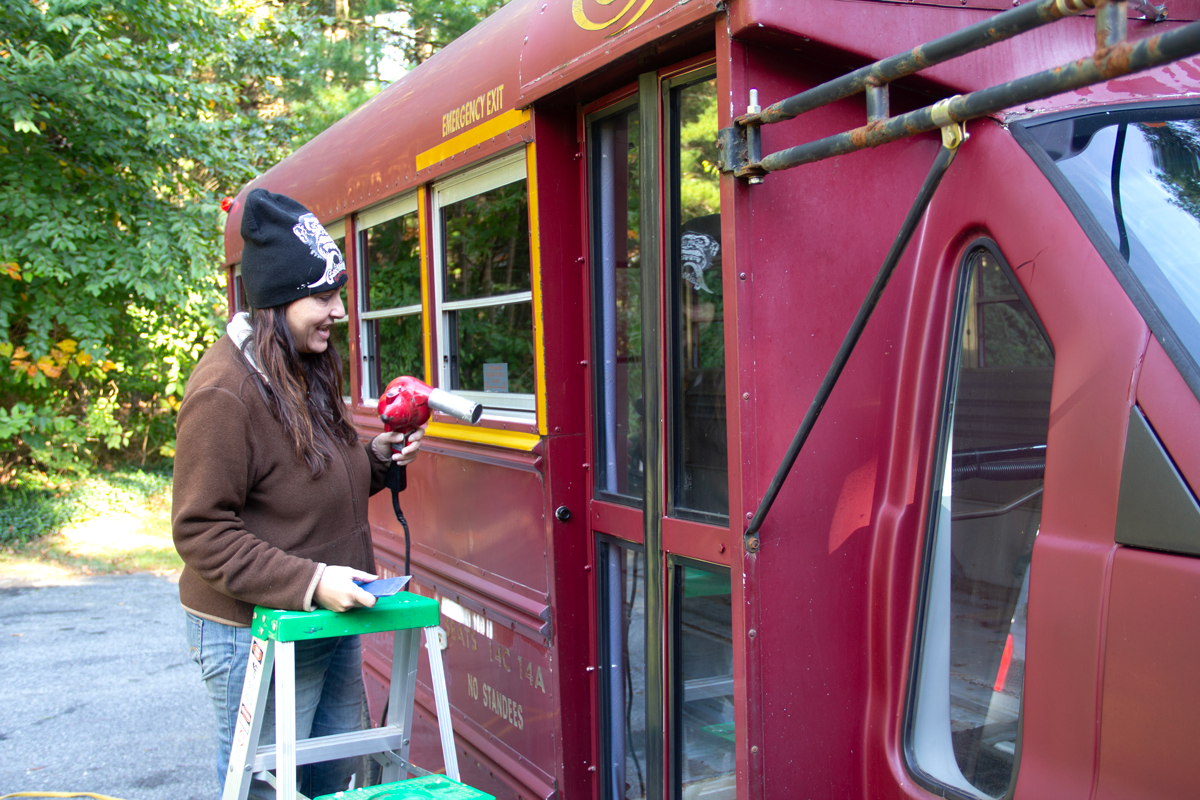
Steph fired up the V8-powered hair dryer and got into it.
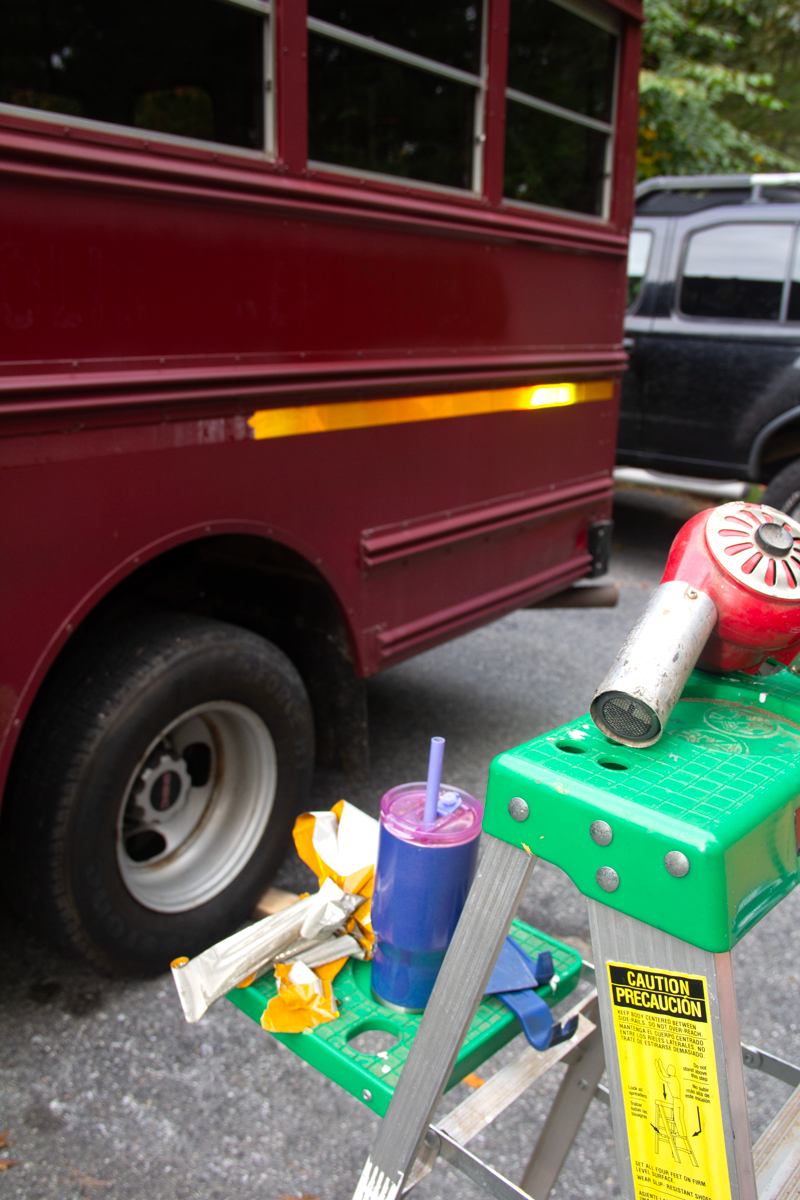
Tools of the trade. The V8 and a purple coffee cup.
The results of the whirly wheel: Sticky schmutz.
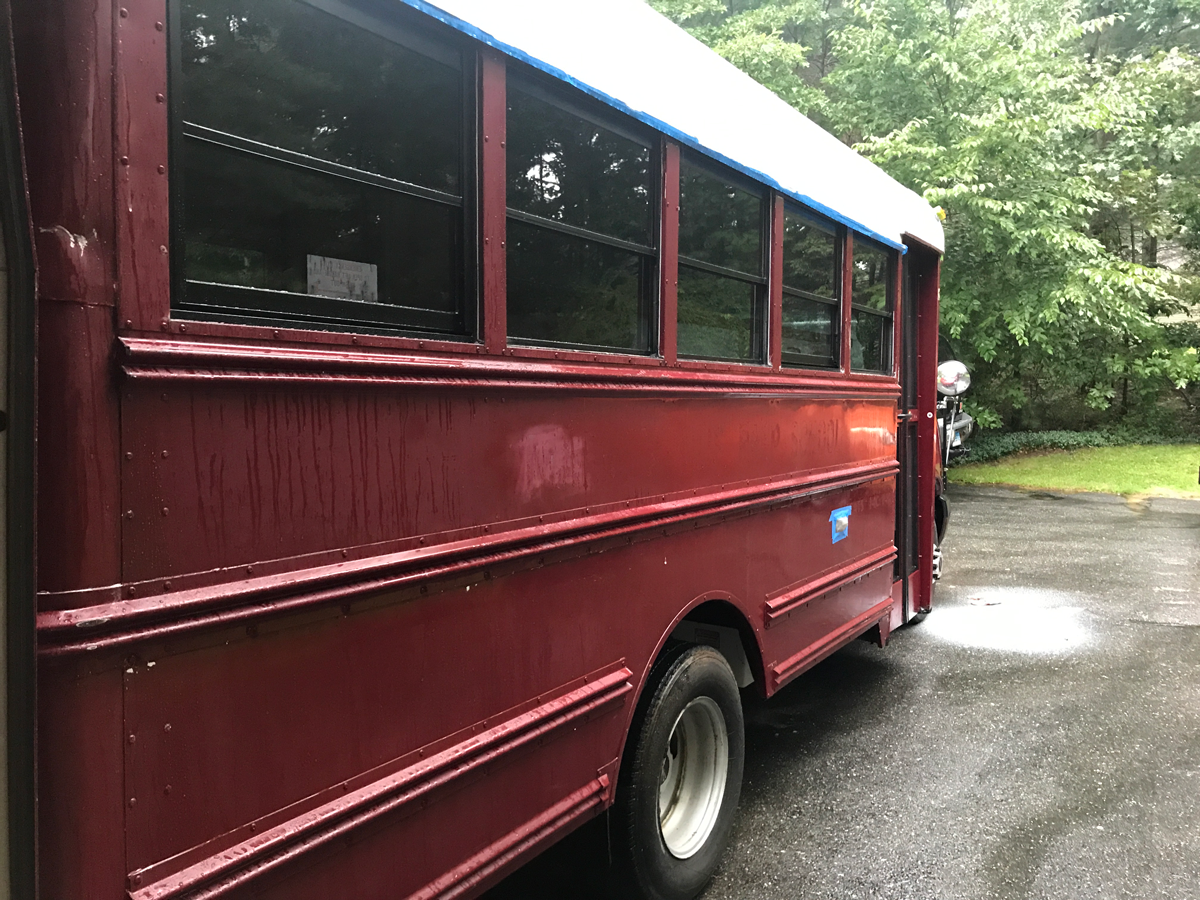
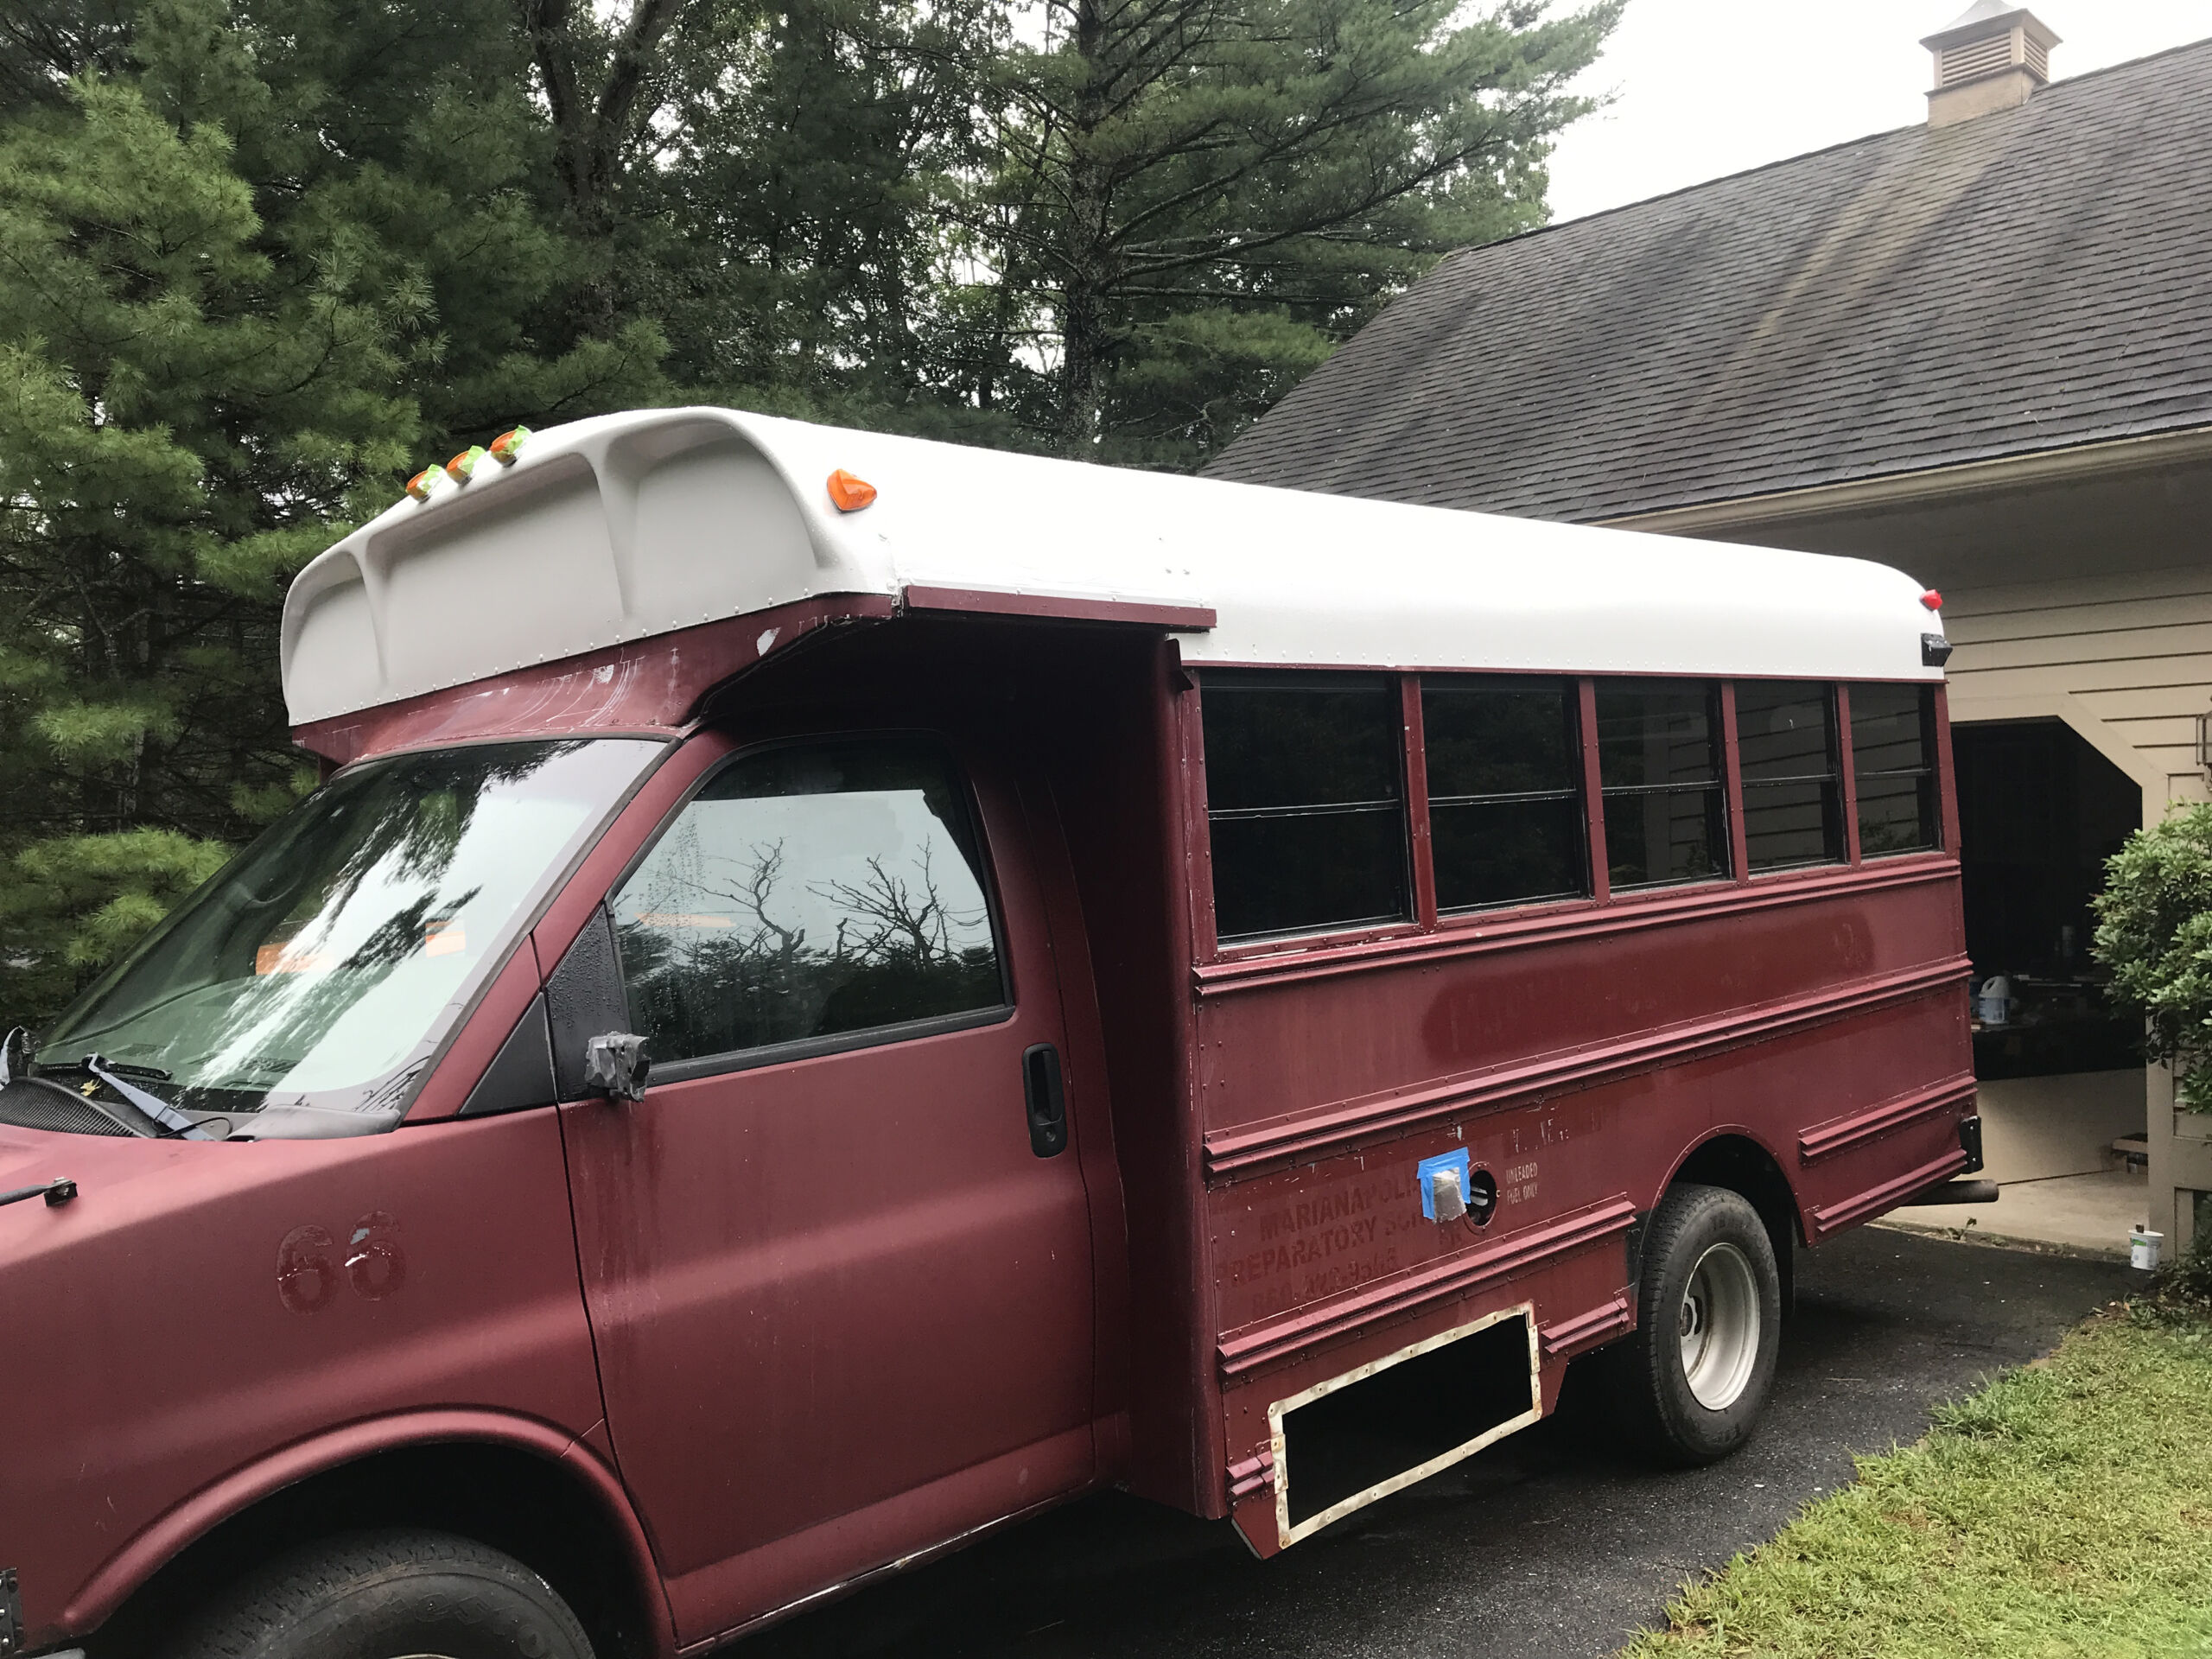
Finally, a sticker free machine — and the Isle of White.
Then came the scuffing
I did some research on the scuffing part for sandpaper grits and the like and we started with 180 for the whole bus, then went down to 220 for another round of whole bus. The higher the number the finer the grit. So 180 gets all the big stuff off, then 220 makes it nice and smooth, but still grippy for paint. For reference, auto body people go down to like 2000 or 4000 grit for that super shiny color between layers. Since we were into the leaf changing part of Fall, we didn’t have that kinda time, patience, or desire for the concours-level finish. We already had a DeWalt sander, which I love, but we needed another so we could both have at it with gusto. To save a little in the budget, we bought the Harbor Freight version and it was actually a pretty good choice. For the better part of a whole weekend, we both masked up and started buzzing off the shiny spots of the paint to get a nice, matte version of the maroon to use as a nice primer. Any spots where we burned through to the actual metal, we re-sprayed with a rattle-can primer, which we also used to primer over where the school name was too, just to make sure that didn’t show through.
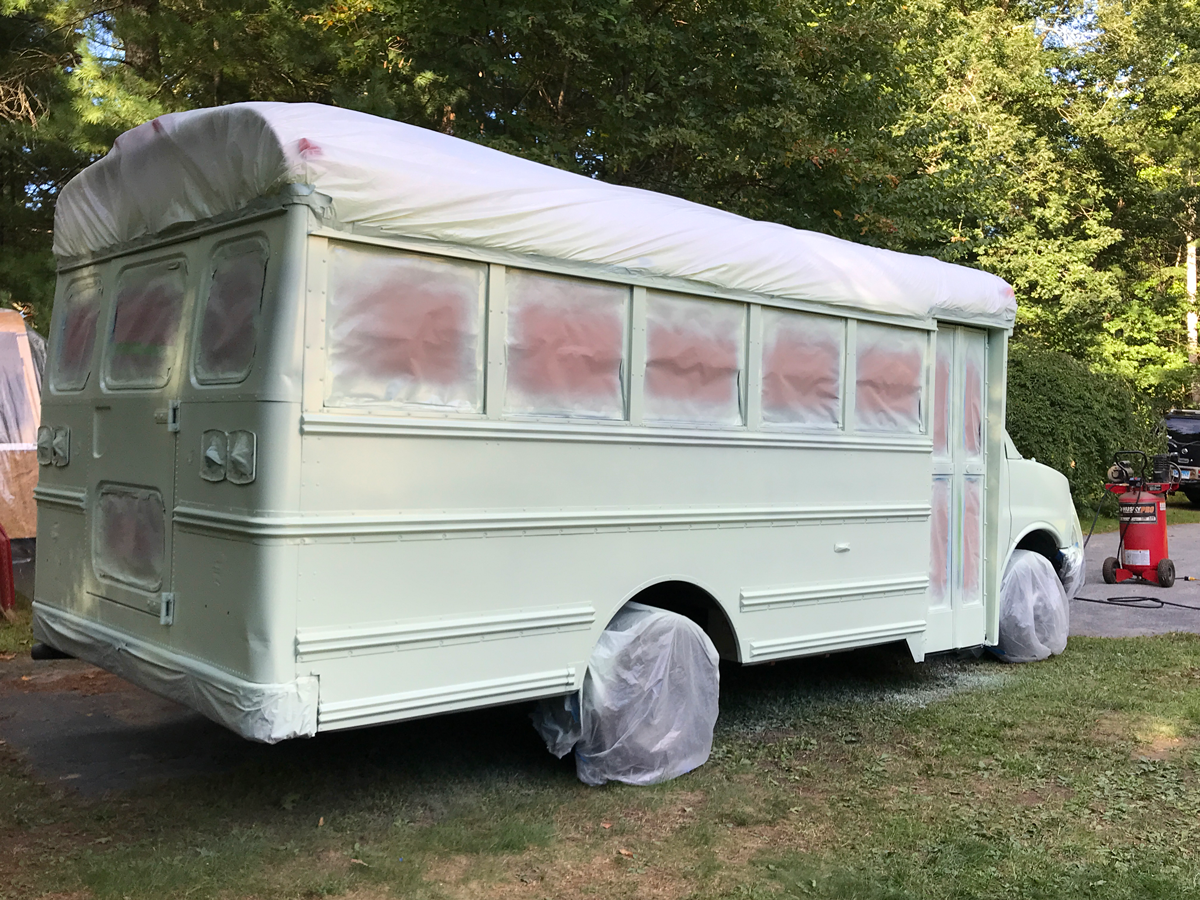
After a final, lighter sanding, we re-washed the rig on a Friday night, then when Saturday rolled around, we blew everything off with an air compressor to take off any loose powder pockets, or a nook and/or cranny that could hide some water. If you hit a water pocket with the sprayer, you’d end up with some spin art or a lot of re-prep. We slathered everything in acetone again and taped off all the parts we didn’t want Volkswagen colored. We taped and masked the fresh roof, the windows, door handles, tires, etc., and burnished it for some clean edges. To save time and tape, we took off the easier bits, like the mirrors, tail light lenses, and side markers, so we could paint them black separately, y’know, except for the tail lights. That would be bad.
Maaco Mode
Automotive paint is astronomically expensive. So the roof gallon was about $40 at Home Depot. This Volkswagen stuff was $250 a gallon, plus the hardener, and we could only find it in some guy’s shed at the base of Mt. Zugspitze in the Bavarian Alps. You have to mix automotive paint with hardener and thinner. The thinner helps it go through the paint gun more easily without clogging up the fine spray holes. The hardener hardens the paint when it’s applied. Figuring out these ratios, yep, included math. If you don’t put enough thinner in, it’ll clog the gun. If you put too much hardener in, the paint will dry too fast. Too little, not fast enough. Chemistry, man. I should have paid more attention. Anyway, we concocted a formula that was close to what we thought it should be per a YouTube University class, took a deep breath, and started painting. Since I had a little more experience painting car models and rattle cans, the fancy term for spray paint if you’re in the know, I got the job of running around in Tyvek pajamas and spraying the thing on a crisp, dry, Fall day.
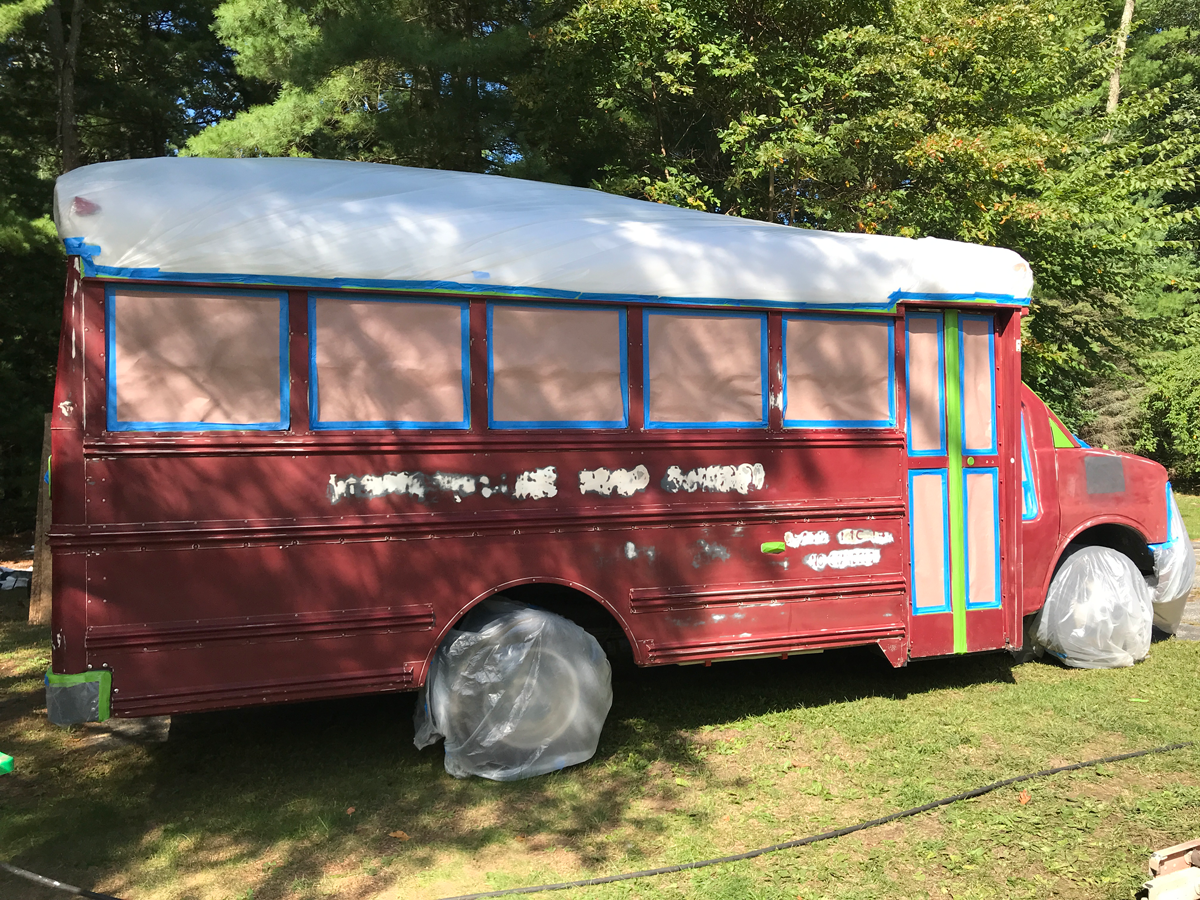
Ninety-percent of a paint job is prep.
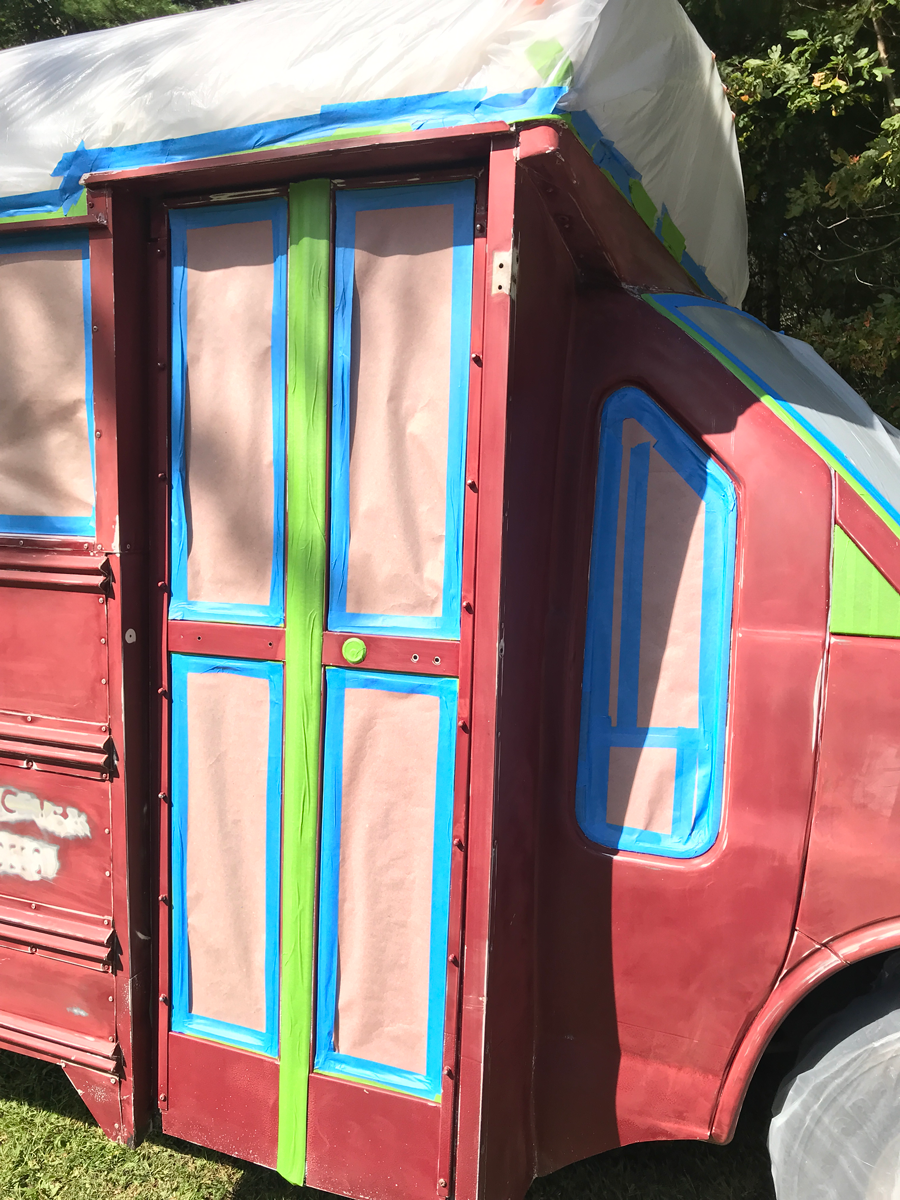
We only used seven miles of tape here.
We used drop-cloths to mask the roof and grille, and trash bags for the wheels.
Just a little primer touch-up where we were too heavy handed with the sanders.
We parked our other cars in the street, pushed the bus away from anything we didn’t want green, rolled the compressor out into the driveway, and went into Maaco Mode. Typically I have an oil dripper mister thingy on the compressor that helps air tools lube internally. That had to come off because you want zero oil in your paint. We had to buy a spray gun, which can cost hundreds of dollars, but we settled with the $30 Harbor Freight version that got fabulous reviews, even by car dudes and ladies. That gun had multiple spray pattern options and its own regulator so all the paint didn’t come out splattered and all at once, like a Jackson Pollock.
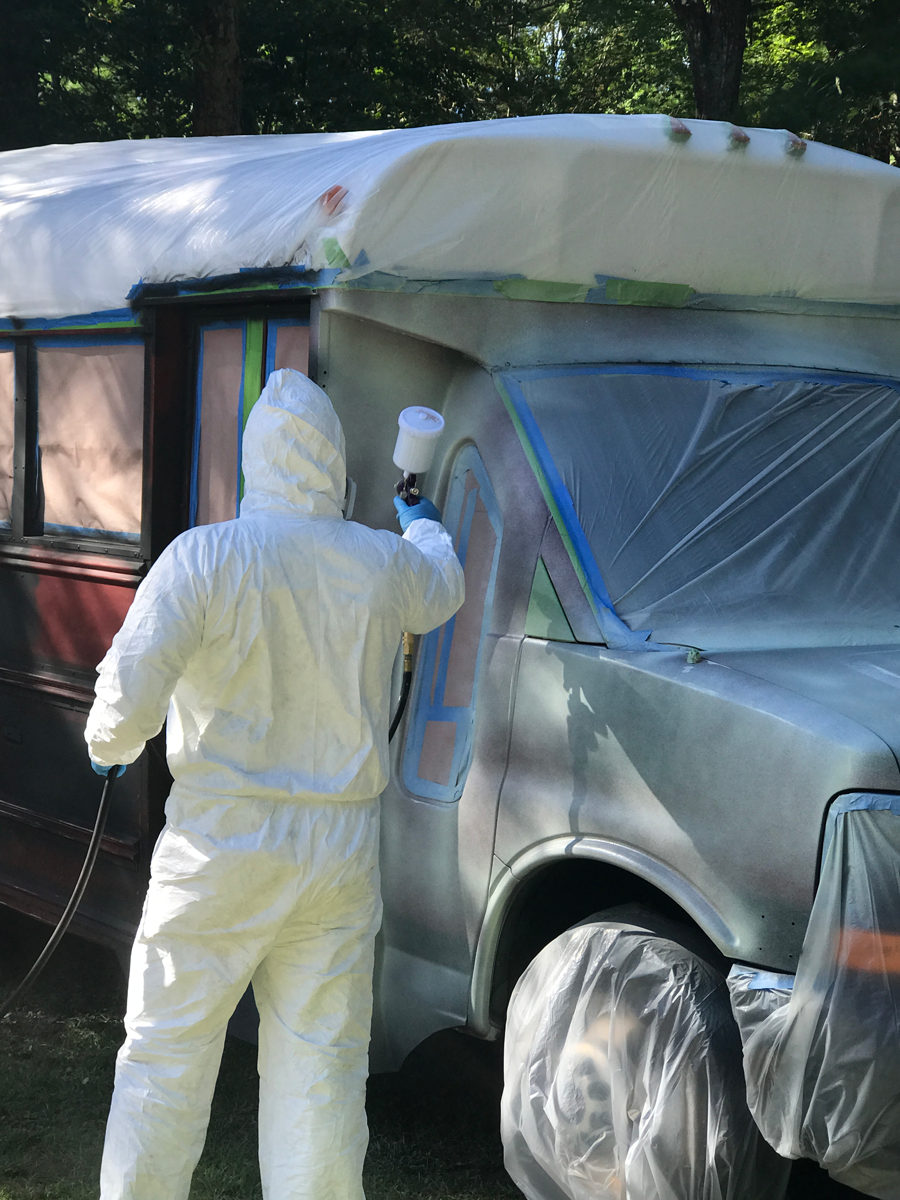
Have you ever seen a Sasquatch in a marshmallow suit?
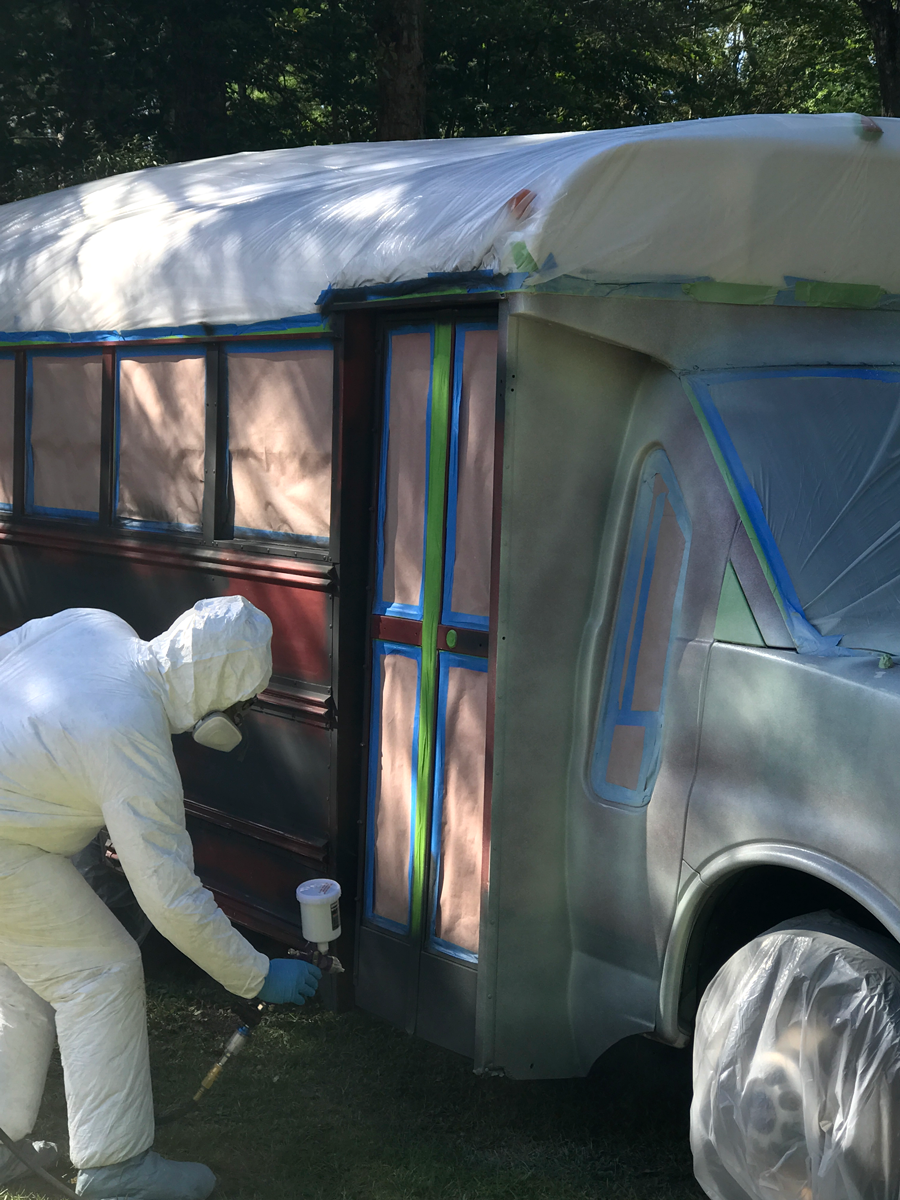
This is the ‘mist’ coat, a very, very light coat to help the other coats grab.
A great way to test volume and spray pattern is test-firing with some paint thinner on cardboard. You can decide the thickness and direction of the paint and the size of the path sort of thing. The idea is to paint several light coats first, with the first one being a mist coat, let them ‘flash’ dry, then paint more coats on top, progressively thicker. Since we couldn’t pre-mix all the hardener and thinner at once, we did a relay system. Steph would mix up enough for the gun-mounted jug, I’d go spray that, then by the time that emptied, she had mixed up the next jug. We did that for the next hour or so, but the paint, thinner, and hardener was going way faster than we anticipated. Fall was falling, so this was sort of our one chance to do this. We ended up using the whole gallon of paint, but in my opinion, we could have used another. In the end, we had a nice, solid paint surface that’s held up, it’s just not as shiny as it could have been with more paint, or real second coats. There are also a few thinner spots that I would have liked to hit again, but alas, we got it done and I’d classify it was a good 30-foot paint job. If you get any closer, you’d start to notice barer spots, a run or two, that sort of thing. I think we put too much hardener in, as each coat dried very, very quickly.
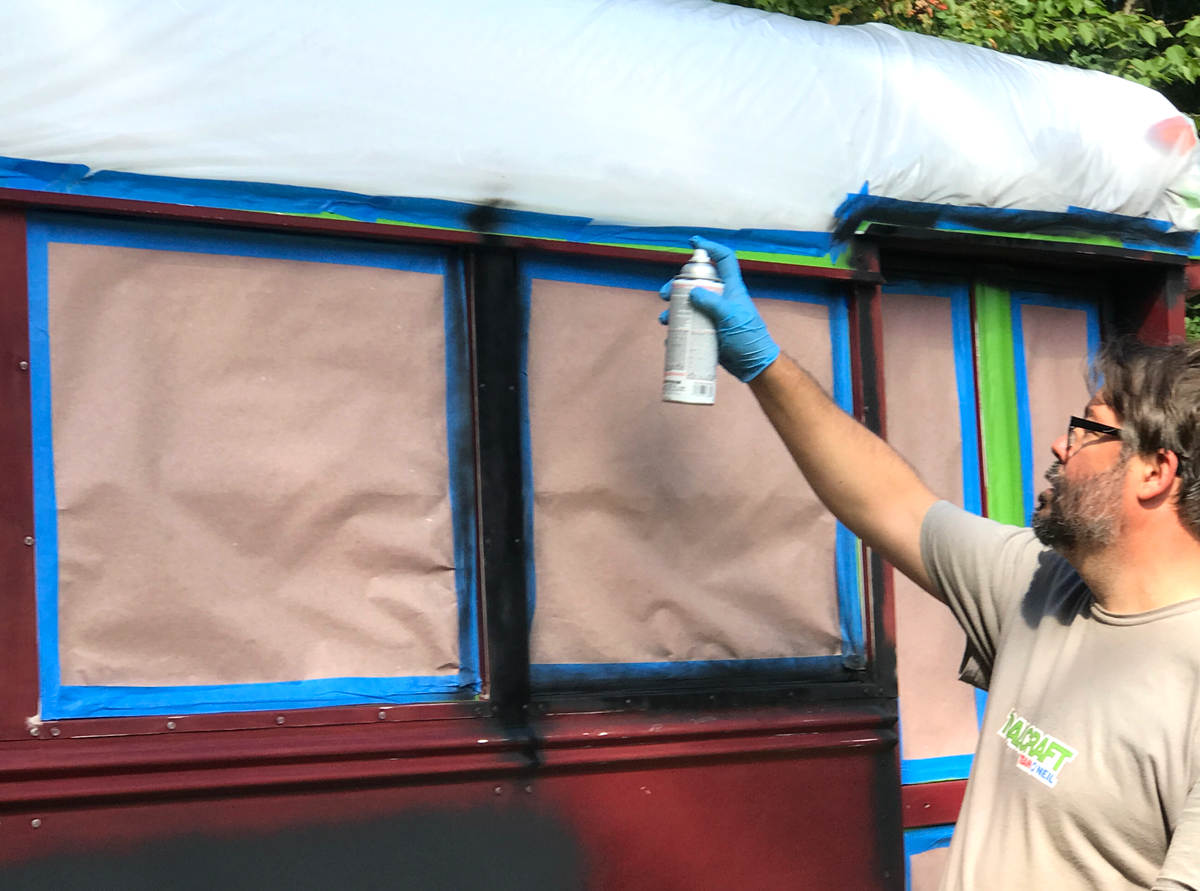
For the other bits, we scuffed those down with the finer grit sandpaper, since there was not really much to fix on those, primed a couple of things, then rattled over in my favorite black spray paint. The long-armed mirror (LAM), aka the clothesline, needed a bit of rust remediation. I had to wire wheel the rustier bits off, then sand, prime, and spray. The side marker lights needed a similar talking to, but they are aluminum and aluminum ‘rust’ is a little easier to handle. The LAM is actually starting to rust through too now, so that will need a little more attention soon. The good news is the next time Steph tries to get me to put my pants on, I can just say: “No, they escaped! For my pants are on the LAM!”

Here’s the final coat!
Once the paint is dry to the touch, it’s best to remove the tape as soon as you can. Even though the paint might feel dry, it’s really not cured. Automotive paint can stay soft-ish for weeks after application. It takes a little while for it to develop that hard shiny shell. Since we really didn’t have a lot of paint and probably didn’t quite get the hardener right, we ended up with sort of a lustery matte finish. If some day we get inspired, we could clear-coat it, but that day probably won’t come until it’s time to restore the thing in June of 2063.
It’s not quite ASMR, or whatever the H that is, but there’s no greater joy than peeling the tape, then re-assembling all the bits back onto a freshly painted thing. Once all the bits were back on, it really gave the bus a fresh appearance that was probably not envisioned by anyone when it rolled off the factory line 21 years ago. This fresh paint gave us some gusto to finish off the interior as well. I think it was the push we needed to really blast through to the finish line!
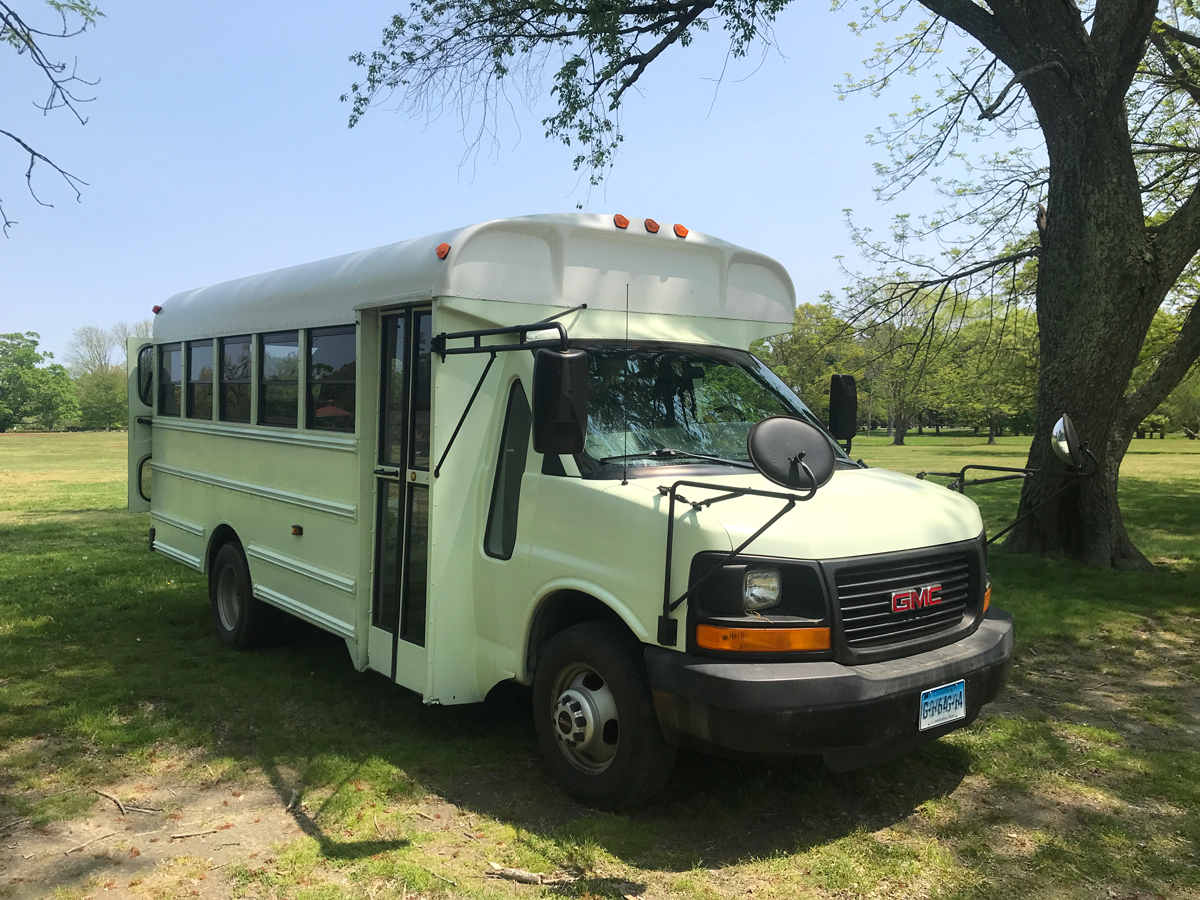
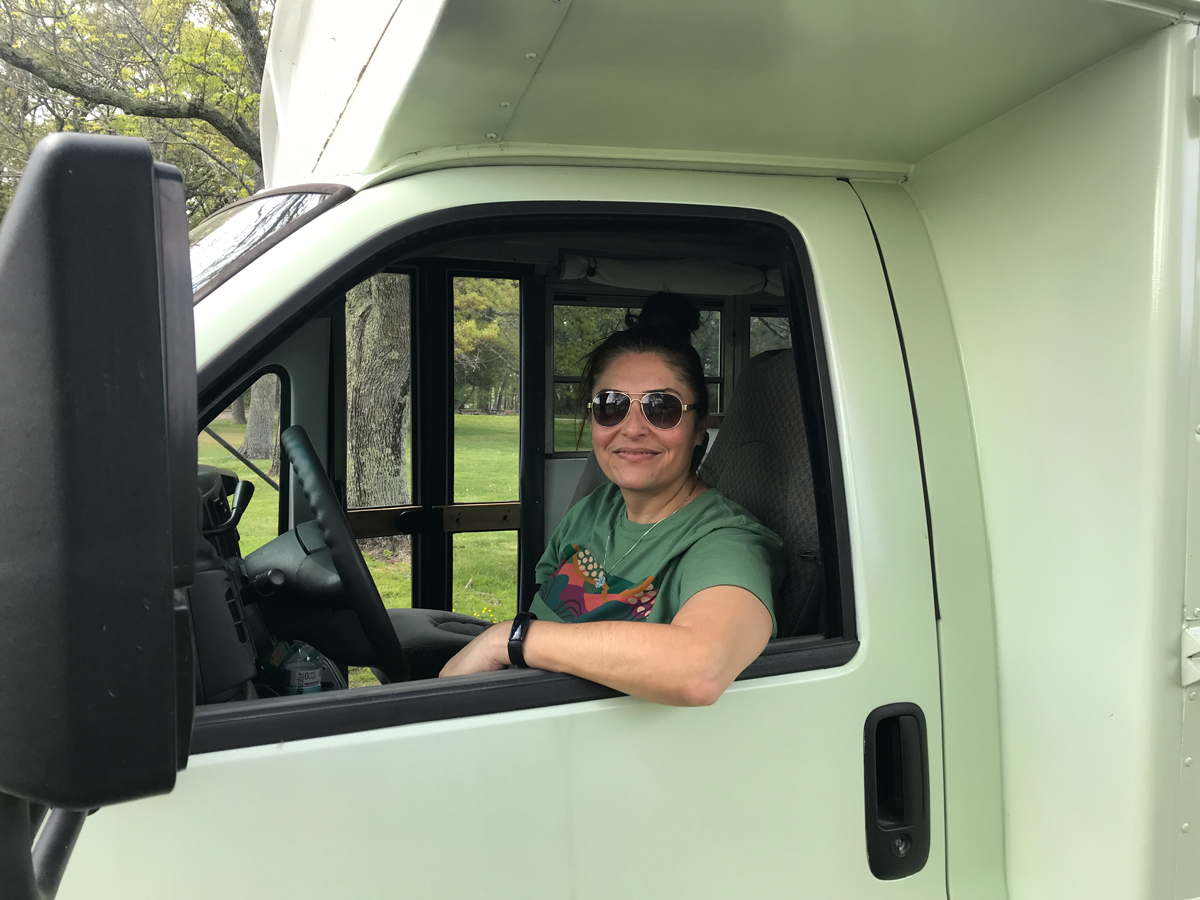
Sunny’s lookin’ pretty spiffy in her new livery!
Very good job you two!! Waiting to see it live and in color as was said on the old tv at one point. Height????? Do you remember the time I saw you on an extension ladder at the 2nd story level?? Think hard. Love you two.