
Here’s something we do every day: Walk into a room, flick a switch, and the room fills with light. Right? Boom. Done. We move on. When you have to figure out where the switch goes though, what it lights up, and how it’s going to get powered, well that’s a whole ‘nother story.
When we first envisioned the bus, the main thing we wanted was off-the-ground sleeping with walls that were bear proof, unlike our vintage pop-up that we had previously. It’s a lot harder for Yogi to get through steel, aluminum, and glass than it is canvas, which is the same material as my garage pants. Now, my garage pants are pretty sturdy, but I’ve stabbed myself with a screwdriver before, right through my pants, so I can only imagine what five inches of claw penetration might feel like from a grumpy Kodiak. Hard walls it was.
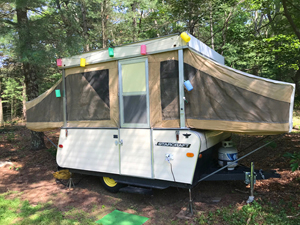
This was our less-than-bear-proof pop-up camper, a 1973 Starcraft StarFlite 6. A Brady Bunch gem.
We knew also that we would want a kitchen sink, a portable throne, a stove, and that sort of thing. To that end, to make it more camper-esque, Steph found us a solar generator that came in a size slightly smaller than those old Igloo coolers from the ‘80s. An off-brand from The Jackery, the Oupes 1200W option was great — and a lot cheaper. It has three 120V house-type outlets, two USB ports, two USBc ports, two round 12V ports, and a port for optional solar panels, so we could charge the thing up off-grid. We ended up getting two solar panels to go with it, which we can daisy chain together for charging twice as fast. The cool thing about those is they fold up and pack into the size of a briefcase. You can also charge it by plugging it in at home, or via the 12V port (cigarette lighter type) in a car. We used Opi a lot for the build. Combined with an LED movie light, the thing ran for days on a single charge.
Then we started having fancy thoughts
Deep in COVID times, our game plan changed a little. To help with the build process, Steph found a free travel trailer listing on craigslist. The fella who was passing it along was in the process of rebuilding it after a tree fell on it during a storm, but he had retired and was moving to Florida ASAP. I wish I could remember his name, but the fella was awesome. Not only did he give us a free camper that was mostly intact, he gave us all the building material he was using, a cache of pricey aluminum angle iron, a giant extension cord, a tarp that would cover the whole thing, a tow hitch, camping supplies, and a few other essentials. We hooked up the 17-foot Palomino Stampede, heretofore known as Stampy D, to my aging Xterra with no brake controller or trailer lights and hauled it back home with tarps and plastic flapping around in the breeze like a kite in a hurricane. Safety third.
The fancy thoughts were on. We originally snagged Stampy D to use stuff from it like the fridge, possibly the furniture, etc., but then we had the light-bulb moment: Should we just restore this thing and sell the bus, should we restore it and use it with the bus, fix it and flip it? Then, we thought, ohhh, let’s remove the electrical system and transfer it to the bus! Aye, brilliant plan I say (theatrically bowing to the Academy).
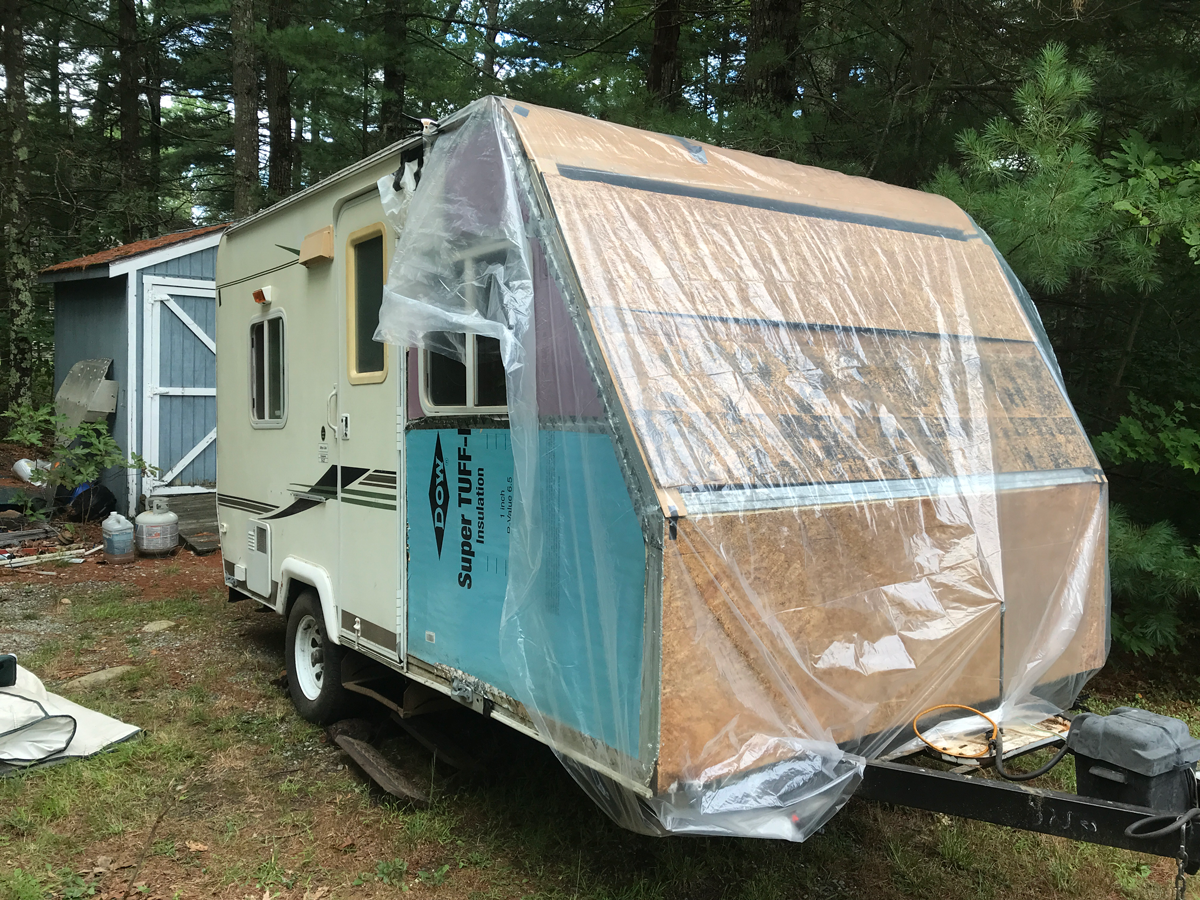
This is Stampy D in all her glory. Despite her appearance here, she is currently being restored by a real carpenter.
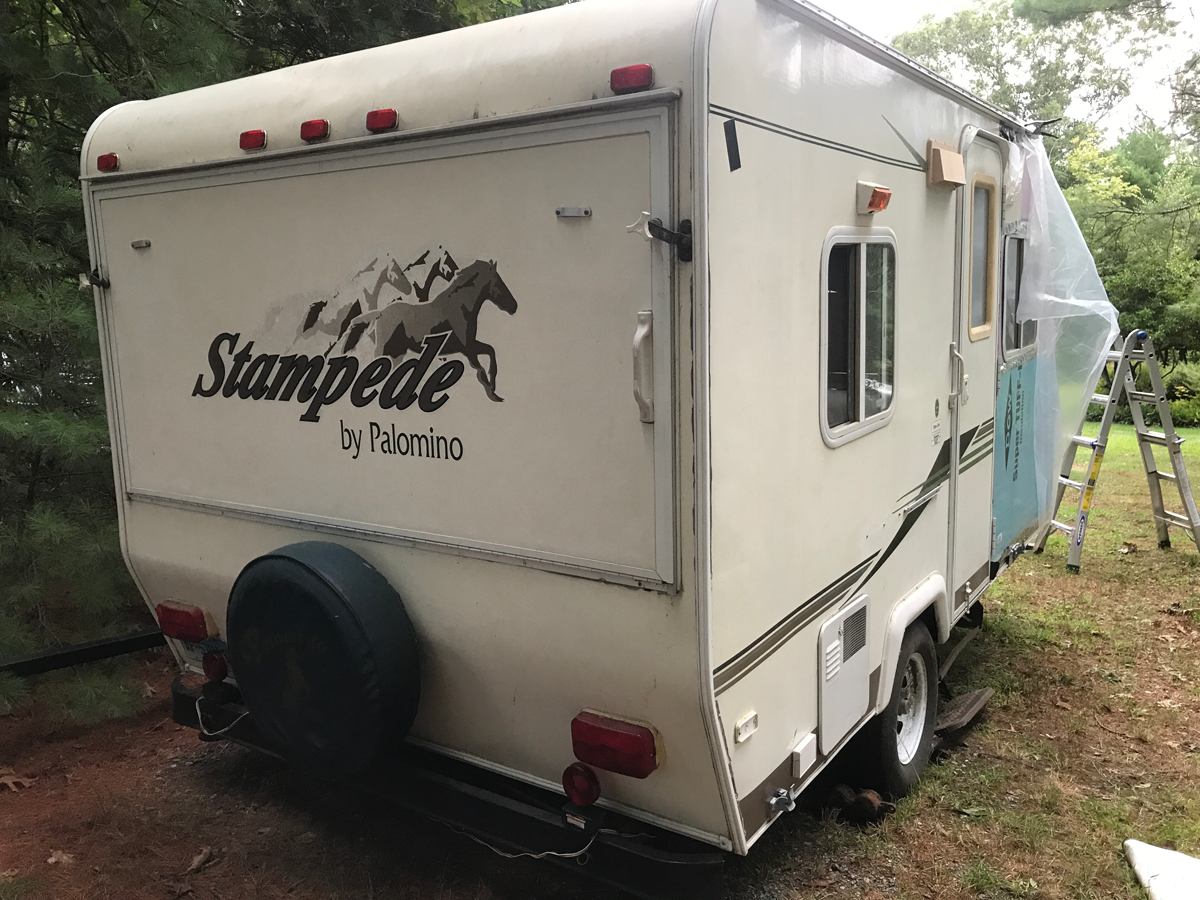
Stampy from the back. Here you can see our temporary lights, which we ultimately got to work, clinging to the bumper like I clung to the steering wheel guiding her home with no trailer brakes.
Stampy D and the Big Copper Octopus
When I built my rally car, before my friend Bill put the cage in, I had to remove all the electrical stuff, the whole harness from the firewall back, including the dashboard, dome lights, marker lights, sunroof, and tail lights, etc. All of it. It all came out in one piece too. I didn’t have to splice or dice anything, as it just came out as one big copper octopus. I thought I could do the same with Stampy D. Not so much. While I wouldn’t say pulling a harness from a car is easy, but it’s way easier than trying to pull one from a camper. In Stampy D, most of the wiring was glued or stapled inside the walls. The goal was to pull it out like the rally car and just transfer it over to the bus, but that didn’t quite happen the way it did in our minds.
One of the reasons we wanted to do it that way was because we could trace everything and know where it all went, what it was connected to, and it would be a complete system. We might have had to learn how to extend a line to a receptacle or whatever, but generally speaking, it was going to be complete. While I had electrocuted myself a skosh on an automotive project once, I had ZERO idea of how to merge 12V auto with 120V house without melting the fillings out of my face.
Somehow RV wiring all just works magically. If you’re unfamiliar, the tow rig hooks up to the trailer to charge the house battery, but also powers the brake lights. Then when you park at a campground, you decouple from the tow rig, plug into a campground pedestal, which can be very questionable, and that powers everything like the battery and the house lights and oven and fridge all at once. How? Who knows. We didn’t, that’s for dang sure. Hence the take-this-thing-apart-and-put-it-back-together-in-a-bus approach. Just transfer that complete system and there you go.
That said, not one to shy away from a challenge, I started painstakingly dismantling the electrics from the trailer, starting with the junction box on the tongue, trying to figure out where the trailer electrics merged with the house electrics, so I could keep the ground but eliminate the rest of the trailer functions, since we weren’t keeping the trailer itself. I labeled each wire and took exhaustive reference photos. Then Steph gave me the perfect book for camper electrics, which promptly scared the sweet bejesus out of me when they started talking about ‘hot skin’, which means the ENTIRE camper shell somehow gets electrified and you get shocked or quickly dead every time you go into the thing.
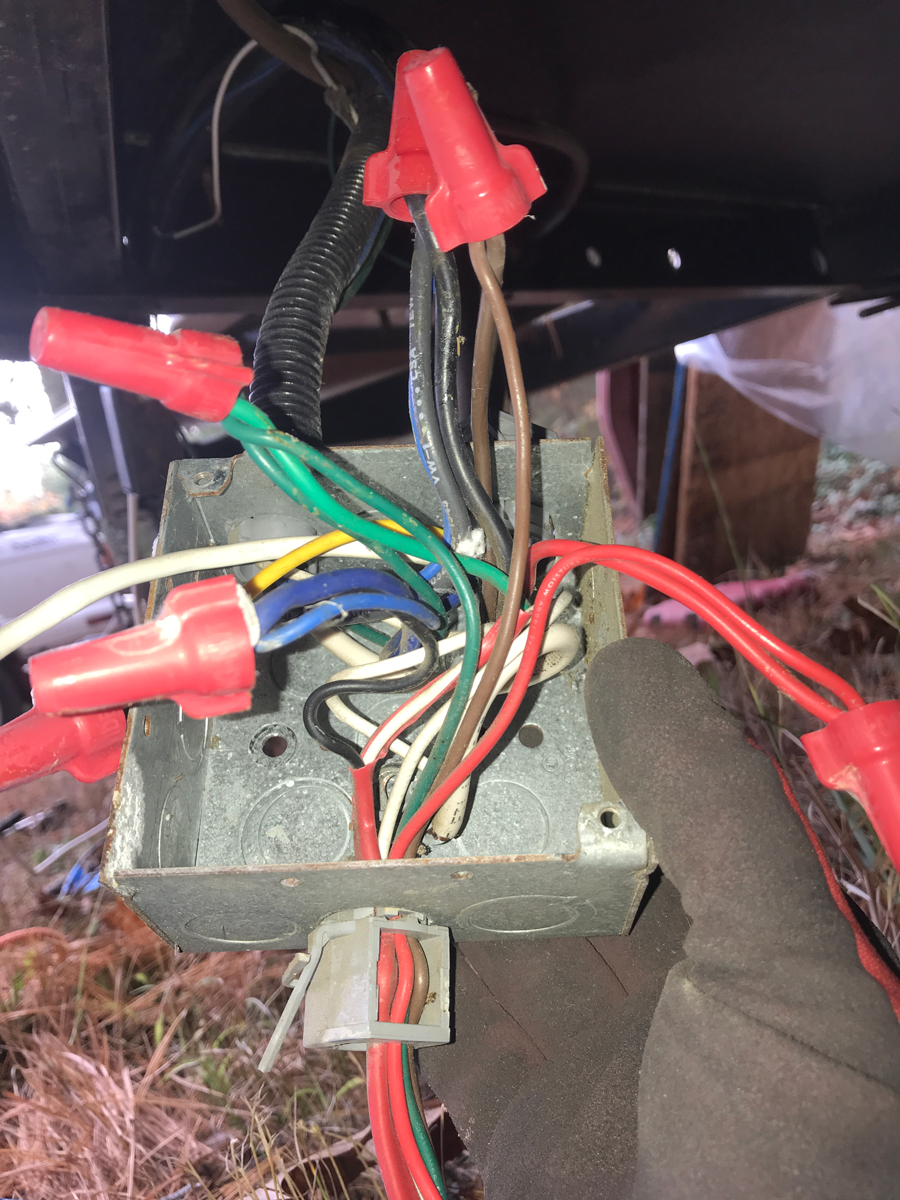
At the beginning, this was one of the scariest things I had ever seen in my life.
I stopped labeling wires and we put up the Bat Signal
Steph and I went back to the drawing board real quick like. Approximately 8,000 YouTube videos later, we came to the conclusion that we needed an electrician, but none of them would touch the bus. None. Neither would RV places. Van places wouldn’t even call us back. Square One.
Back on YouTube, we searched a little more. Steph searched for more electricians, van conversion places, RV dealers, etc., until she found this fella, Ross Lukeman, out of Houston, TX. A former architect, he gave up corporate life for van life and hit the road after he built his own rig. When he came back, after working for van builders as an electrics installer, he started RossLukeman.com. Now he teaches professional builders and DIYers like us how to build mobile power systems for vans, buses, off-grid cabins, overlanders, sailboats, travel trailers, small countries, and space shuttles. You name it and he’ll show you how.
One fine Saturday, we stopped building for a while and watched several of Ross’s’s’s videos. His pace was fantabulous for newbie level. Brand-newbie. Us-newbie. We-newbie? Anyway, he uses a methodical, step-by-step approach, explaining things along the way, for people jittery about electricity just like us. My father always says, “I like plumbing better — because you can see the leaks.” You can’t see the leaks with electricity, except when you’re watching your life-review reel at the Pearlies.
Ross doesn’t sell complete systems, rather he shows you how to build your own, or by using a system he designed and built, he can help you complete one that you have already started on your own and got stuck. While that might seem scary, it actually gives you a better comprehension of what is going in your system and how it all works. As luck would have it for us, at the time, Ross had that complete system all mapped out with parts lists and everything. For me, it was like a giant Radio Shack project and I was all about that part of the deal. I got to actually build custom cables and map the layout. It was awesome (see Part 2). Luckily, Steph picked up all the theory quickly, amps and watts and voltage, oh my! So together, we had it made. The cost of the Victron components and parts, on the other hand, for me, was a bit staggering. I got over that pretty quickly when I learned all the fun stuff we were about to build with our own hands.
Ross’s program starts out with something he calls the Ultimate Van Power Cheat Sheet that talks about all sorts of good stuff, with the three charging sources being the highlight: Solar, Alternator, and Shore. Solar obviously is the juice from the sun that charges the batteries. The alternator power charges the system whenever you’re driving (or idling). And shore power, if you’re unfamiliar, is power from a house, campground, or boat dock. I think the latter is where the term originated, when ships came in and hooked up the shore-based power so they didn’t have to run their engines to keep the lights on while they were tearin’ up the town on leave. So we did all the things from the cheat sheet and got totally hooked on the whole thing. When I compared the cost to the quality, I got over the price tag. It’s almost always better to buy quality stuff and not have to worry about it than fix things every two seconds. There’s ‘done’ and ‘done right’, know what I mean?
We were stoked! Ross has two components for the DIY piece. One is the Van Power Method Masterclass, which teaches you step by step how to build the system he designed, which is called the Victron VE Bus. He also offers a monthly group called Mobile Power Insiders. We bought both for a few hundred bucks, which is the best money we’ve spent in a long time. The Master Class is awesome and super easy to follow. He teaches you the theory and the practicality of things like making your own connections, crimping the terminals, the order things should be assembled, even the best tools to buy. Mobile Insiders is also awesome because it’s a monthly group call hosted by Ross and other real people who are working on a slew of different projects. You can basically ask an unlimited number of questions on just about any project, not just the one we built. You could walk in there with an extension cord and ask how to build the rest of the system, basically. When I was in full Go Mode, there was a woman from Norway, building her van’s electric system, an Australian guy working on an off-grid cabin, a British chap rebuilding a sailboat, and us, building our bus. The group calls really do build a sense of camaraderie and a sense of accomplishment in building — and programming — your own system. If you already built your system and need to work out a few glitches, you could always just do a consulting call with him too. If you want to become a pro installer and make gobs of money, there’s a group call for that too and a certification class in Florida and Houston.
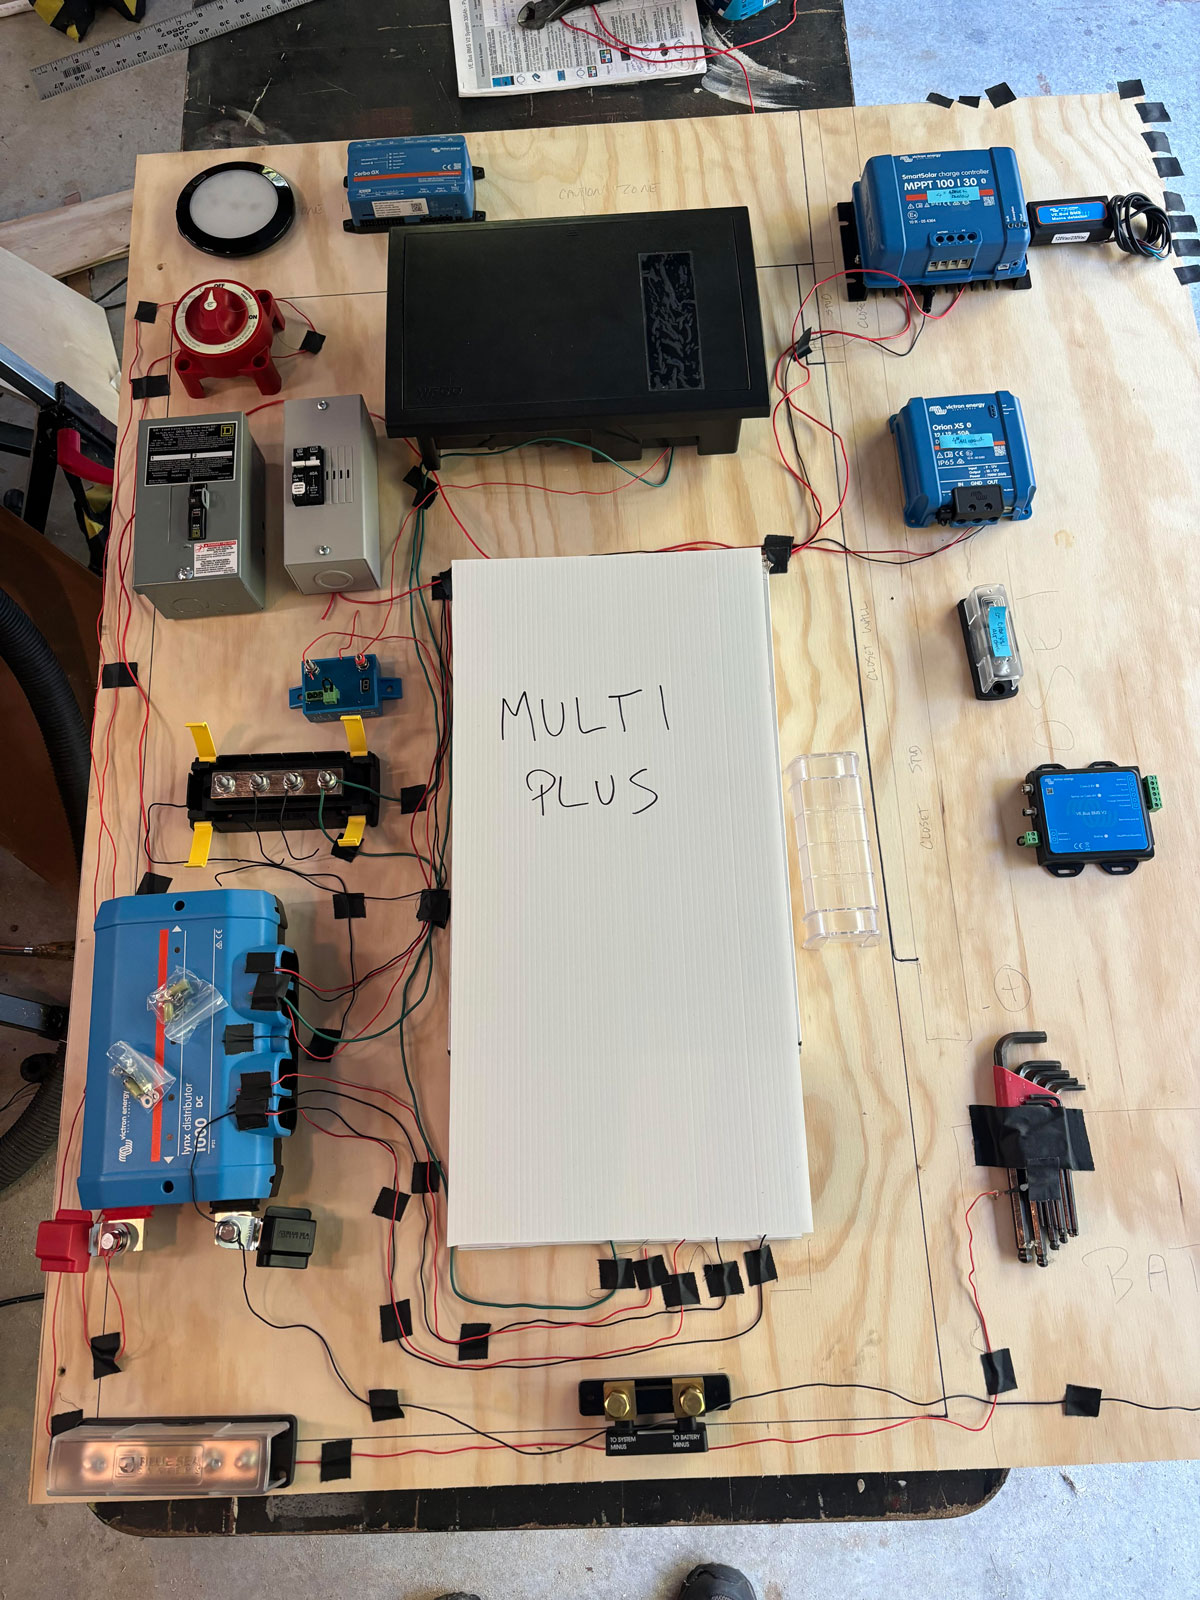
Per Ross’s’s’s advice, I cut the back wall to spec and built a test layout with the components I had available at the time. Each of the Victron components, all the blue things, needed a specific amount of space around them for proper cooling and airflow.
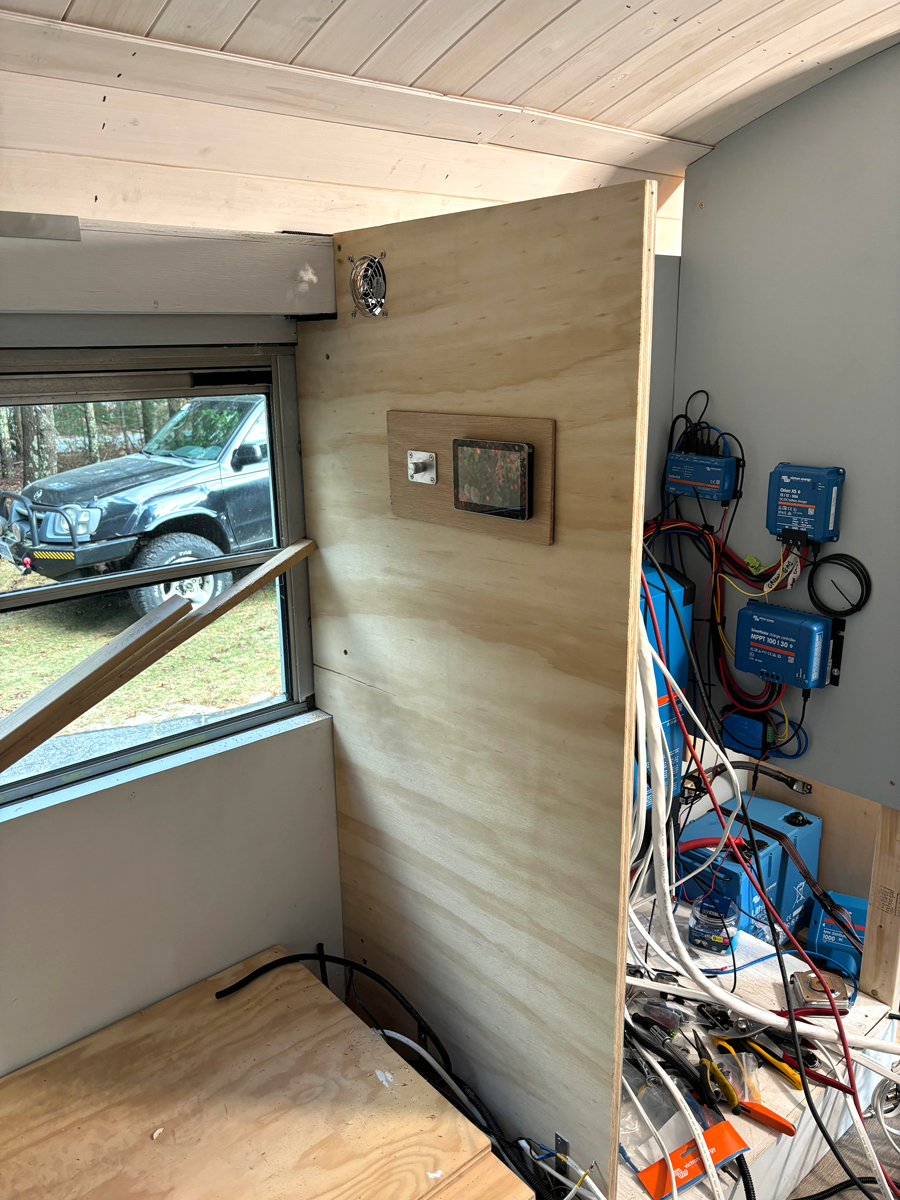
Here’s an in-bus progress shot. To the left of the wall is where the bed/dinette will be. Inside, there’s a copper octopus farm. Through the window is Sally, the s-hero camper hauler.
Fair thee well, Stampy D
All was not wasted with acquiring the camper however. We learned a lot about how things worked, how they were built, and how much engineering can go into a tiny space. Once we decided Stampy D wasn’t the right way to go, we used Opi to gather up all the inside things we thought we might be able to use in the bus, like light switches, 12V dome and reading lights, hinges, etc. We decided that the plumbing fixtures and plumbing itself, which had been discovered by mice over time, wouldn’t be a good fit for our project. Half of me wanted to keep the trailer itself for an around-the-house rig, but the time it would have taken to dismantle and toss, would have eaten up a lot of bus building time.
We listed Stampy on craigslist in the free section and got a holler from a carpenter. She seemed excited to take on Stampy D, despite the condition it was in. She wasn’t going to strip it down either. Her plans were to take it home and do what we were doing with the bus. She planned on gutting it to the studs, keeping the main structure, and then doing a complete custom build. I should have kept her contact info, because I would have loved to see someone who actually knows how to build stuff build Stampy D out and resurrect the life she once had. Alas, that was not to be. I’m just glad that there was someone out there that wasn’t just going to demolish the thing. Good to know it’ll be back in a forest making new memories.
So then, what’s next?
We watched and re-watched a bunch of Ross’s videos and decided to jump in with both of our feet. All of our feet? All feets? I don’t know, anyway, we signed up for The Van Power Method MasterClass for $297. Money very, very well spent.
If you’re ready to take the leap and want to use Ross’s systems as well, have a click on the links below. I have a discount code available too, just give me holler for that if needed.
The Van Power Method MasterClass
Up next, Part 2 – The Install!
-30-

Leave A Comment