OK, so I think I just discovered all that is wrong with carpentry — it’s their naming conventions. See that orange triangle in the photo of bathroom tools below? Triangle, right? Nope. Square. Those weird wood people from @ThisOldHouse call that thing a square. A Speed Square, no less. A square? Come on, Norm. Tommy, clearly that’s not a square. Also, Kevin, where’s the speed? It’s not even a power tool for cryin’ out loud. Where. Is. The. Speed.
No wonder nothing lines up in this thing.
So, yeah, you’re welcome. Fix that name and you fix all of carpentry. I should get some kind of award for this discovery. I bet Mauro, Lee, and Jen name all their tools correctly.
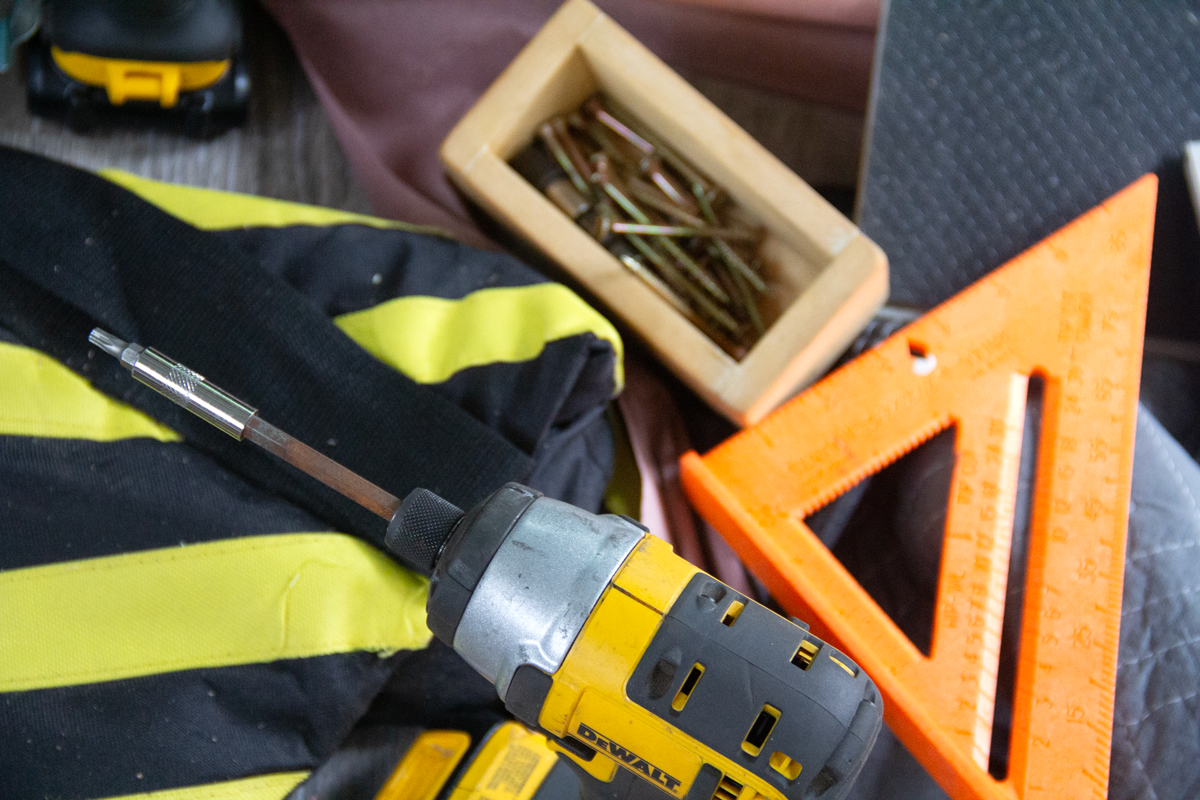
A square? Really?
All right then, let’s not get sidetracked here. So Steph and I have never built a wall. We’ve painted plenty of them. Even took tile off some of them. We also did our fair share of spackling them. But this is our true, first wall — even though the wall isn’t true at all (see ‘square’ above).
First, let’s flatten the Earth
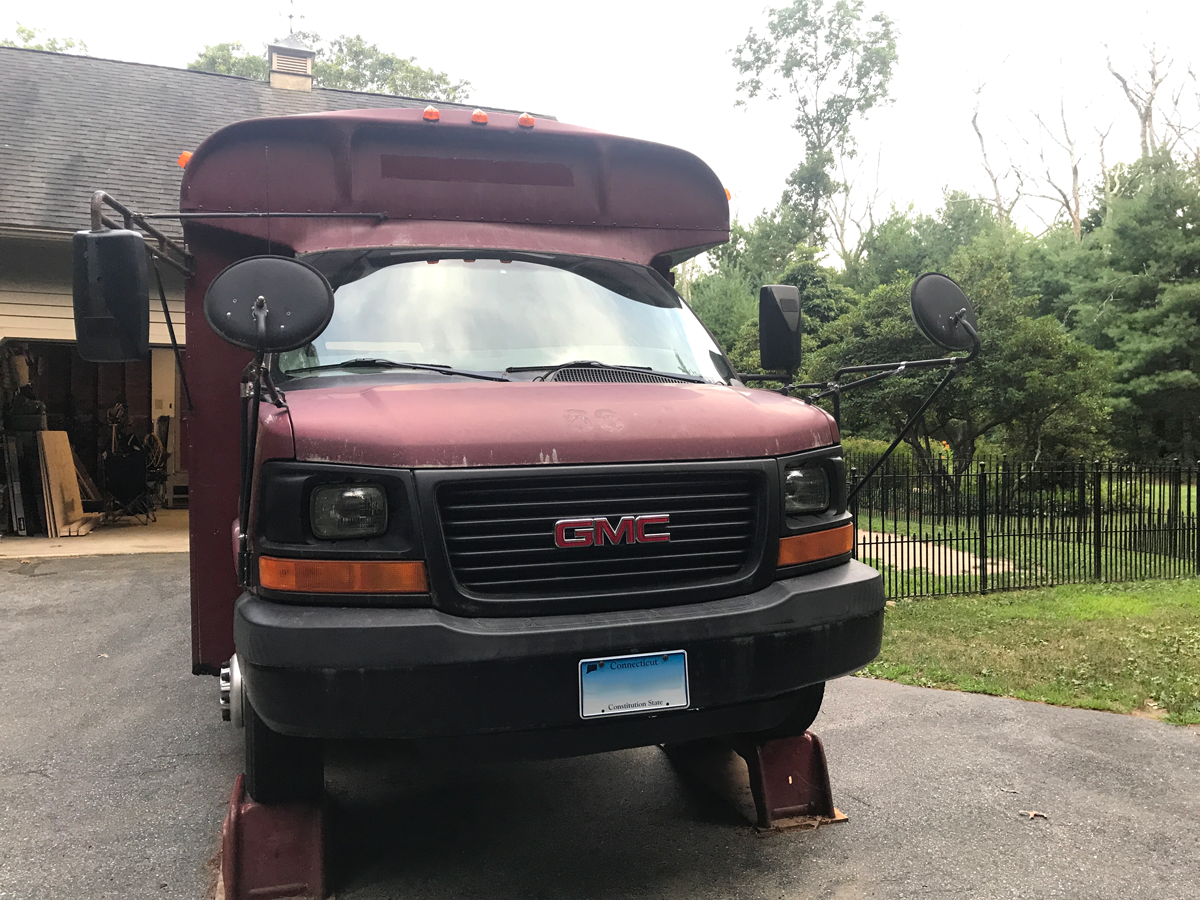
To give ourselves a little slack, we knew that the bus didn’t have any lines that land in perfect angles. What I haven’t really showed until today, is that the bus was actually up on ramps in a vain attempt to flatten the thing out so we didn’t have to build uphill, or if we dropped a screw it wouldn’t roll away. The driveway slopes downward and the bus slopes upward in the rear, to accommodate the weight of all those hooligans in the back. So normally, when all the kids pile in, the rear end of the bus levels out to the front end. When there are no seats filled with miscreants though, the rear end pops up like ’71 ‘Cuda about to launch off the line at a drag strip. Compensating for all that rigmarole required a quick jaunt to our favorite scrap joint, like when we fabbed up the Tetris Beam, for some ramps.
Ramps acquired, we faced the bus downward from the garage, so when we drove up on the ramps, the bus leveled out inside, with the bonus of making the back door easier to get into, especially after we built a step out of more leftover deck rehab lumber (I have a hardware store in the basement). Now, driving a large trucky thing up on those ramps was a different story. You kind of have to close your eyes and send it. No. Don’t do that! Go slowly. Slowly up the ramp, then you’ll feel it crest over a little ridge, then drop down into the little tire divots, so it doesn’t roll off the back of the ramp. I took it down and put it up so many times, I started getting used to it eventually. We’d take it down for little jaunts here and there betwixt building projects, so it got easier, but that first time always has that roller coaster feeling, like am I doing this right, or will it end up in my untimely death.
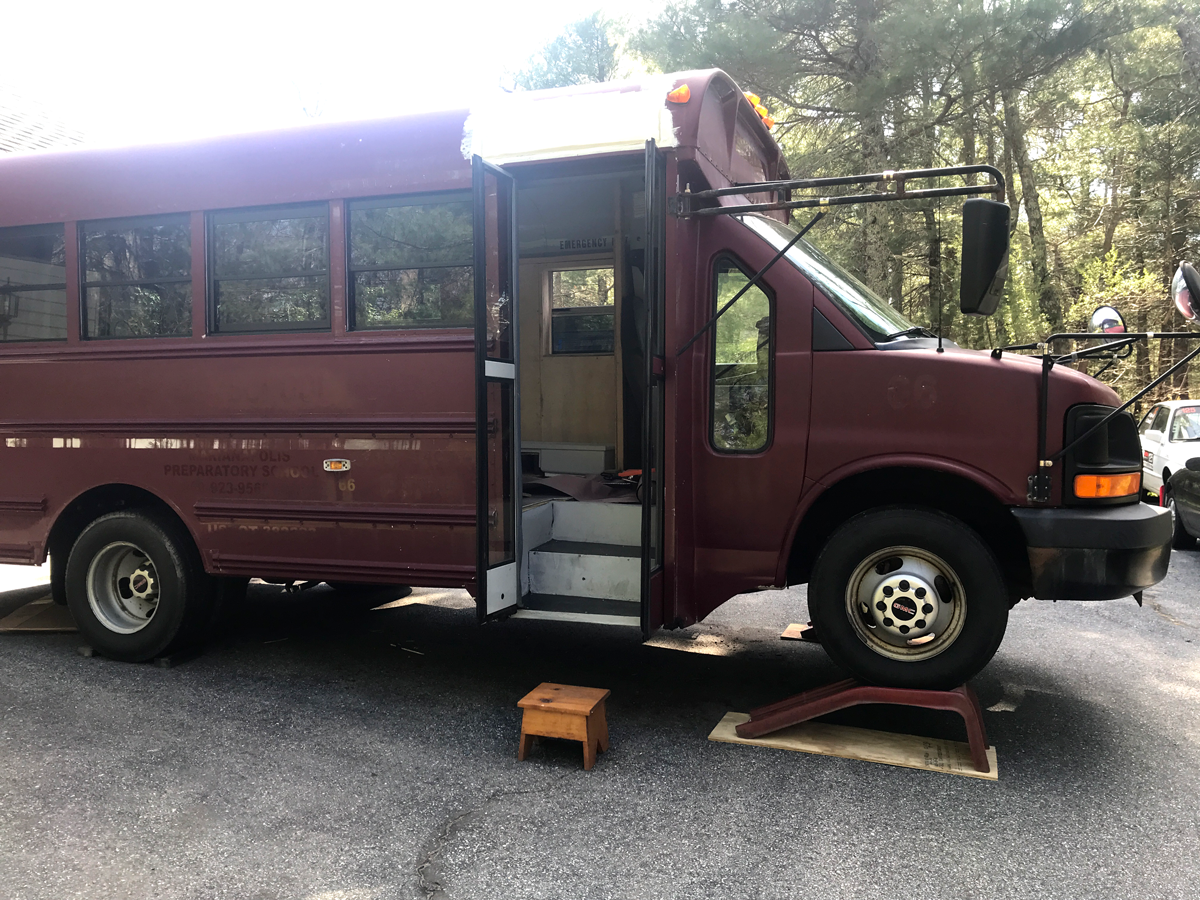
The bus up on scrapyard ramps to help flatten our work area. That little stool came from our popup camper.
That foot or so doesn’t look so tall from here, but inside the bus, it looks like you’re gonna fall off El Cap.
Enough of that. Where were we? What was I talking about? Oh, yeah, building the Throne Room and Butt Washing Emporium!
Paneling has changed since the 70s
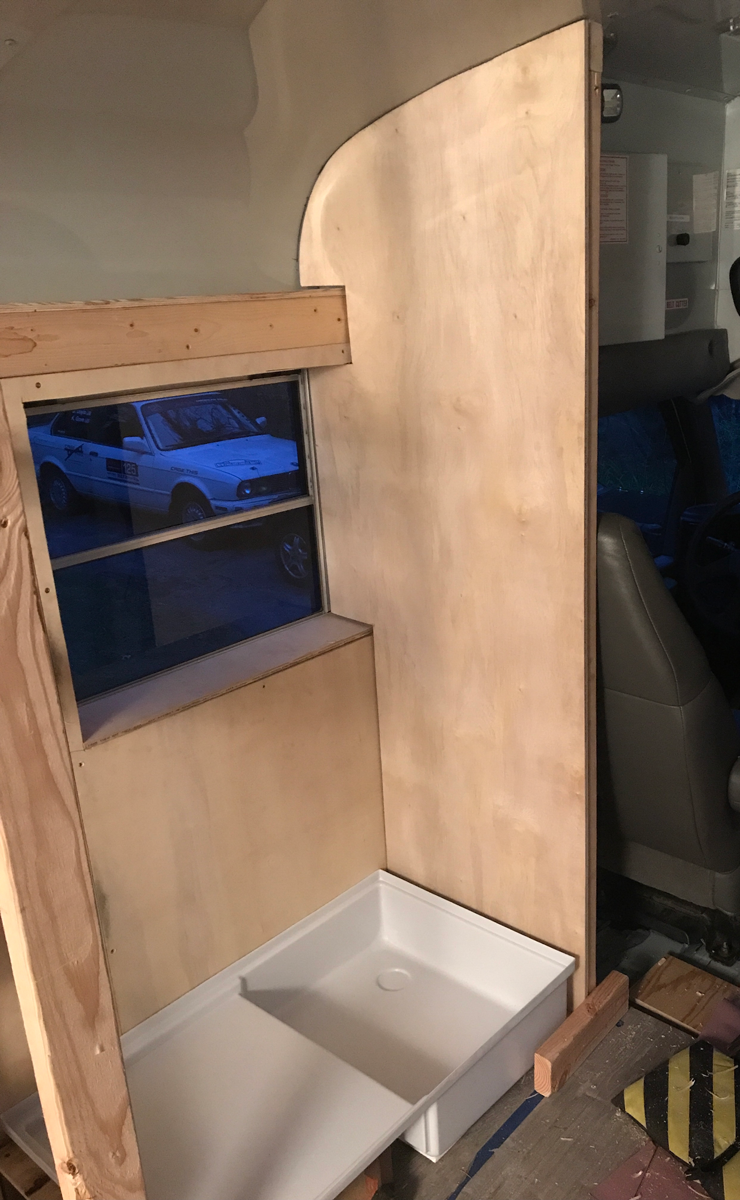
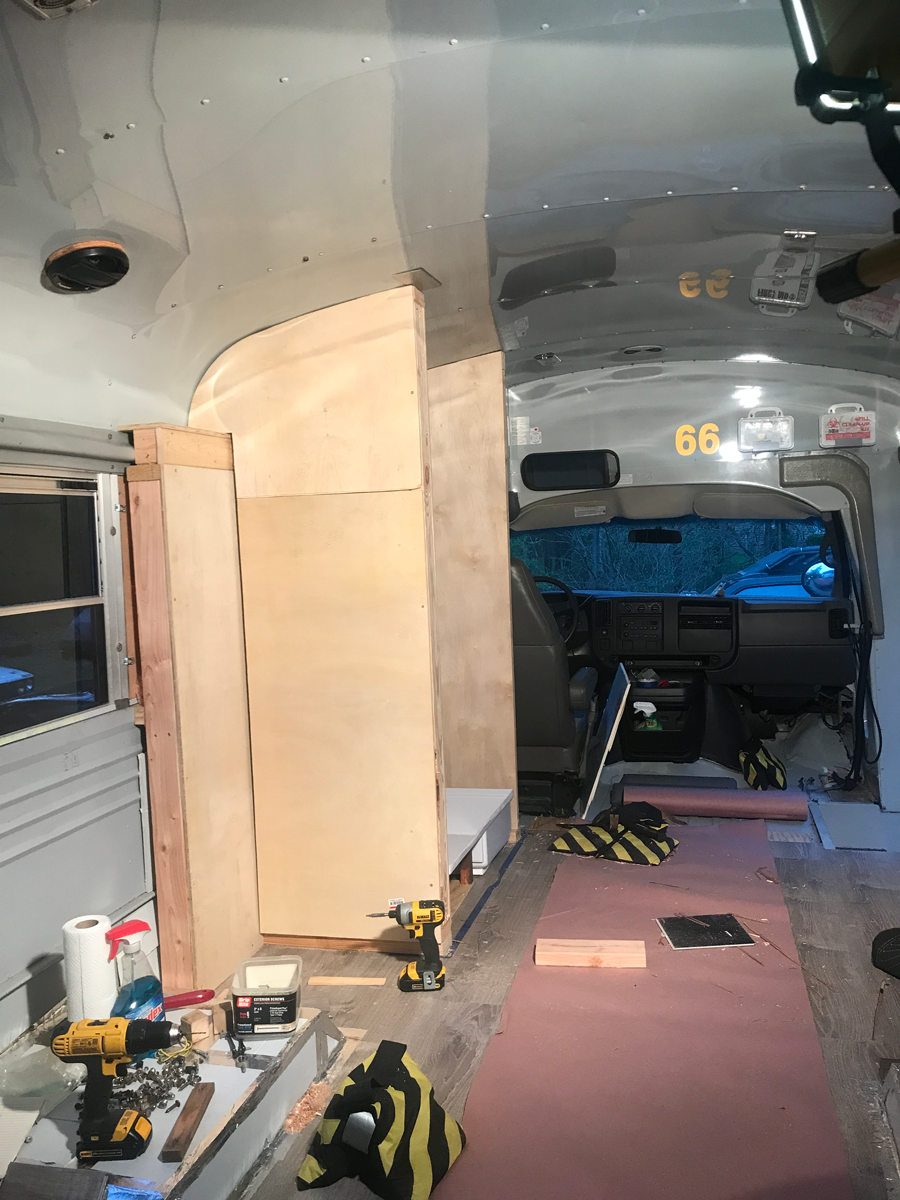
Since we couldn’t use drywall, for all the bumps and potholes would crack it into powder before we left the driveway, we needed a wall material rigid enough to stand up straight (mostly), but light enough so we weren’t carrying around unnecessary weight (easier said than done, am I right?). Three-quarter inch plywood weighs as much as wet lead, and 1/4-inch, like they use in modern RVs, was much too light and flimsy, in my humble opine. We found this stuff called Sande, which is supposed to be water resistant and mold proof, technically marine-grade plywood, but even at a 1/2-inch, I think the Minnow would definitely be lost with this stuff. However, although brittle at times, it does make for a sturdy wall paneling that had a smooth finish to glue other stuff onto it, would hold nails and screws, and it is super lightweight. Plus, for those accountants out there, it was pretty cheap too. This was during peak plywood gouging season too, so a $30 piece of plywood was then topping out at close to $100.
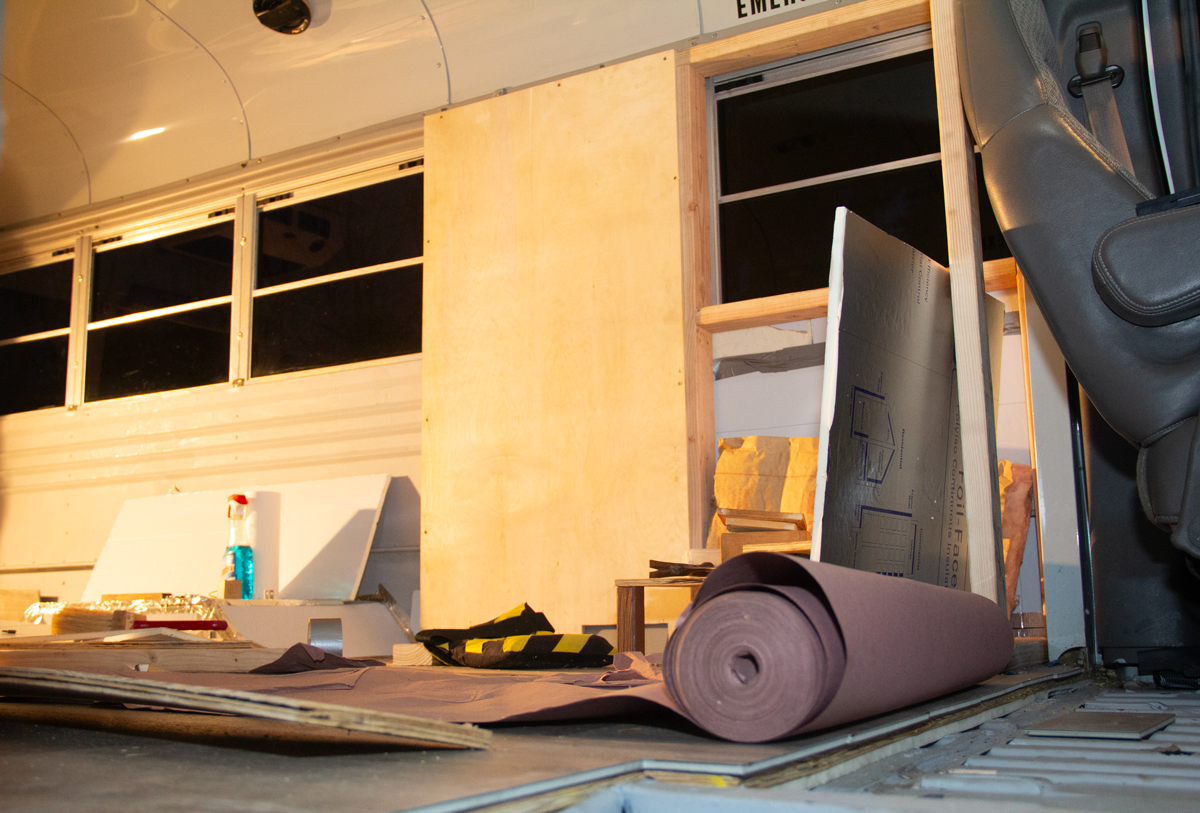
Behold, the back of the closet. This is a good place to see the floor sandwich too.
All that settled, let’s throw up some walls, right? Not so fast. If I haven’t mentioned it 276 times already, the bus has a rounded ceiling. Because of this unique feature, we had to make a template of the rounded shape, then transfer that template to the wood, get cutting, and make some walls. Well, that wasn’t the case either. It seems, as many times I tried to make the template with cardboard, even with using an EXACT piece of factory rounded metal, it STILL wouldn’t match the ceiling, never mind those other cutouts for the window. From one end to the other on this thing, the floor dipped, the ceiling had a different shape than the ceiling 3 inches next to it, that sorta thing. So we made several templates, cut the pieces, trimmed, shimmed, sanded, and swore until the round met the round enough to at least get a bead of silicone to seal the area, or put some kind of trim on the gap so it didn’t look like a dizzy 5-year-old made the thing. The process of making a single wall only took approximately 1,346 days.
Get out of my bathroom window¹
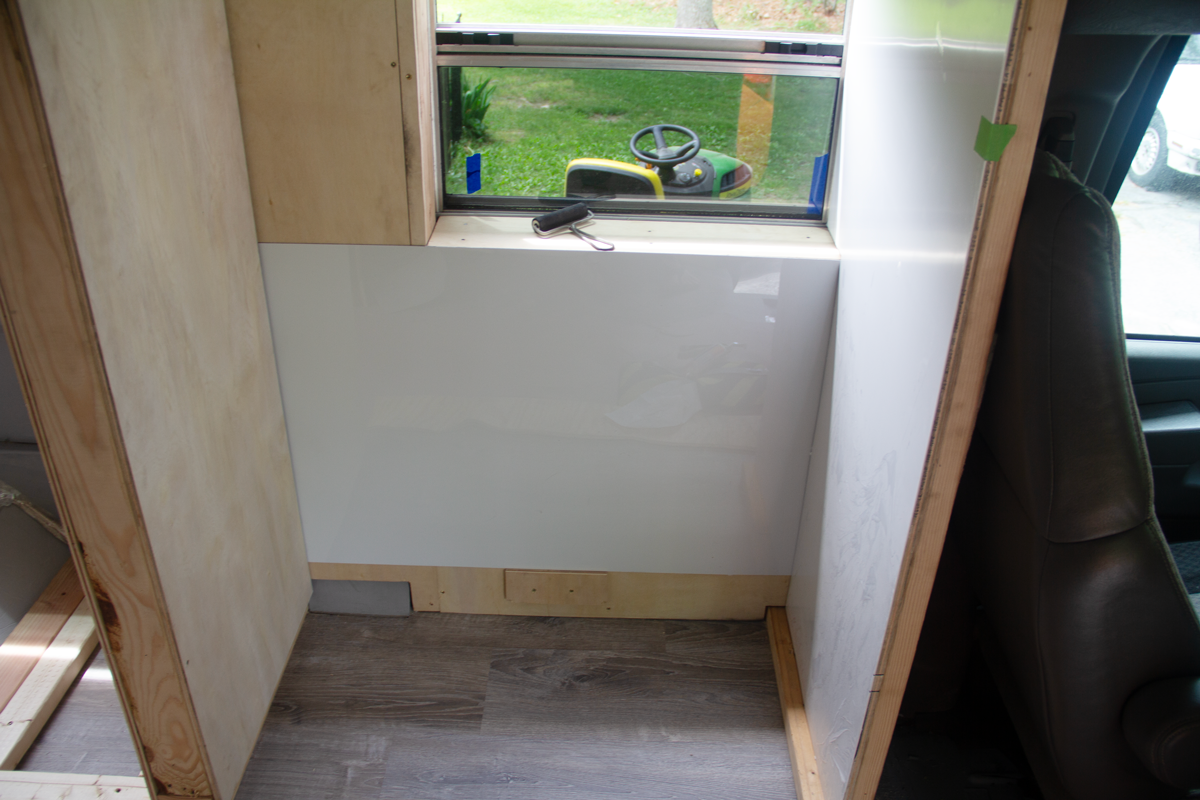
As the walls started going up, we realized that since the b-room was going to take up two window spaces, but keeping one usable, we had to block off the one that we weren’t going to use. Originally, I wanted to block it off from the outside with a piece of sheet metal that would then be painted with the rest of the body color. Since it was only one window though, we figured it might look kind of boarded up from the outside and that would take away from the overall glam show.
To make things easier on ourselves, we just cut a window-sized section of 1/4-inch plywood, painted it black so you couldn’t tell is was blocked off from the outside, then secured it directly to the window frame with some sheet metal screws and old picture hangers I had in the hardware section of the basement store. Boom, window now blocked. Since we built back-wall studs, temporarily held in place with some L brackets, we tossed in some insulation we had laying around, which really means I took it out of our unfinished garage walls and stuffed it in the pockets. I was in The Zone and didn’t want to take time for the 90-minute turnaround to Home Depot.
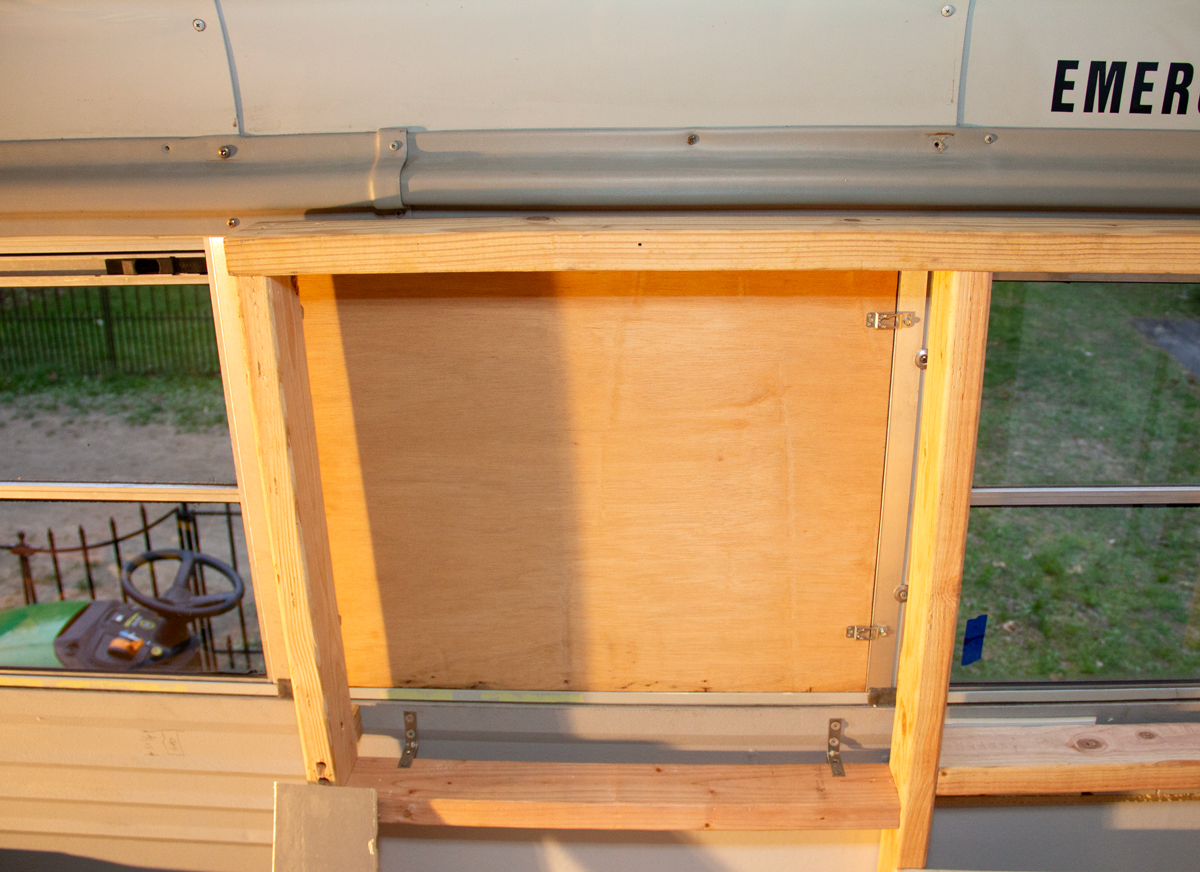
We painted the other side of this panel black, so the woody look didn’t show through and look boarded up.
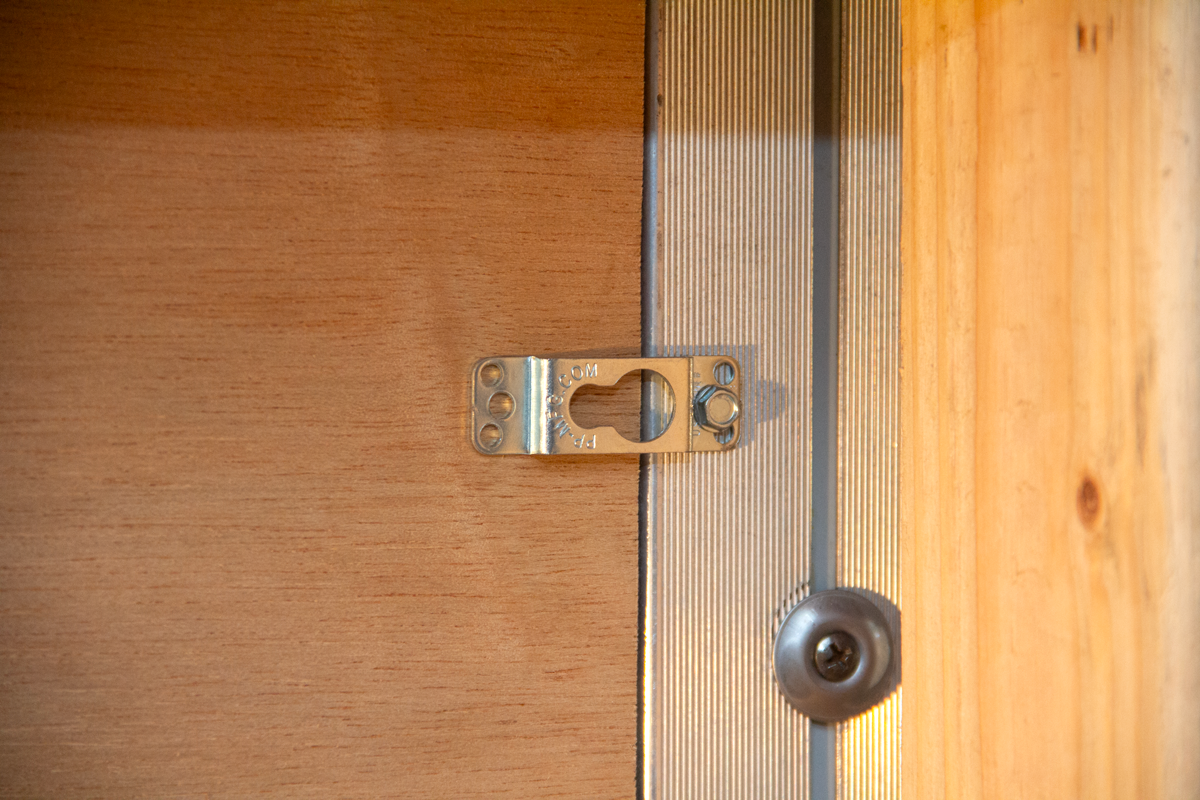
We raided the parts bin in the basement and found these picture hangers that we turned into clips.
Things are getting squarer
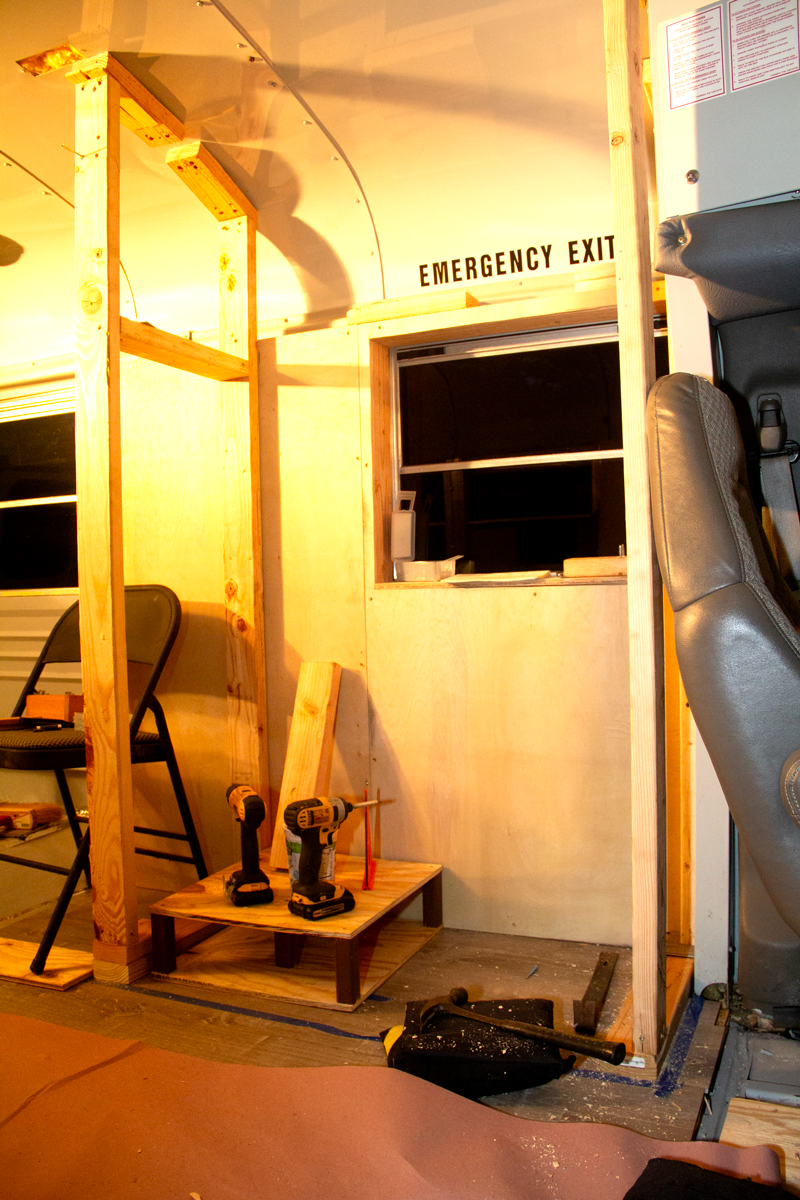
Sufficiently stuffed, it was time to start building some panels to get this thing enclosed. Let me tell ya, inspiration comes in the form of putting ‘finish’ stuff on, like even the back panel covering the window. It starts to look like things, even if, in this case, the panel would ultimately be the back wall of the closet. This means that we’re actually going to have a closet, that we built, with walls and everything, in a moving vehicle. We took the wins, no matter how small.
We started making squareness (or triangleness?) happen and then it became a little easier to start slappin’ up panels, for more of a roomy feeling experience. When it came to the ceiling again, mounting locations for the studs were a bit tricky. The ceiling skin was basically just aluminum sheets that we couldn’t really use for structure. There were, however, steel ribs underneath, holding both the aluminum skin on, but also providing the whole-bus structure. These were a great place to screw things into that made the whole thing really start to feel solid.
In reality, it took many, many trials and errors to get the stud pieces to fit on the ceiling structure, like length of screw so it didn’t poke through the roof, how far to countersink a screw that we had so we didn’t have to buy another box of a different length, position of the wood to actually hit the ribs, that sort of thing. Some processes seemed nice and easy, while others had me contemplating my existence in the universe and what the H were we all doing here. In the end though, we were going to have a bathroom!
Here’s most of the back wall temporarily covered in the paneling.
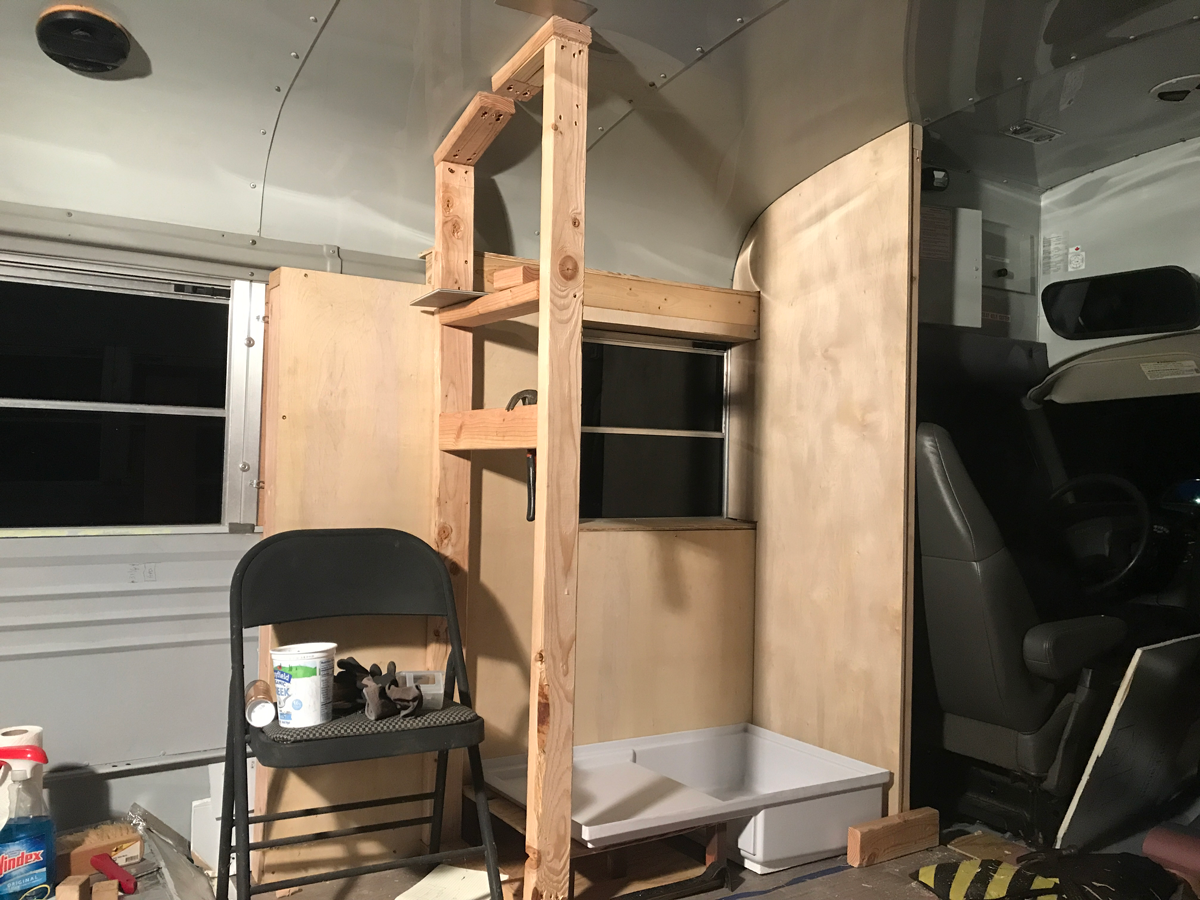
This is the moment, to me, that it started looking like a thing.
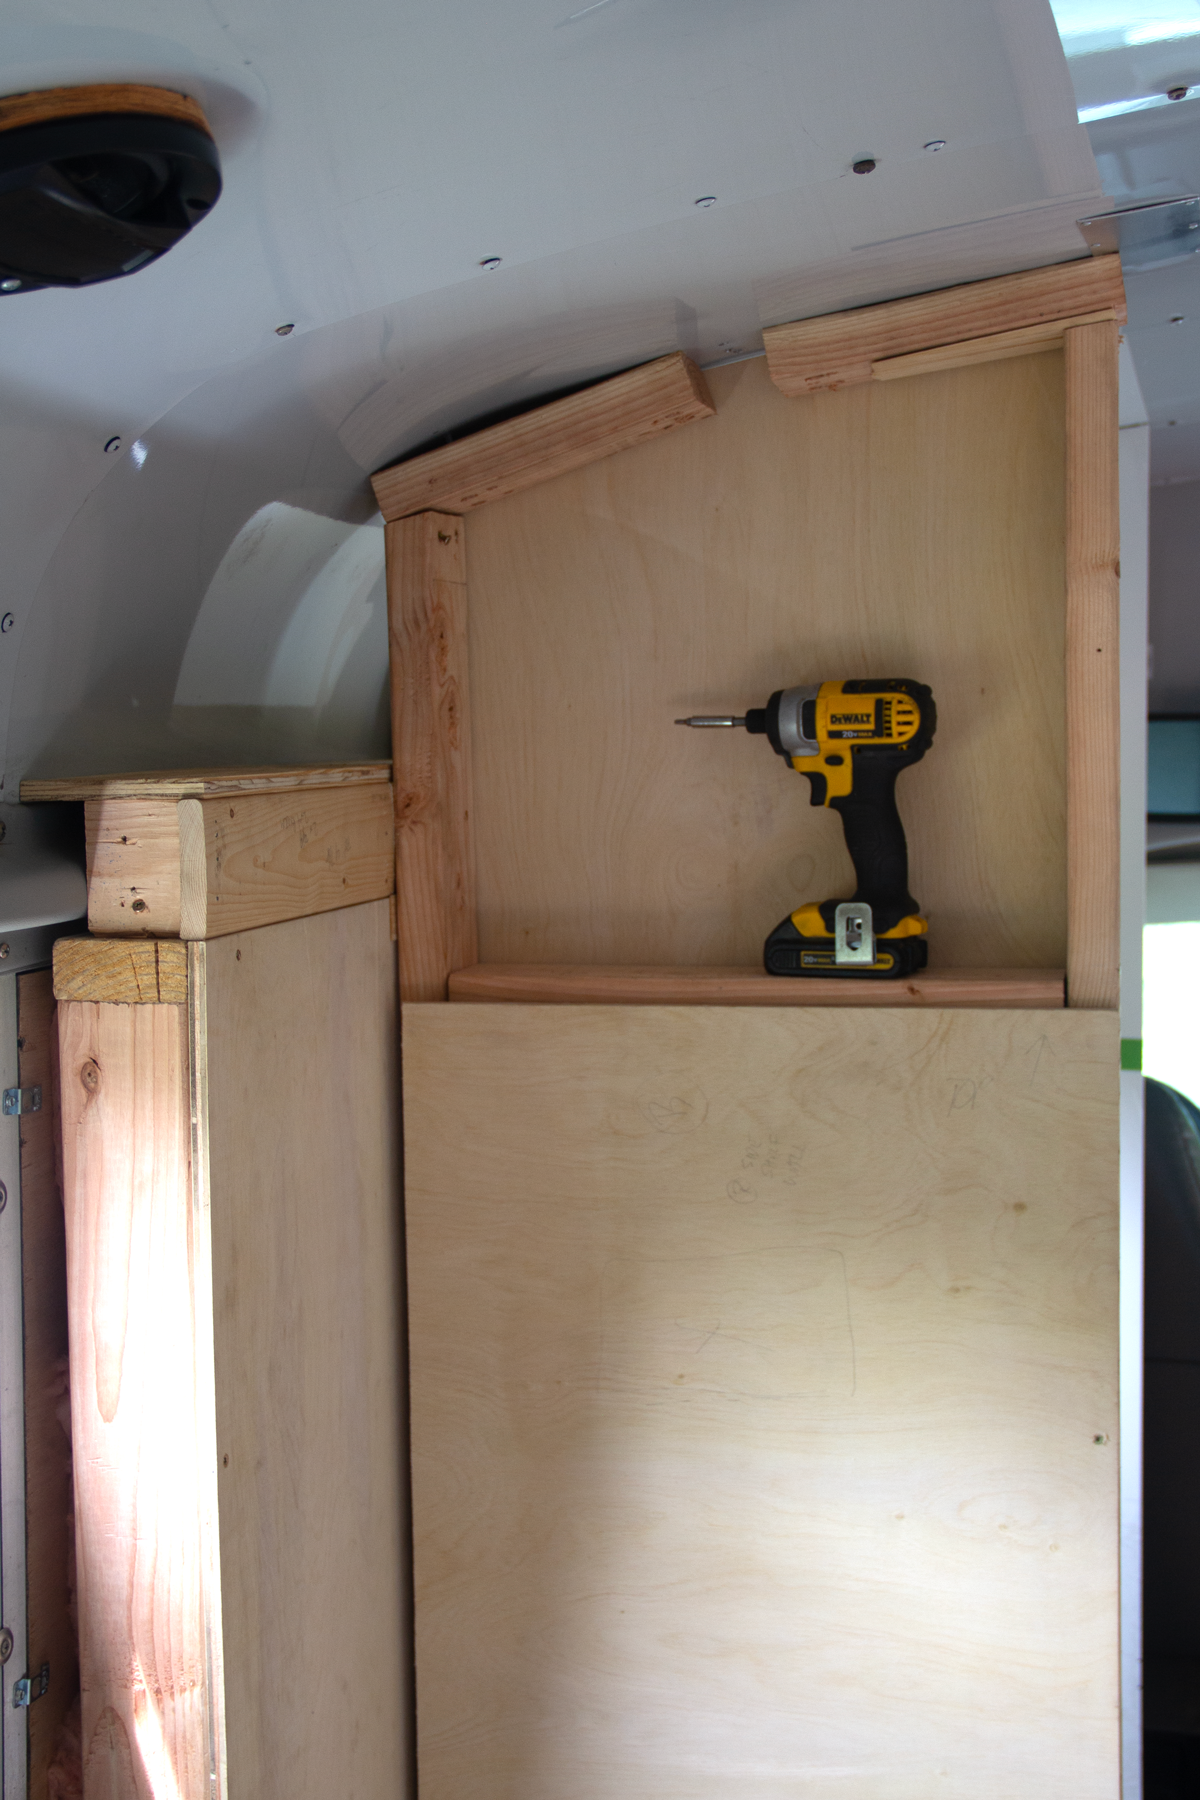
The top section that’s holding the drill was originally going to be an access panel for the wiring behind it, but we found another solution. And no, I didn’t seal the drill in the wall like a moron, because when I put the panel on, I couldn’t find the drill to seal the wall.
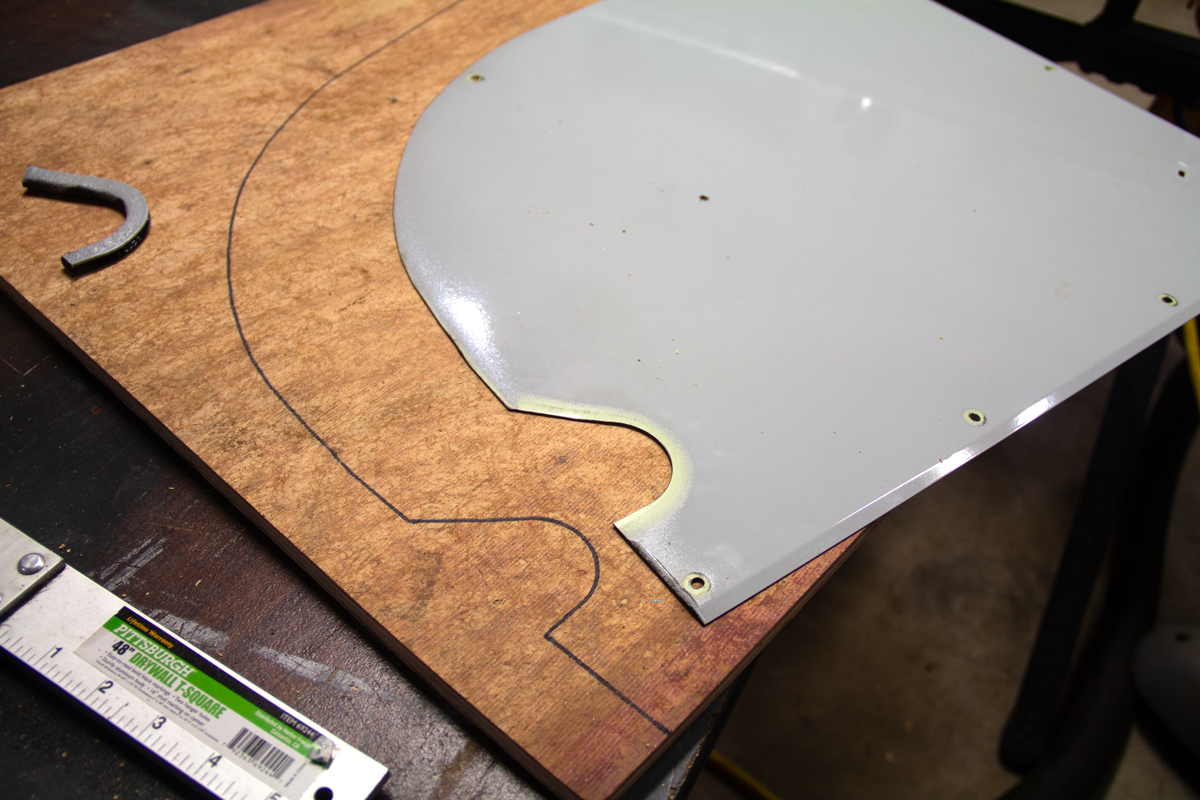
Looks like a good idea, right? Exact replica of a factory panel? Nope.
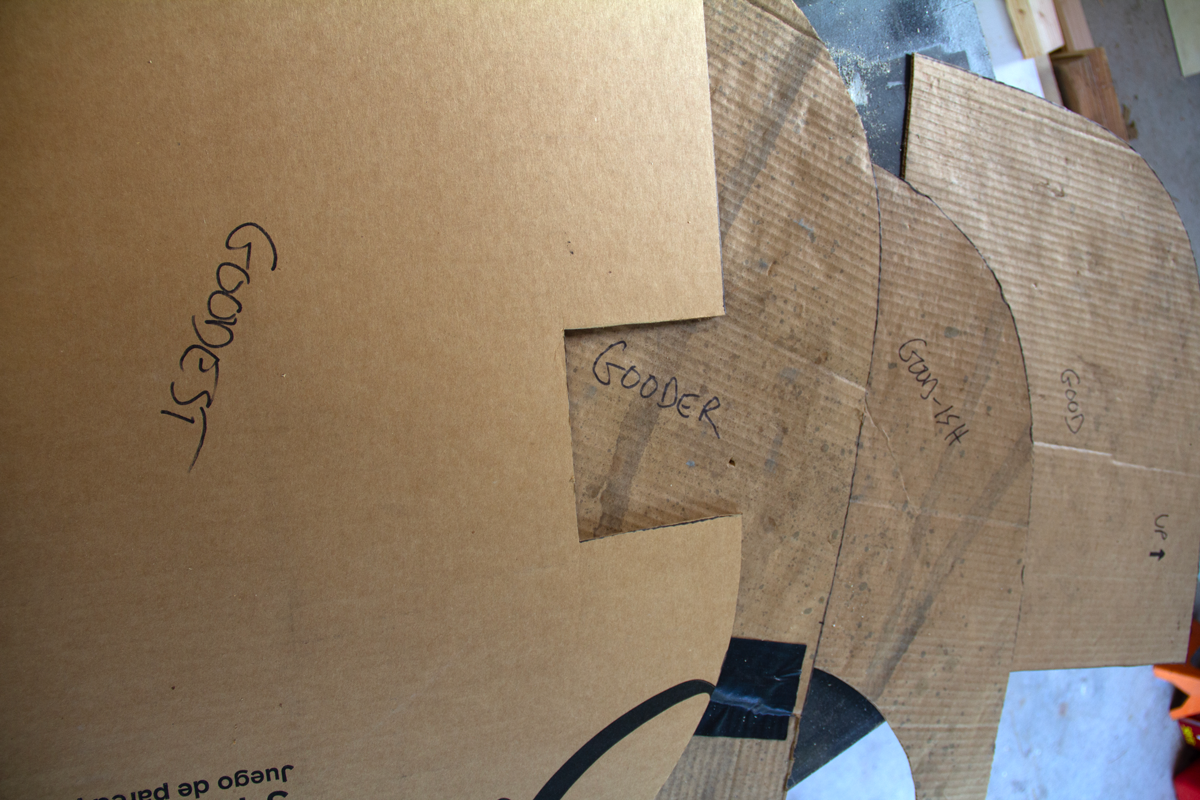
Here are a few attempts at templates.

Almost there…
After 57 hours and a dozen Sharpies, I think I nailed a template.
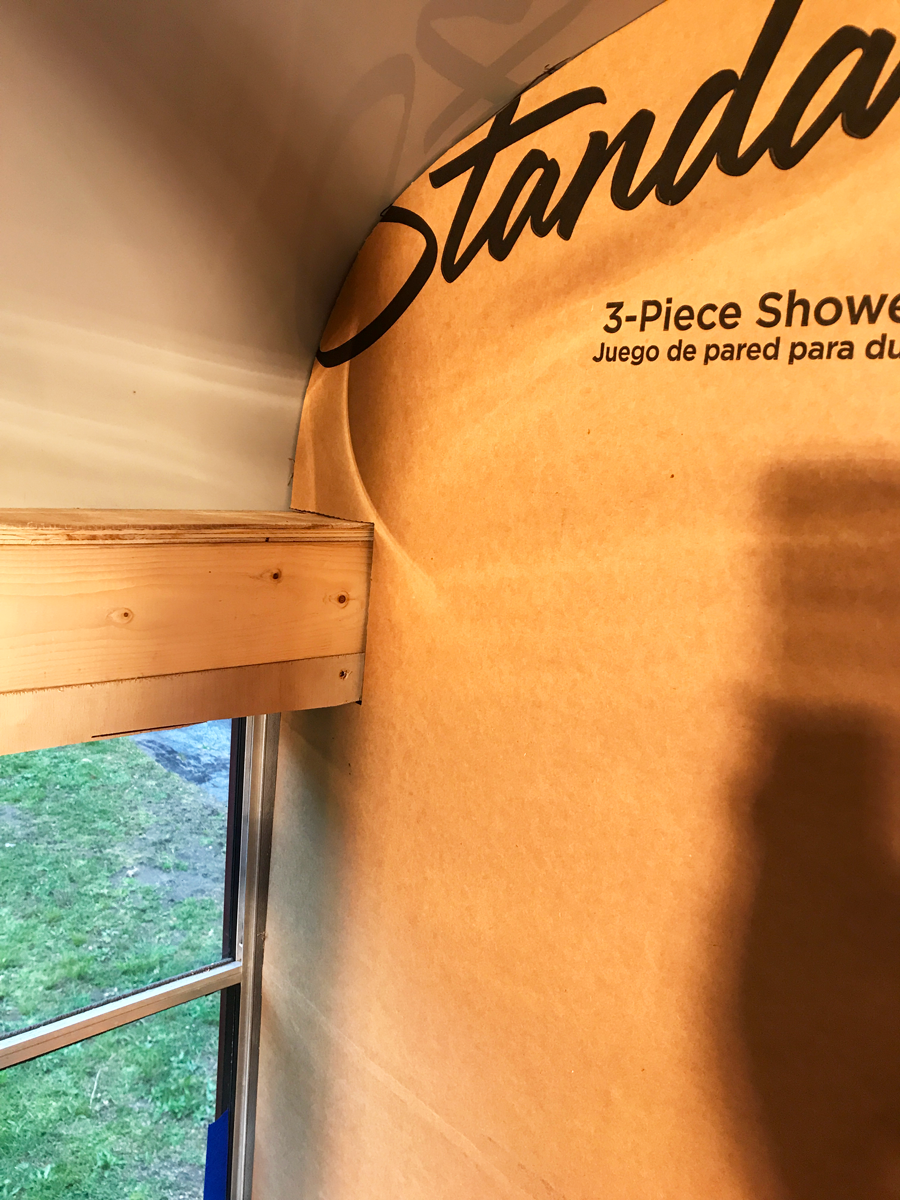
I transferred the template to actual wood and the gods wept — and so did I.
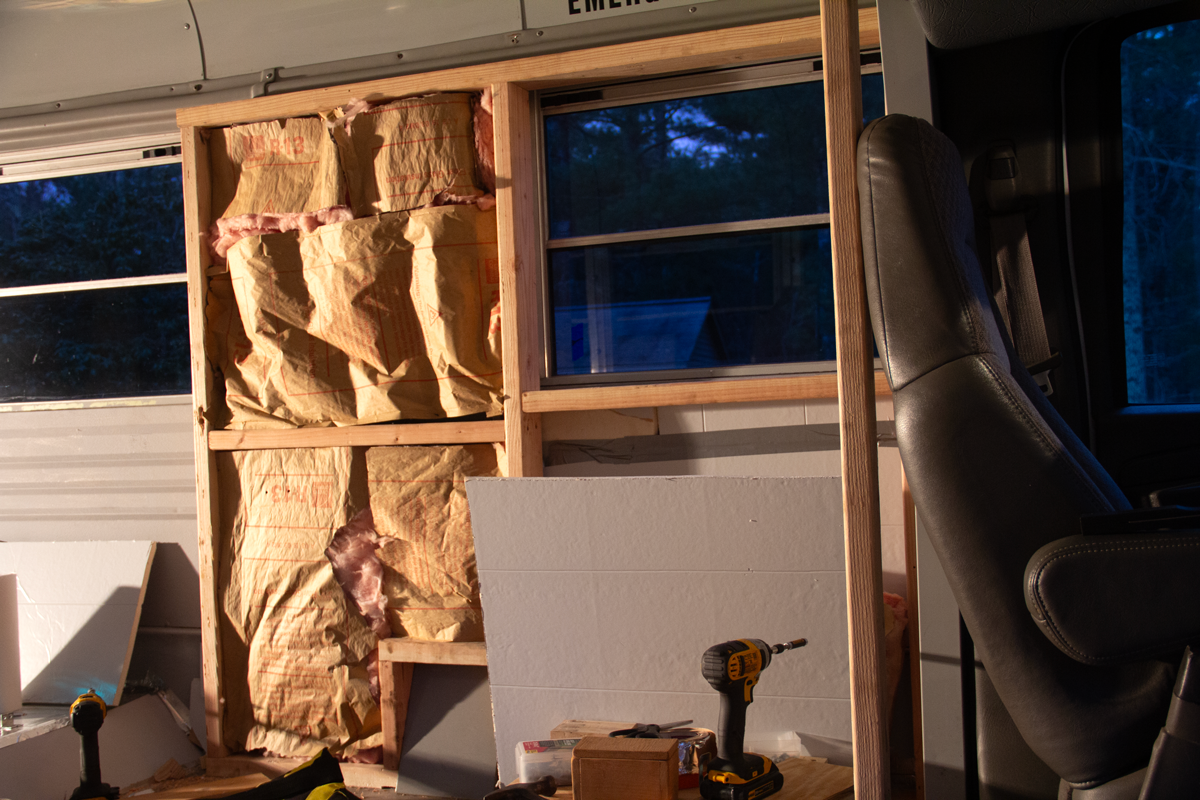
We’re pretty good at MacGyvering. This insulation was mostly for sound deadening, as we’re only building a 3-season cabin on wheels.
So many, many holes in the plan
I can’t really close without talking about yet another hole, which seems to be a thing with building RVs. Gas holes, water holes, plumbing holes, electric holes, keyholes, and other holes. In this hole instance, we’re talking about the shower drain hole. Remember that super precise, pre-molded hole in the shower pan? Well that needs an equally precise hole in the floor for the water to drain out into some sort of tank underneath. To achieve this feat of engineering, we daringly cut out the shower pan hole first. Daringly because this pan wasn’t cheap and you can only cut a hole in one direction. For example, if you cut the hole too small, we can always cut bigger, though that’s not as easy as it sounds. But if you cut the hole too big, you can’t cut it smaller, although there are options, but that’s a whole other thing. That said, we pressed on.
Finding that precise spot to drill the hole, we placed the shower pan in its spot, remembering to add in the throne riser, account for the thickness of trim that wasn’t there yet, account for varying heights and angles, and all of that good stuff. Once we were pretty sure that we could thread the needle, we used a hole saw, a round saw-blade-looking bit with a pilot drill bit in the center, to carefully line up the holes, and like the game of Operation, we didn’t touch the sides and starting slowly drilling. Once the pilot hole made it’s mark in our fresh new floor, we pulled the pan out of the way, and dropped the hammer — well, started drilling more.
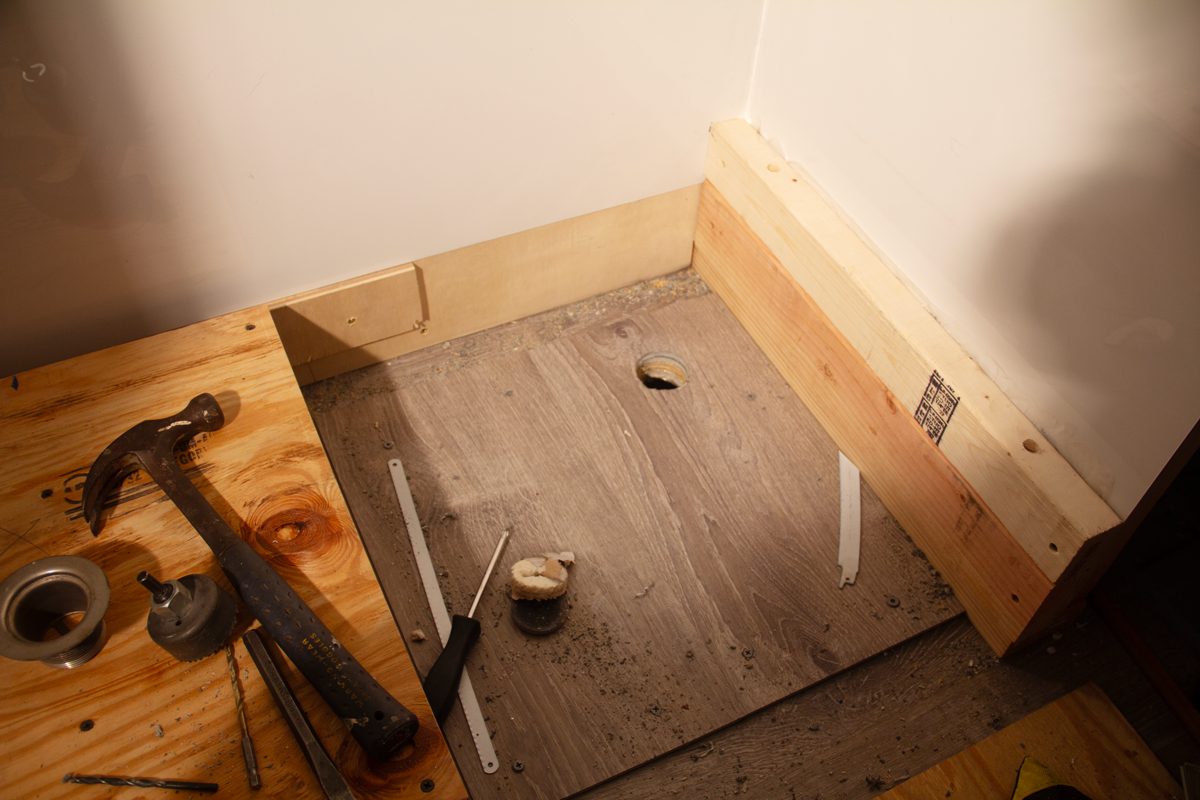
Looks easy enough.
Press on Regardless: Rally Mode
During this part, Steph had gone inside for her class and apparently I went into Rally Mode. I started drilling and everything was fabulous. I had even checked underneath the bus to make sure I wasn’t going to cut through fuel, brake, or electric lines. The hole saw cut through the floor plank like nobody’s business, went straight through the plywood subfloor, breezed through the the foam insulation, and hit the metal bus floor and ground to a disturbing halt, after it had started squeaking a metal screech and smoked like Spicoli tumbling out of the surfer van. Fuuudgicles, I said. I looked down into the nearly-cut hole and saw the shiny ring of fresh cut metal. Then I looked at the saw and instantly realized two things: One, all the previously pointy saw teeth were now rounded nubs, like a dog that liked to snack on rocks; and Two, I realized that I was trying to cut through thicker gauge Deeetroit steel with a hole saw made to cut doorknob holes in wooden doors.
Oops.
No matter, I say to no one in particular, still in Rally Mode. A quick jaunt to the toolbox for the proper metal-cutting equivalent I go, only to find I have every version of hole saw ever made except for the correct one.
Oy.
Back to the bus I go. I’m almost there, I’ll just put some weight on it, sorta cheat it a little with brute force. I lean and squeeze and put all of my covid weight right into it. More squeaking, more screeching, more metallic smoke. I cut a little bit more, but progress stalled. I pull up the folding chair, pour a Founders Porter into a frosted glass, and contemplate next steps. Just then, Mike, the neighbor’s son, rolls up on his motorcycle with his girlfriend Kate. They just stopped to say Hi and check on the progress. Let’s just say Kate left after a half hour, Mike became my co-driver for the night, and we blasted through this thing with anything and everything we could find: Half-inch drill bits, making several holes, 1/4-inch drill bits, tin snips, punches, sledge hammers, handheld hacksaw blades (no handles), more punches, more beer, more drill bits. One final whack with a punch and sledge revealed the pavement below the bus lit by the glow of garage lights. Fuh cryin’ out loud. No stores were open at this hour and the thought of stopping seemed very un-rally like, so we just kept going. From solid floor to cut drain hole probably took us two hours. That was two years ago. We haven’t seen Mike² since.
Alas, with Phase 2 construction just about complete, we’ll finish it off next week with some different kind of paneling, a Matrix-esque curtain rod, and a sense of accomplishment!
1 Growing up, the phrase, ‘Get out of my bathroom window’ meant that when on the swings in the playground, on the upswing, if someone else matched your height on the upswing, you would joyfully shout with mock anger, “Get out of my bathroom window.” Ironically, the place I grew up in was a street full of townhouses that had no bathroom windows at all.
2 We actually have seen Mike and Kate since, so we didn’t scare them all the way away. Although they did move out of town briefly.
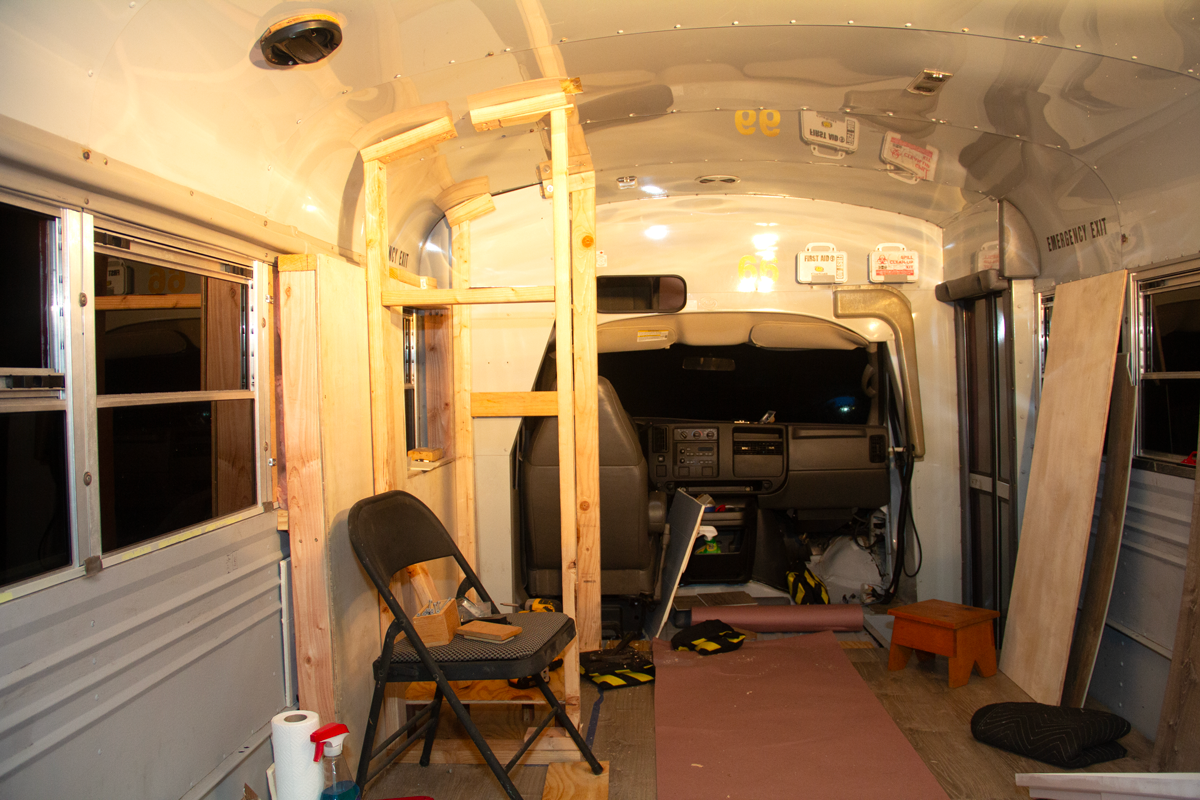
Here’s a perspective shot of the bare bones.

Getting closer to the finish.
Here’s the full bathroom walls and the right and back side of the closet, the most coveted thing in the entire rig.
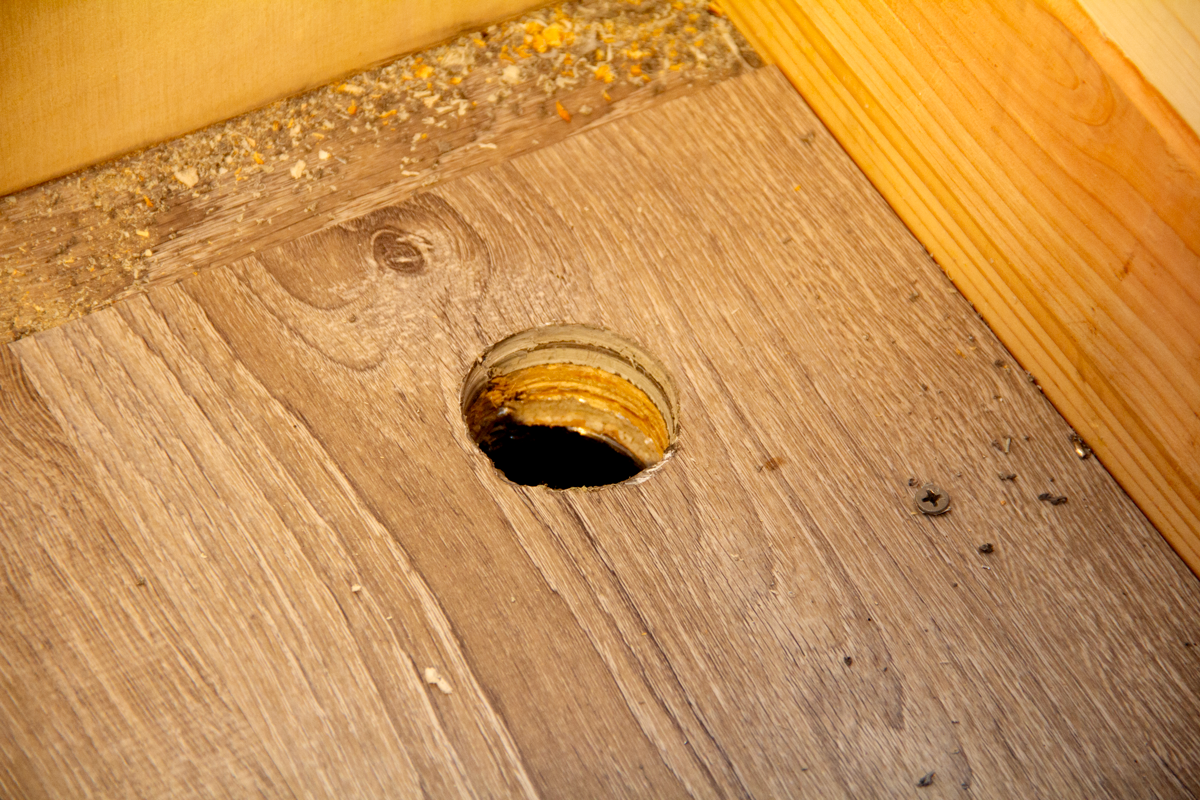
Close-up hole.

Back by poplar demand, here’s a closer look at how we handled The Gas Hole.
Here’s a teaser for next time and that’s all you get!
-30-


Leave A Comment