
Photo by Waldemar Brandt on Unsplash
Just get to the point, would ya?
By this time in the build, both Steph and I were in graduate programs at YouTube University. For every one good video on “How to Build a Bathroom in a School Bus”, there were 10 videos that had us sighing and huffing and puffing at the TV. They would have titles like the above, we’d click the link, then all of a sudden instead of showing us how to build the bathroom, we’d be in their car on the way to the pharmacy to get Grandma’s prescription, then off to the coffee place to watch their friend Zeke & The Monotones play, then a jaunt to Home Depot for unrelated items, then back to the bus to work on the bath-, no, the light switches, or painting a piece of furniture that wasn’t even going in the bus anyway. Ughs.
Eventually, we got there. We found some good videos full of ideas on how to build bathrooms in a bus. Steph just completed her research paper, The How-tos and Whatnots of Bathroom Structures, so we were armed with knowledge. We started looking again at those basement / garage-type shower stalls, similar to those at campgrounds and the like, but they were all too big, thick, cumbersome, pre-moulded, ridiculously expensive, or hard to shape into a magical little Porta-Potti that can do 75 mph.
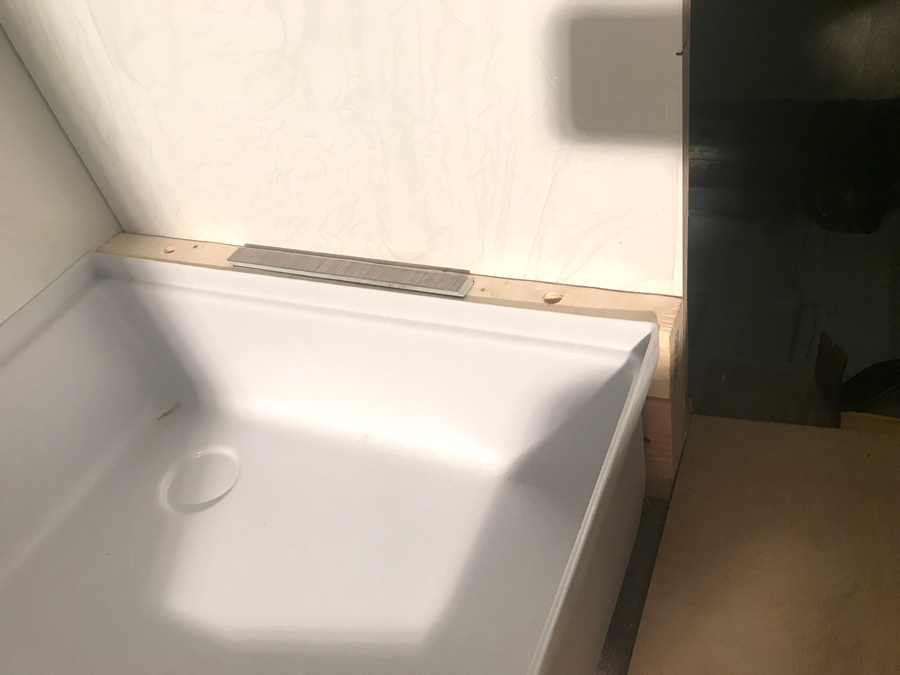
Here’s the shower pan, temporarily located, whilst building up the filler space that I didn’t account for, despite all my NASA-level measuring.
Here’s the shower pan with the J Insert, to help cascade the pure mountain water down to the drain without becoming a stagnating mosquito nest.
Steals & Deals
Walking around Lowe’s one day — looking for very specific bathroom-on-wheels things — Steph found a gem tucked into a tiny discount slot at the end of an aisle, behind stuff that no one else could see. She’s a visionary like that. It was a bathroom shower stall kit that was made out of FLAT, thin, flexible panels that came with only one moulded part, the corner that holds the shampoo, which was a separate piece from the rest of the panels. A gem, I tell ya. A single gem. It was the only one there. Better yet, it was $300 originally, marked down several times to $45. Yep, we threw it on the cart quickly, and before they realized their egregious accounting error, we ran out of there like we stole the thing!
When we got home, we did some English-major math, which never turns out well, and realized we were going to be a few feet short of a yard. No matter, we declared, we still got a smokin’ hot deal. Even if we had to buy another sheet of polystyrene, the stuff they make model cars with, it would be worth it anyway, and we’d still be on high ground with the savings. So we thought. We now know that there was nowhere local we could swing into and buy a sheet, so shipping was needed, but sooo expensive, we starred looking elsewhere for other materials possibilities. Side Note: If there’s one true thing about what bus-building YouTube videos always say, if you choose this endeavor, you will take many, many, many trips to Home Depot or Lowe’s.
Then, the clouds parted and the sun doth shone down upon we. We were again in Lowe’s, but at a different one, still looking for specific bathroom parts, like a faucet, when Steph struck gold — again! She found another dusty discount section and behind some giant pre-fabbed Fiberglas menaces, she found another kit like ours that was the same brand, model number, and discount price. Like school girls, we giddy’d all the way to the car and sped away like we just lifted the Mona Lisa from The Louvre, or wherever she lives.
Hurry up, I gotta pee!
Now that we had enough panels to finish this thing, we set about the task with gusto. Since this plastic was super thin and the tolerances super tight, we had to be a little more precise with our guess-measuring. The good news was that since it was made out of plastic model kit material, we could basically cut it with a beefed up X-acto knife: No eardrum bursting grinder or table saw, just a sharp razor knife got the deal done for the most part.
Since there were no more cheap panels in the known universe, for the templated sections, with a gulp of shaky confidence, as if we were balanced on a high-wire above the Grand Canyon with a net-less drop below, we re-used the cardboard wall templates to make our cuts, adding a few more pegs on the tape measure to give us a little mess-up room. We really took our time with these parts, since cracks and open spaces in a wet bath wouldn’t be a good thing for mold prevention. So if you’re embarking on this sort of thing, take your time and get tight with your focus. Also, if you can, keep the protective plastic film on in case you slip with the knife or the jigsaw, which I used to cut some ‘rough-in’ parts before getting technical.
Stick it
After we cut all the panels and scraped off the burrs with a deburring tool like this one from AFA Tooling (paid link), or some finer grain of sandpaper, as polystyrene doesn’t take much to sand down, we attached the walls with Loctite Power Grab (paid link), a waterproof construction adhesive. After pressing it into place, I used a rubber roller that I used to use back in my newspaper days to ‘paste-up’ stories on flats before sending to the printer (yes, I am Newspaper Old). The rubber roller helps squish and spread all the glue down for a better seal against our Sande panels. I later noticed, after the second time building the bathroom (arrrgh, see future post), that I had not done this process as thorough as I would have liked, as some of the poly panels are lifting at the edges. I will most likely jam some more goo in there, or cover it with trim. Pro Tip: That sh!t dries fast and it’s a ‘one-shot deal’ when placing it, so if you have a giant panel, make sure you have enough goo for the whole panel, like we did not. PS That deburring tool works awesome on metal too, which it was originally designed to handle.
As a general rule, I like to take on the hard stuff first, so things get easier as the day draws to an end. We did the same here, glued down the templated giant panels, then moved on to the square-ish panels, which got smaller and smaller and easier to handle with our tiny headline roller. By the end of that day, we had placed and goo’d all the poly panels and the damn thing started to look like something!
Now that the walls were in place and had some flashy waterproofing, it was time to drop in the shower pan. In true-to-form English-major math, I came up a skosh short on the measurements on the right side, opposite the throne pedestal. I took an hour or seven to fill in the gaps with scrap wood. As luck would have it, I used a scrap piece of the original poly corner panel, the one that was supposed to hold all the shampoo and soap and all that good stuff, to cover the wood. I cut the bottom off the corner piece and rolled it sideways to form a little waterfall-esque slope that would push the wall water down the slope and into the pan instead of just having the water sit on a flat surface growing mold and mosquitoes. We also stuck the pan surround to the poly walls on the edges for a tighter seal. I was pretty stoked by this as it seemed to just ‘work’ and it let us use even more of the cheap thing we got, so it made it seem even cheaper (welcome to Gove’s Skool of Finance).
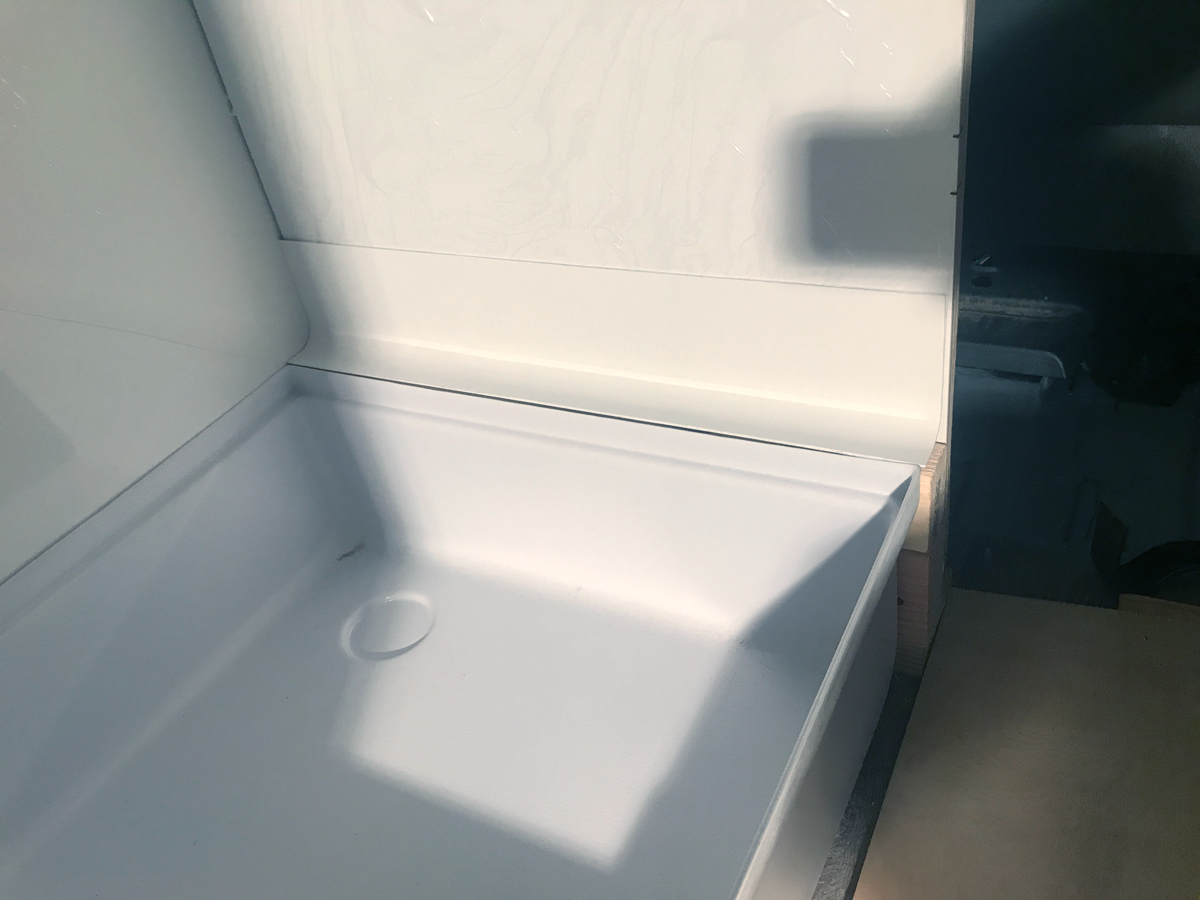
The poly panels went in fairly nicely after fine-tuning the templates.
Seal the deal
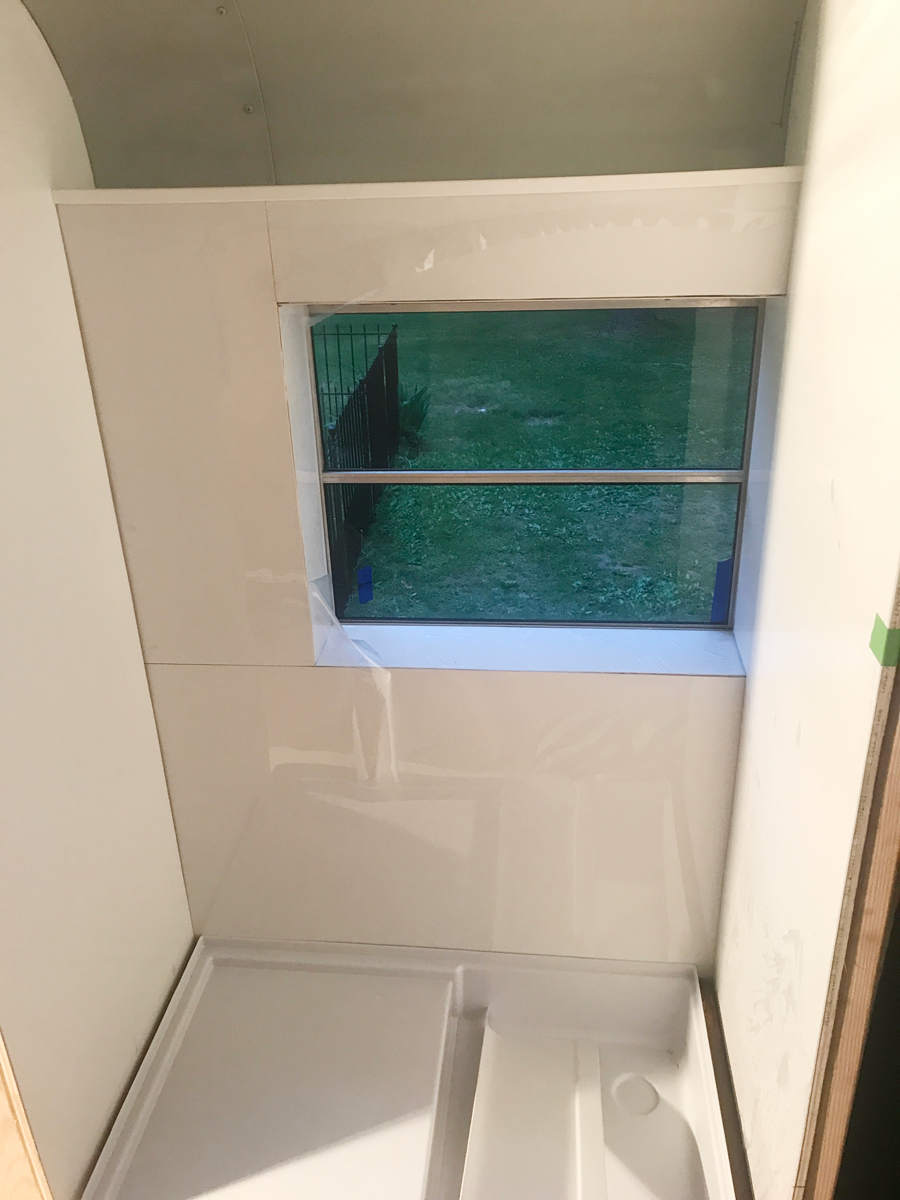
Once we got the pan squared away, we started in on the trim, using the same Power Grab as above and GE Advanced Silicone (paid link) caulking to seal everything up, like the PVC moulding and trim. I paid special attention to sealing in the shelf above the window because underneath that shelf, which would hold our shampoo, soap, and other wet things, was the original bus conduit that held several electrical cables that not only served the truck parts, but also the house electrics to a degree. Nothing says “Good Morning” like a nice burst of lightning in the shower. So seal that thing up!
Speaking of the window, Steph also found, cut, and installed some killer translucent film that made our window look like stained glass. It lets enough light in to not feel like a cave, but not so much light that you can see into the shower from the outside — not even at night. It’s become a crowd favorite!
While I was sawing away at forming a vented panel at the bottom of the shower, in case any water did drip inside it would have an escape vent, Steph was back in Research & Development mode in finding a shower curtain and rod. We thought about building a regular door, but the space is quite small and while I might have been able to get into the shower with a regular door, I don’t think I’d be able to move around once I got in there and my claustrophobic panic attack would send me directly to Danvers State.

After many graduate level courses at YouTube University, we got a pile of things to start looking like one thing.

Here’s a slightly different angle with much better lighting on that mighty drain that took 17 hours to drill. This also shows the trim and moulding as well.
Nifty engineering
Back in R&D, Steph found this articulating shower curtain rod (paid link) that folded into the bathroom to keep the curtain out of the way, but also folded out into the hallway a bit to give my Sasquatch size more room to work the soap. It’s a brilliant design, really, despite its initial zig-zaggy look. We had to add a little wood block in behind the wall to the right side just to sneak the fourth screw in securely, but other than that the thing just installed like magic. It was really the perfect size and type of item for this compact camping scenario.
So now that we had a sealed, waterproof room with a toilet, where the H-E-Double-Hockey-Sticks is the water? Well, the toilet is a self-contained cassette-type unit that can be emptied in any bathroom, but we planned on using it for only No.1s, as we had no plans to install a black water tank. The water for the shower is coming soon however, when the rest of the plumbing arrives.

This genius-level zig-zagging curtain rod is a game changer.
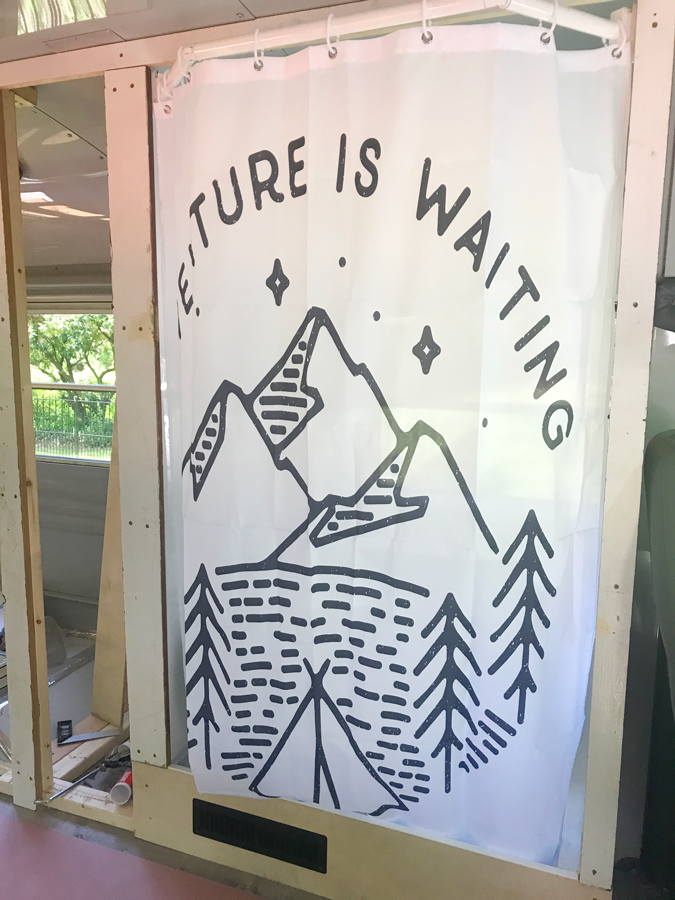
The future has waited long enough to get to this point in the build.
That’s a wrap!
Once the bathroom features were in, installed, and sealed, we added some trim around the bathroom to help it looked finished. We used our favorite screws, then added some sandable and paintable caulk (so silicone here, paint falls right off) to hide the screw heads and cracks, then painted the whole shebop white, to match our cabin-y, beach-y, farmhouse-y vibe.
That’s just about a wrap on the bathroom install for now. Stay tuned in future posts for the shower head install, as well as the plumbing situation throughout!
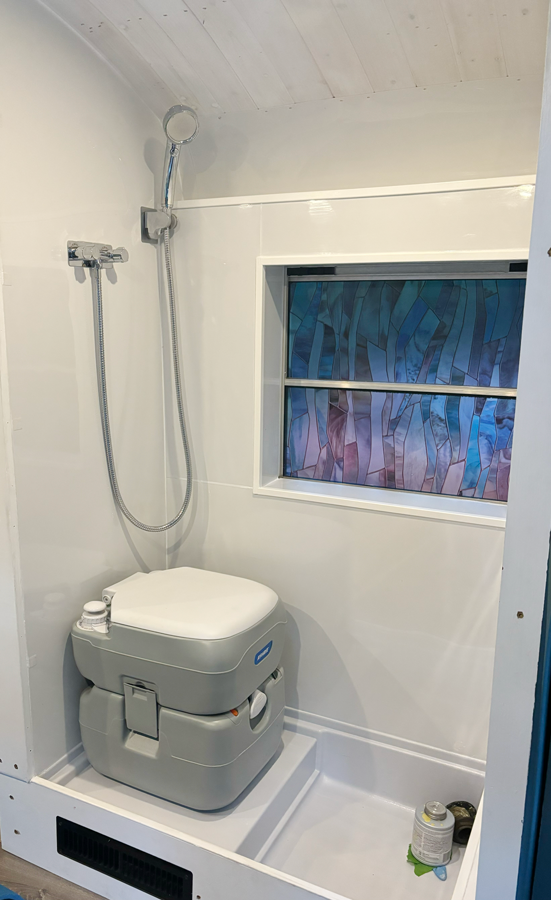
The bathroom is as complete as it will get for the time being, with a little sneak-peek on the shower head, which is long enough to reach out the window to rinse sandy feet, or wash smelly puppies. The drain isn’t quite complete, so we had to weigh it down a bit to avoid ambitious critters from slithering in, but man, look at that stained-glass window!
Up next week, we’re shifting a bit to dig into some Go / No-Go mechanical issues.
-30-


Leave A Comment