
Compared to skoolie people, you could say that most DIY vanlifers have it kind of easy. Since most buy empty cargo vans, even if a few years old, they have a distinct advantage of sweeping the thing out, then get rockin’ & rollin’ on the install. Skoolie weirdos, on the other hand, have to dismantle everything before, uh, re-mantling? Y’know, we have to take a whole bunch o’ stuff out before putting it back in, or replacing it, and building from there.
Such is the case with the floor. With the last post still simmering, now, at least, we got to actually put something in the bus instead of taking it out, cleaning it, putting it back in, or just tossing it into the recycle pile.
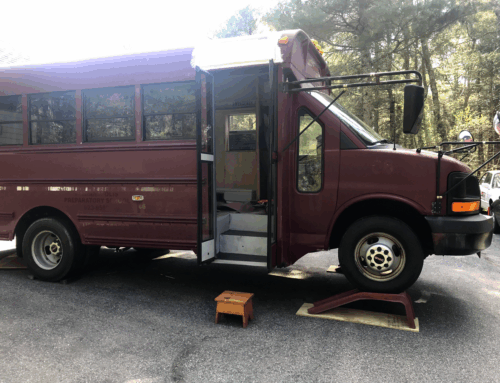
While not sure if full-size skoolie builders have more headroom than us shortie people, we still had to be mindful of my height so I didn’t smash my face on the ceiling fan sorta thing. While Steph can do cartwheels and jumping jacks in the bus, if I wear shoes or get a compliment, my head hits the ceiling.
That said, we had to go minimalist on the insulation and flooring choices. While we are not full-timers, we still wanted a three-season rig. To that end, we installed:
- 1/2-inch rigid foam
- 1/2-inch plywood
- 1/4-inch finished floor
Here are the 214 steps we took to get a fabulous floor that looks great and has the power to resist a rally weekend, silent retreats, sandy wet kayaks, muddy mountain bike tires, and the smelliest, nastiest things of all, puppies.
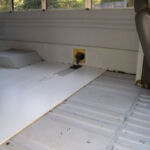


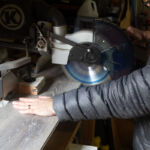
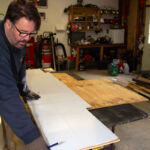


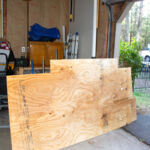
Using the template idea in the last post, we used that template to cut the new plywood and the new insulation, since they were the same shapes. Since cutting Styrofoam-like products is like nails on a chalkboard for Steph, I took care of that process. Now, I have the same affliction. Cutting through aluminum foil with rigid foam and a plastic backing glued to it, with a razor knife, emits a unique grinding squeak, that I can hear right now, in my mind’s ear, as I type this. It’s like chewing on aluminum foil with a mouthful of fillings. I don’t like it.
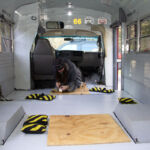
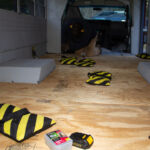
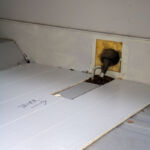
Once we cut the templates, we glued down the foam insulation, using sandbags from a video project to hold them down and somewhat in place. We used plywood cutoffs to not leave R-Value-reducing knee dents. So Steph used them like the alligator heads in Pitfall to apply the aluminum tape to cover the cracks between foam pieces. Pitfall, for those not in the know, was an Atari 2600 video game from the 1980s that featured an Indiana Jones-type fellow, who had to run through the jungle using vines to swing across swamps. When there wasn’t a conveniently located vine, sometimes he had to face three menacing alligators in the swamp, who somehow always opened their mouths in unison. Pitfall Harry had to jump on the heads of these pixelated predators to make it across the swamp to the gold, or he would face certain doom with a life-ending flourish. Here’s another fun fact: The original commercial for the game was Jack Black’s TV debut!
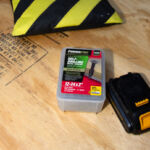
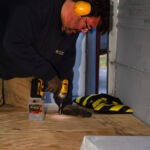
Once Steph made it to the other side of the ‘swamp’, we started placing in our new plywood and screwed them down using a Teks-like product called PowerPro Self-Drilling Metal Screws 12-24×2” (Lowe’s). In short, for our purpose, these things were awesome. They come with the star-shaped drill bit if you don’t have one, and they have a metal drilling/tapping point and thin metal ‘wings’ that cut through the wood. So the self-tapping part drills through the plywood, foam, then the metal floor, whilst the wings cut a bigger hole to let the screw head countersink just below the surface of the wood. Once the wings hit the metal, they snap off and just becomes a sheet metal screw. This is all in one shot too, so there’s no drilling pilot holes and all that baloney. I would give these a 97% rating as they did struggle a bit with really thick metal, and in our case, there were three to five screws per box that had paint over-sprayed into the head, making if difficult and/or sometimes impossible to get the bit to set in the hole correctly. Other than that, these things worked great. Once all the screws were screwed, we also shimmied under the bus once again to seal the business end of the protruding screws so they wouldn’t suck up any moisture, via condensation, that could sneak in an mold up our underlayment.
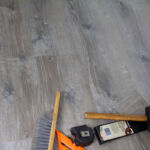
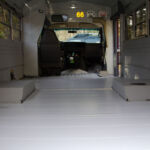
A few impact battery refreshes later, we had screwed down our subfloor and we were ready for some fresh, new, non-trodden on, cabin-esque, aged wood-looking floor, in all-natural vinyl, called LifeProof. This stuff, while technically a laminate, has NO particle board/MDF. It’s just a very thin layer of foamy type rubber and the vinyl and then the textured print, whatever that’s made out of. Basically, it’s all plastic-y rubber stuff that’s totally waterproof and we’ve beat the bejeezus out of it so far, just with the rest of the build. It’s been wet, dirty, dragged over, has had those kayaks in it, mountain bikes, and so on. And it’s held up great.
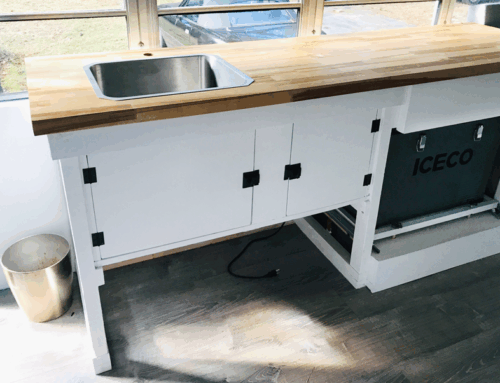
However, while we did read the directions for this floating floor, on how to install the snap and lock bit, but we did not follow the don’t-screw-it-down-because-it’s-a-floating-floor-dummy instructions. It snapped and locked great and we even bought the extra tool for tight spots, but we did make the mistake of building on top of it and screwing down into the flooring.
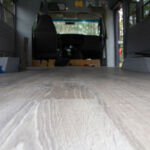
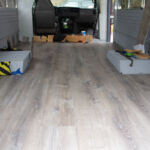
The floor looked spectacular when we finished it, really impressive, if I do say, but by not following the instructions, when the season changed, so too did the floor. When it got chilly with the fall, the floor contracted and split the seam right in the middle of floor. To me, it’s rather unsightly, but a little bead of flexible caulk should do the trick — or a fancy throw rug. Even better. That’s much quicker and less sticky.
That said, always keep in mind that these things expand and contract all the time, like it’s breathing. I read somewhere at some point that a car’s exhaust pipe can grow 1 to 2 inches when the car fully heats up and the metal expands. So while our floor contraction was only about an 1/8 of an inch, it was significant enough to alter the finished product. Chances are though, like Steph says, we won’t be staring at the floor lamenting over the fact that we didn’t follow directions, when Devil’s Tower looms through the windshield.
If I’m feeling super spunky on a rainy March day, I might go out an make some relief cuts at the edges of the built-ins so that center crevasse can shrink up a little, then cover it with moulding. In reality though, I haven’t felt super spunky in March since I was eight. So there’s that.
Tune in next time for the giant Radio Shack project that will help us see at night, stay warm when it’s cold, cold when it’s hot, and even have a hot shower!


Leave A Comment