It might be all the latch-keying, but I think Gen-X 70’s kids have a unique sense of humor. One of those humor inputs comes directly from Sesame Street and the Muppets. I mean, come on, Super Grover? The two old dudes in the balcony? Exactly. Their names are Statler and Waldorf, by the way. About 10 years ago, the Muppets did a car commercial and one of the band members says, “I’m spacin’ out on all this space.” We always liked that line and I still say it occasionally a decade later, because, y’know, I’m a weirdo.
Speaking of space, and spacing out, space is at a puh-remium in a bus, particularly a small one like ours. We chatted about this in a previous post, but most skoolie people build a permanent bed structure in the back and build their ‘garage’ underneath the bed. Typically, the garage contains the electrical system, tools, shore power cables, Jimmy Hoffa, plumbing stuff, stuff that gets dirty, etc. While that’s a great idea for some, we wanted more Muppet space.
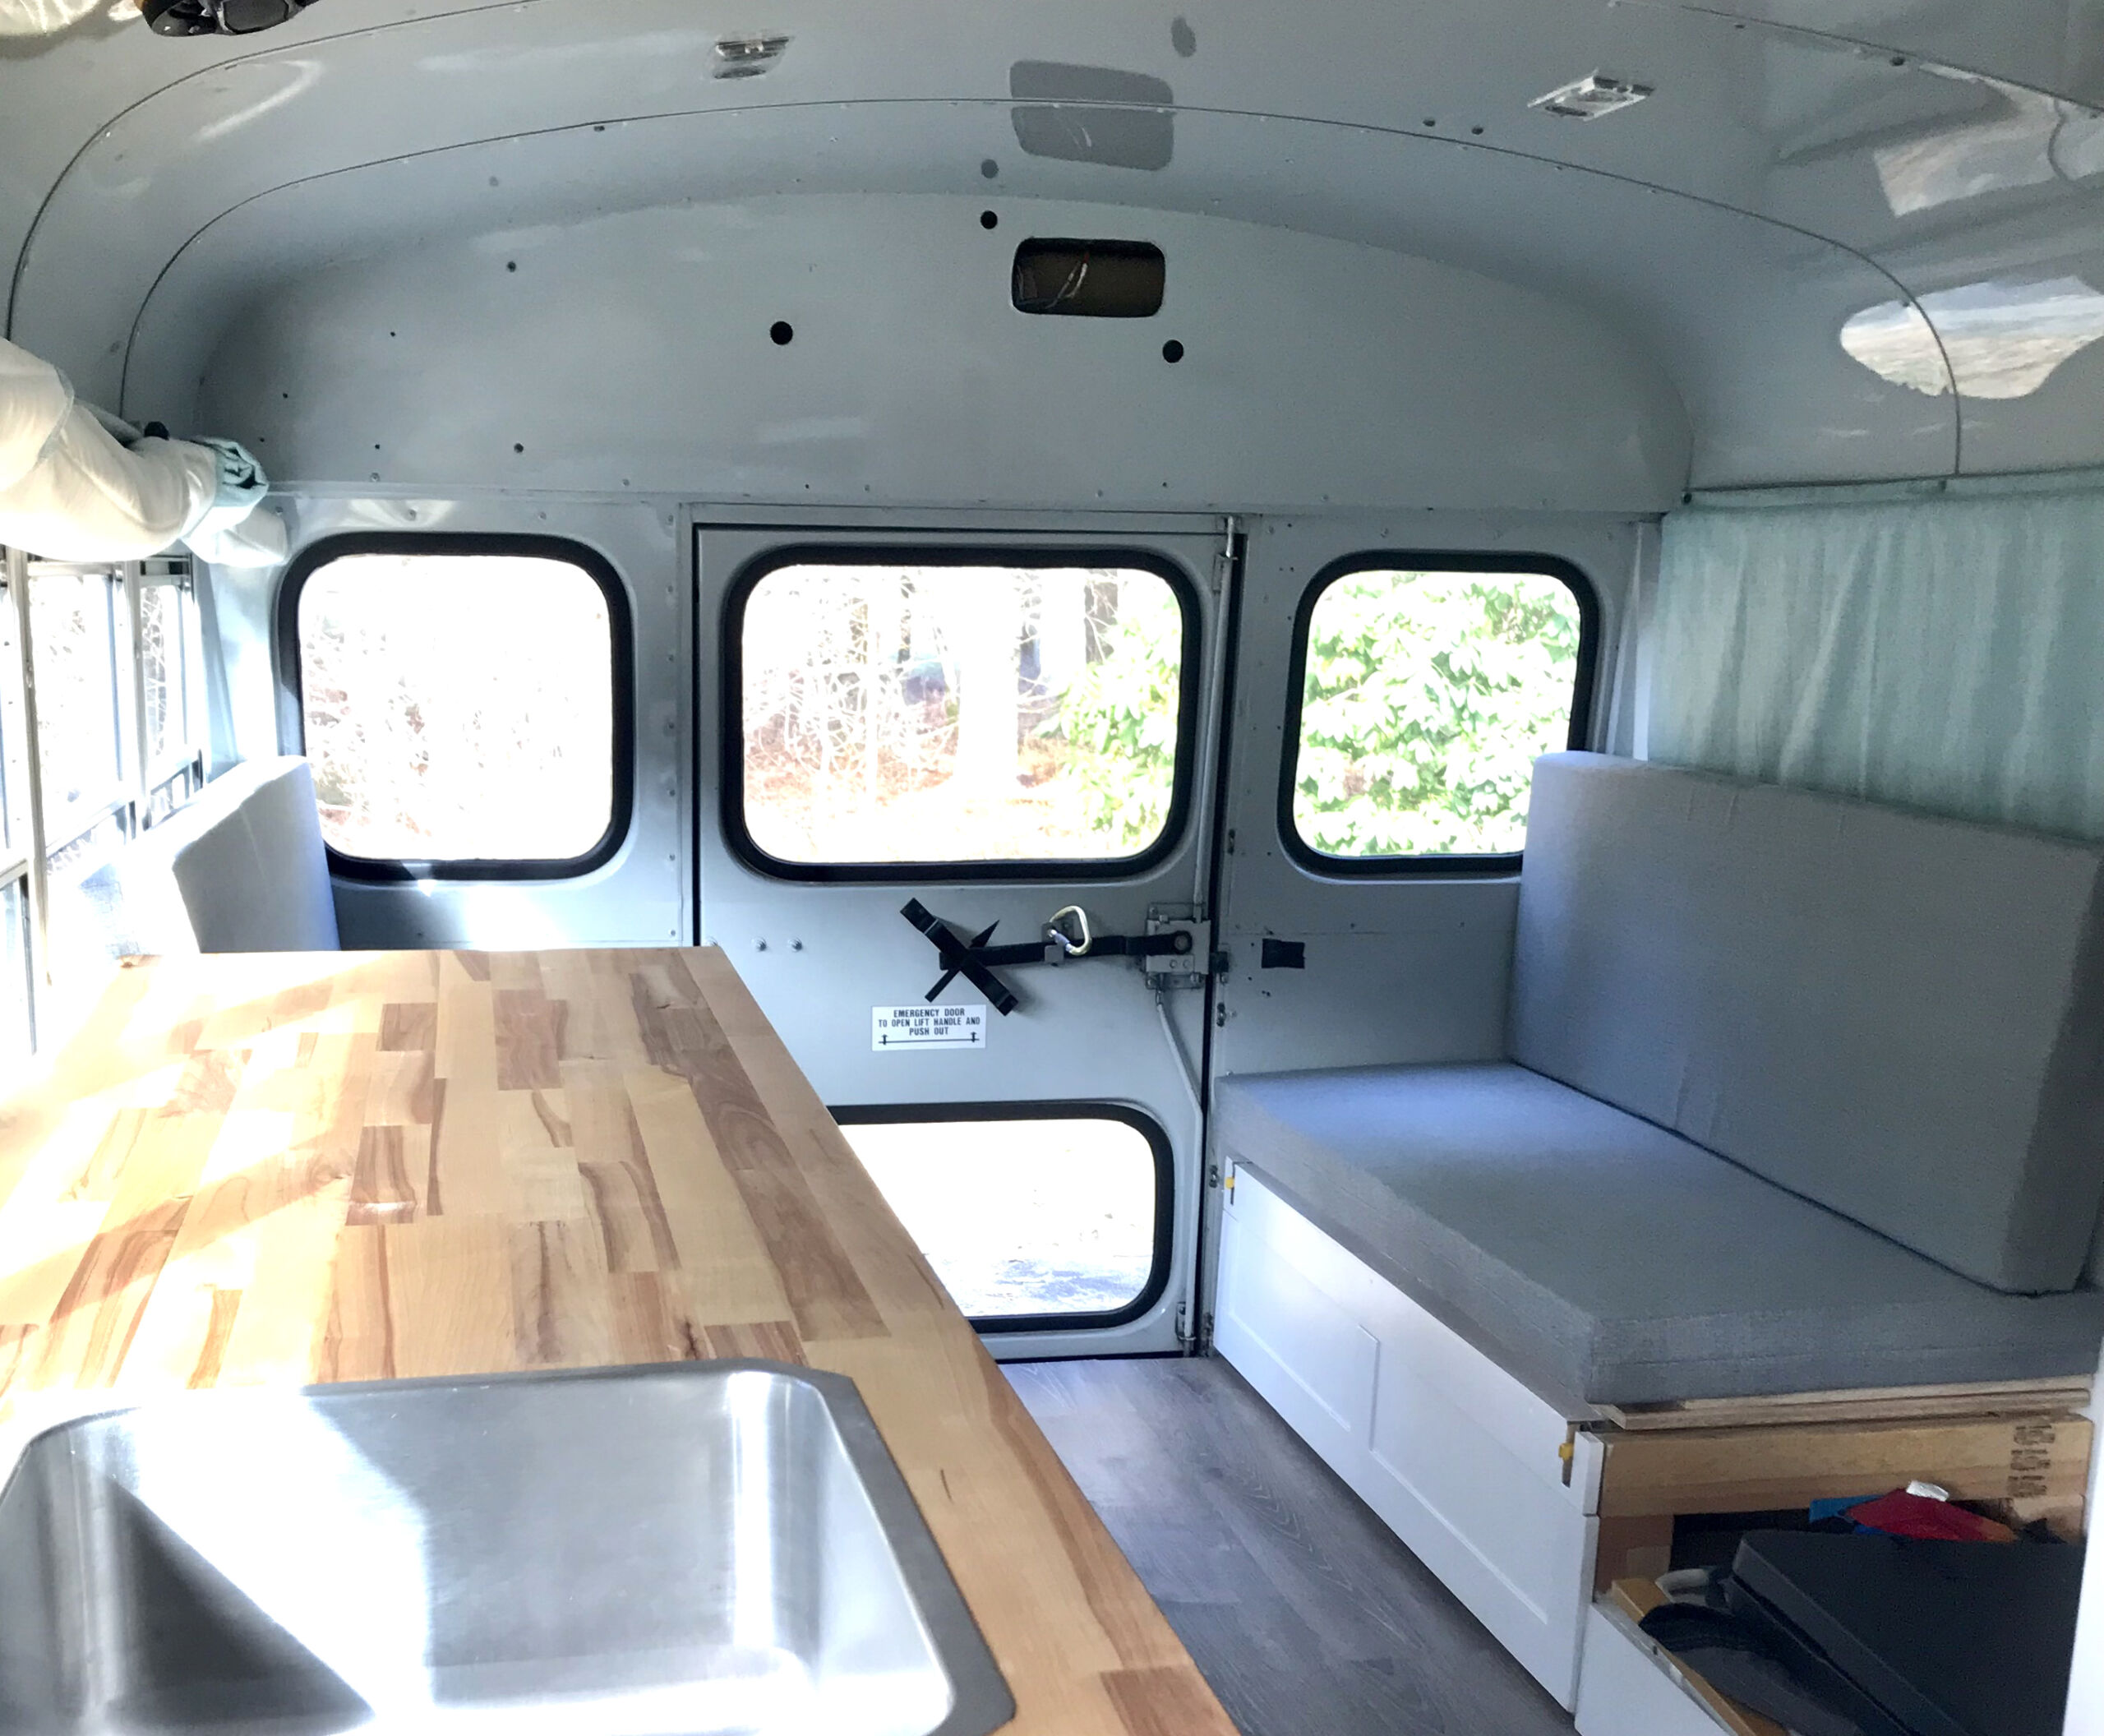
To achieve this miracle, we scoured pages and pages on skoolie.net and YouTube, of course. We settled on a hybrid system where we can fold the bed into a dinette in a few minutes. We did this for a couple of reasons: One, in Dining Room Mode, we still have phantabulous access with the giant rear door. We can throw kayaks and beach chairs back there if we wanted to, or rally tires, tools, and other racing necessities. Then, after a brisk paddle, or parking in the rally service area, we can transition into Bedroom Mode and catch a much-needed nap.
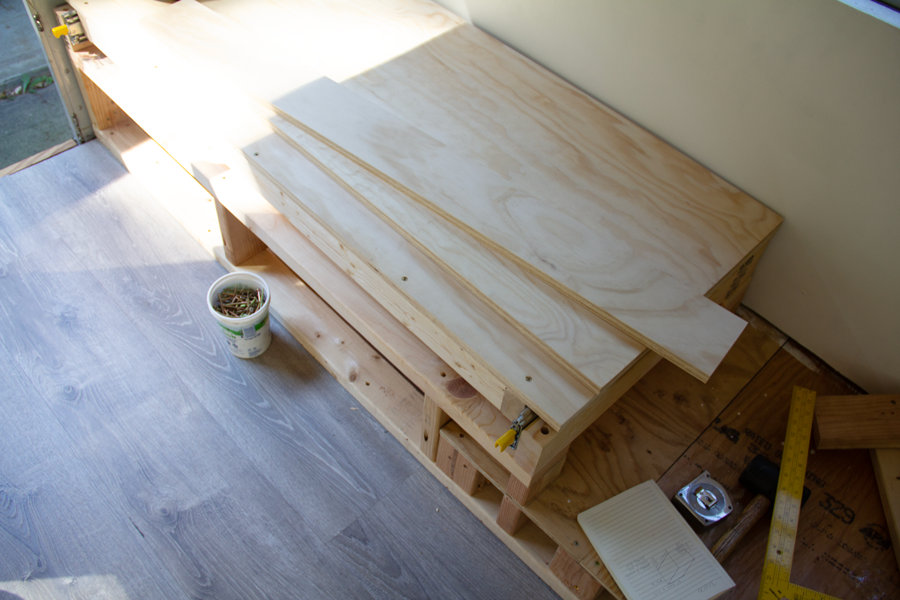
Primo plywood keeps the splinters down.
Here’s enough wood to hold up the Pru — and me!
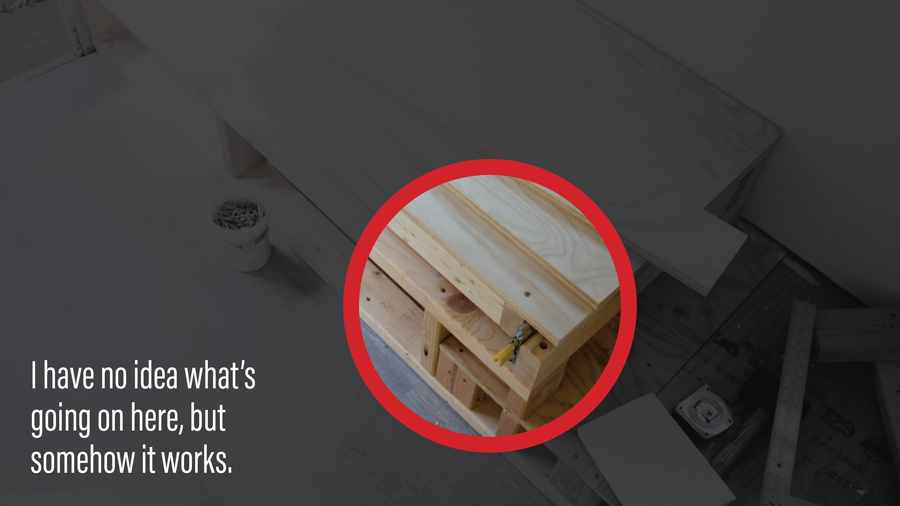
This might be the Rube Goldberg version of building the supports, but hey, it’s done.
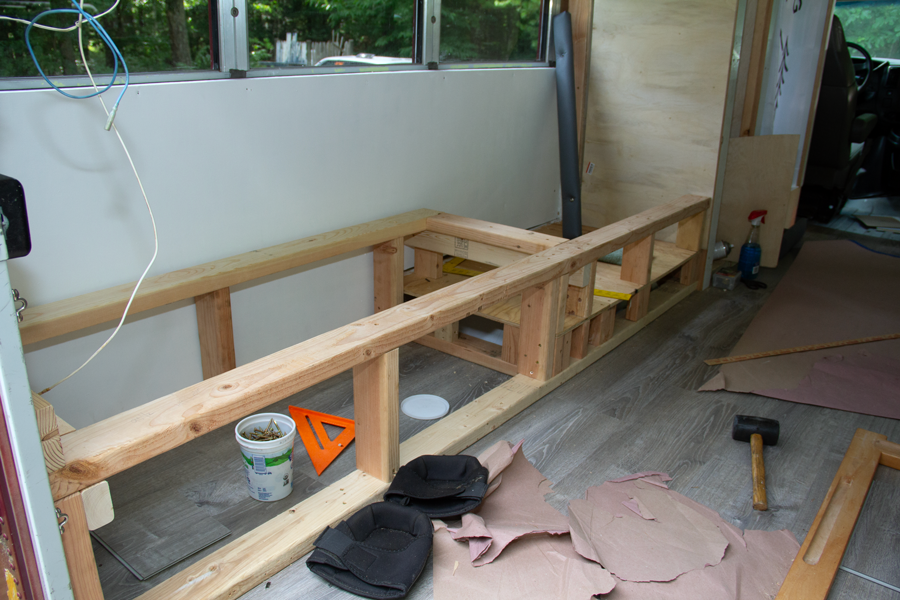
Industrial strength sleepy times
I occupy a Sasquatch-sized body. So in this case, industrial strength building was definitely a necessity. Maybe we could have gotten away with something lighter, but I wouldn’t have been comfortable thinking that the bed could suddenly turn into a yoga mat with splinters if it fell to the floor. So 2x4s it was again. And three-quarter-inch plywood with a presentable face. Presentable meant pricier, but it also meant that the cushions would slide easier without snagging on any splinters. The plan was to paint it as well, which would further help in keeping down spiky wood, but we haven’t gotten there yet. Paint, or some other finish, will help prevent moisture issues, so if you’re doing yours, paint up.
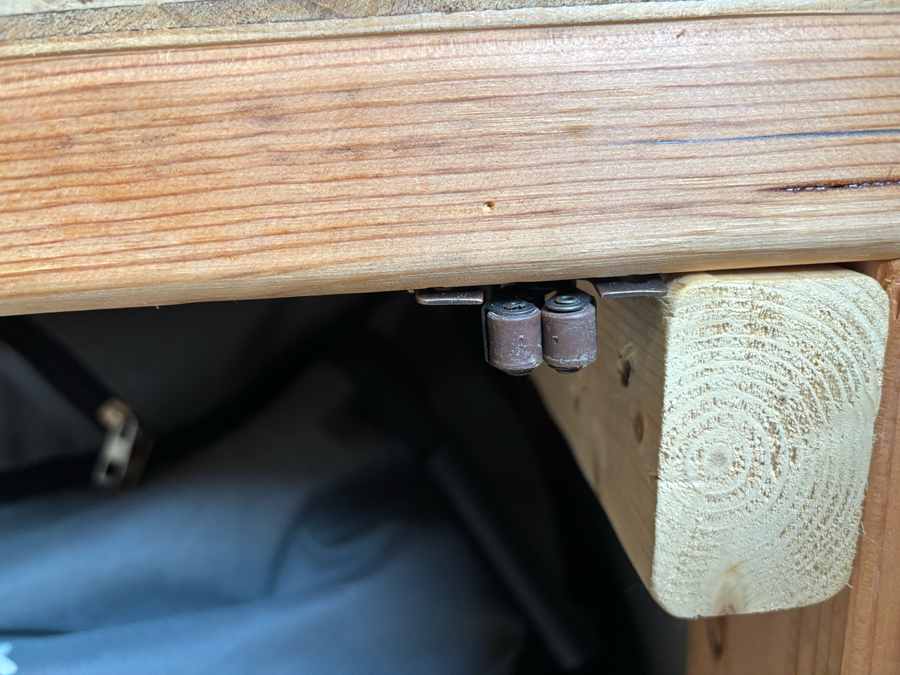
Steph went a-surfing again and somehow found us some locking drawer sliders (paid link) that had a weight capacity that clearly covered my mythical forest creature requirement. She also found some stainless piano hinges in heavy duty format for all the flipping and flopping we’d be doing opening and closing the ‘bed space’. I laugh that the latter, as most home-buying/remodeling shows now refer to everything as a ‘space’. Oh, here’s the kitchen space. Here’s the play space. Here’s the yard space. Nope. It’s a yard, a playroom, and a kitchen fuh the luvva Pete (whoever that is). Anyway, she found some industrial strength stuff that would take the weight of a rally tire or twelve.
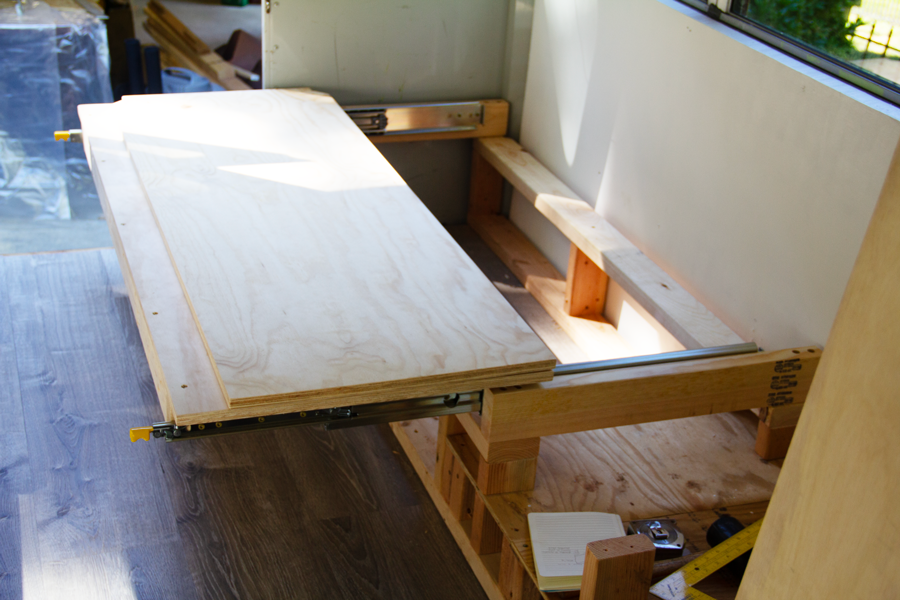
Stuff is happening. The industrial slides went in pretty smoothly. That little yellow tab is the locking mechanism. Just flip up and sliiide out.
Math doesn’t live here
Since neither of us would win a Nobel for Breakthroughs in Mathematics, figuring out the flippy bits and the floppy parts took a little thinking, which involved quite a few burnt circuits in our, um, brain spaces. Steph knows the most math between the two of us though, so she figured it out, including how to make the other side lip land on the slider so we didn’t have to buy two sets of sliders. Brilliant! She can balance a checkbook, whereas I always end up with a remainder when I carry the G and multiply the carrots. That said, she gave me the measurements and we set about the cutting up of some primo wood, which is almost as scary as math.
If you plan on making your own flippy bed, don’t forget to ask the math professor to accommodate for things like weird angles in the bus walls, and the width of piano hinges, and back-door lock rods, which don’t appear inside when the back door has been open for 2.7 years during the building process. We had to notch out a little corner, but only on one side, because, y’know, bus shapes. Then once we completed the building, attaching and finishing, we went to flip out the bed when the back door was closed, as you might do for a rainy day snooze, and discovered that the leading edge hit the lock rod on the back door and wouldn’t fold down flat. That would have been terrible had we not discovered it at that point. Well, not really terrible, I guess. I mean, there was enough play in the rod to open the door, flatten the bed, then close the door and the rod would bend enough for a tight fit.
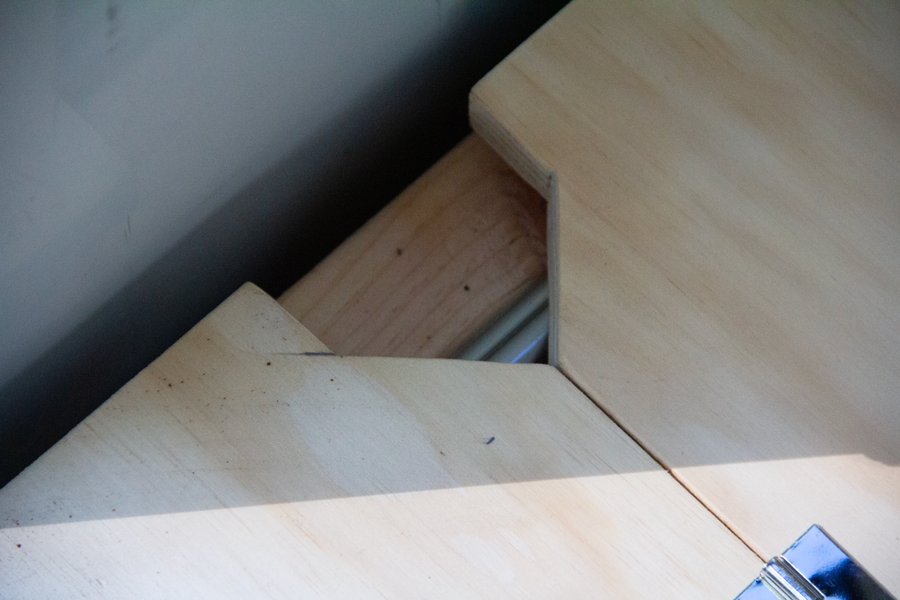
We cut this upside down Monopoly house shape to accommodate for a weird bus shape in the corner, which is where the tail light cables and the like run down to the rear of the bus.
Sometimes history repeats itself
As if I didn’t learn the lesson from three seconds ago, I did it again when I built the under-bed storage doors. I built the panel on the driver’s side and again didn’t account for the lock rod being in the way. Since I was planning, building, and mathing on my own this time, with the back door open, to me, that issue didn’t exist. So I built the entire thing (see below), then tried to open the storage door with the back door closed, then clunk, lock rod. Oy. A little swearing and trimming later though, boom, the thing went right flat to the floor, as intended.
Sticking with the casual farm industrial look, I made the storage door panels to look Shaker-ish because 1, we like the simple lines, and 2, simple lines are waaay easier to make for the math deficient. We had some leftover Sande plywood, the light, waterproof-ish, cheaper stuff from the bathroom build, so I used that for the base. While traditional Shaker uses stiles and rails and floating panels and all that professional mumbo-jumbo, I just cut some quarter-inch plywood and glued it on top of the larger panel to give the appearance of a centuries-old technique. I think it came out quite swell.
Quaker or Quacker? Here’s the finished panel with Sande and quarter-inch plywood. The flippy bed hinge area is visible here, but you can’t see it from up top. So don’t worry fellow OCDers.
So you built a door, but does it open?
Sande is definitely not a strong wood, not like the bed surface anyway. It has a little more rigidity than that 70’s living room wall paneling, and it’s a little thicker, but I wouldn’t want that to be the only thing that’s holding back a hungry Kodiak, know what I mean? I don’t think there are any bears living under the bed, so this panel door thing just had to be sort of a functional decoration. So cheap, light wood works great in this instance. To help the door open, I picked up more piano hinges that Steph found. To help close it, I got to use recycled closures from Gove’s Hardware Store in the basement, or Down Cellah, for my fellow Massholes.
Bust out your abacus for this next bit. The idea was to have the door open downward for easy access to the stuff inside, but to also have the door lay flat on the floor, so if we stepped on it, or dragged heavy stuff across it, it wouldn’t shred the edge of the panel, pull the hinge out, or split the wood. That said, if you want to do yours like this, don’t forget to calculate the distance of the flappy door to the floor, like you have to raise it up a skosh to accommodate the folded part. To do that, I put the door flat on the floor, then put the hinge on in the open position, then started screwing in the 1.6 million screws that come in the package. Perhaps from an automotive standpoint in torquing stuff down, I started in the center and went out; one on the left, one on the right, one of the left, etc., until I reached the end four days later.
Now the door opens and closes. To keep it closed, and to prevent all our stuff from spilling out and sliding into the windshield during an emergency coffee stop, I installed the receiving catcher first, one on each end, then attempted that measuring thing I’ve heard to much about, to guesstimate where the catchee should land. Somehow, that all worked out and now the thing closes and stays closed! After using it a few times, I still want to router in some little finger pulls to make it a little easier to pop open, since we couldn’t use door pulls on account of that flat-on-the-floor part. After, of course, I realized one can buy flush-mounted pulls, but 1, I don’t want to spend any more money on that, and 2, I’m kinda diggin’ the clean look.
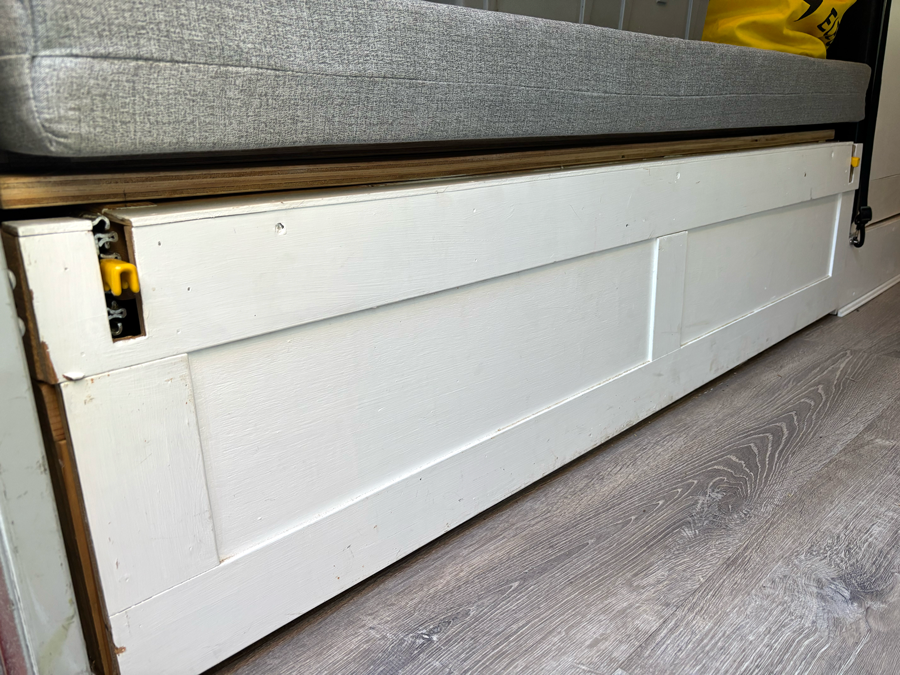
Here’s the finished storage panel with the cutouts for the sliders. You can also see my hack job on the left to make room for the back door locking rod. This has fresh paint now.
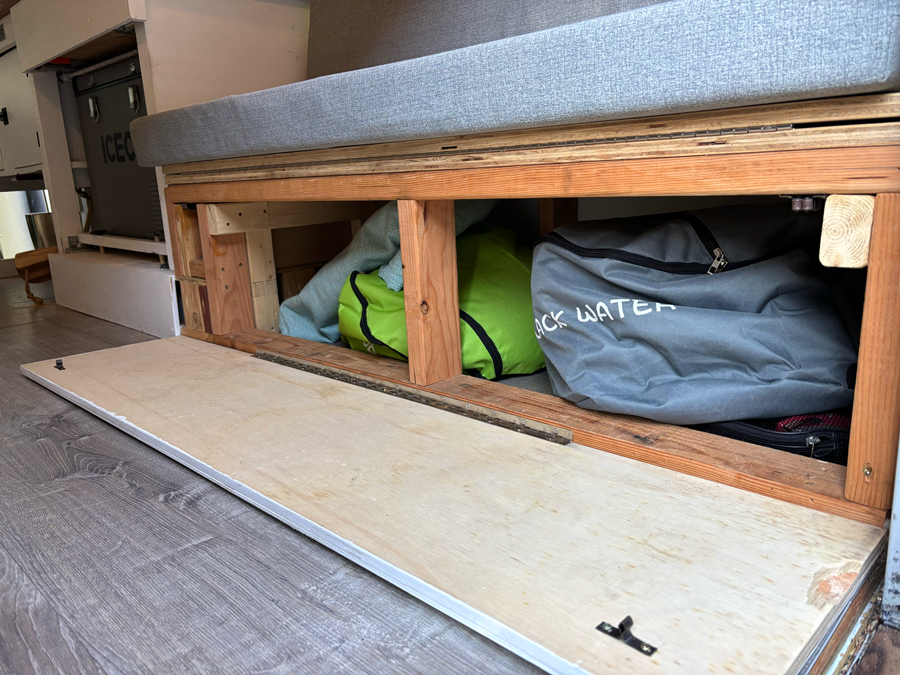
After months locked in an Austrian Mathematics Lab, I figured out how to get this to lay flat so an errant rally tire wouldn’t rip the hinge out.
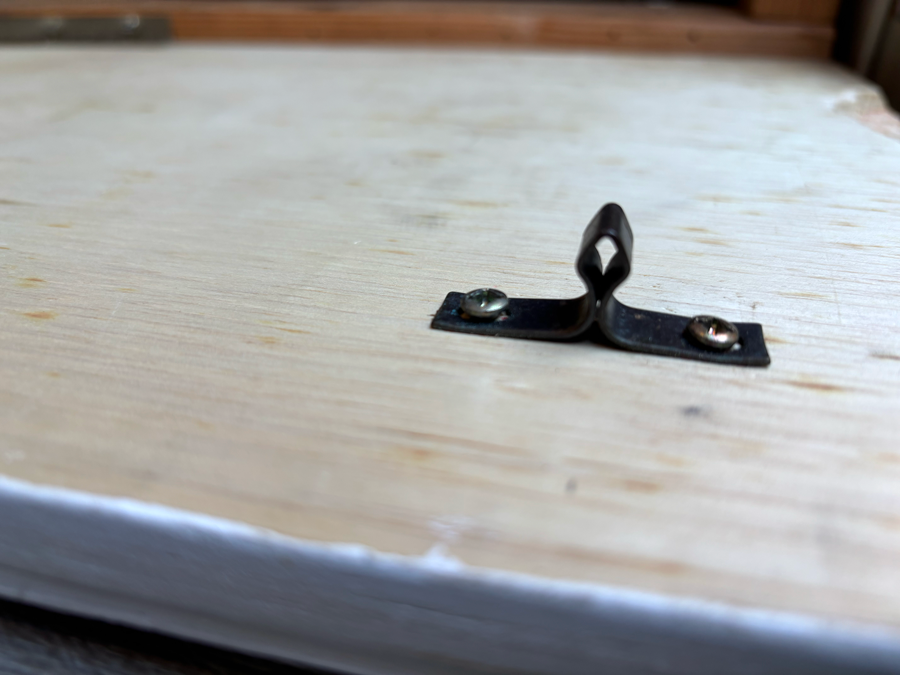
Here’s the closure hardware pin that’s probably from the 1970s, but it works.
Here’s the other half of the hardware closure, which works surprisingly well.
Mattress + Seating = Cushions
Speaking of math, when it came time to make the cushions for the nest, Steph disappeared into her attic workshop. Fabric flew in from far-off lands, thread bobbed in from some lady named Jo-Ann, and out from under lock and key, came the fabric scissors out of their sheath, like a samurai sword from an ancient dynasty, shhhiiiinnnnnggggg! My ear pressed to the door, I heard a gentle, encouraging voice from a computer. Soon after, some sewing machine sounds, then snipping sounds, then, moments later, some truck-stop swearing from another, much closer voice. Suddenly, dead silence. Too close. I backed away slowly, silently, backward down the stairs in my garage boots, which I immediately manifested into ballet slippers. When I looked down, our dog was doing the same thing. We read each other’s worried faces and fled. The silence was deafening. Finley ran to his bed in the corner and I jettisoned into the warm embrace of the cold garage. That was a close one!
Days later, it seemed, some foam showed up. This gave me an indication that progress was happening and the chances were less for me in pulling those coveted fabric scissors out of my neck. Some house tools, I have learned, are not to be used for general purpose things. Clearly, I was banned from using the fabric scissors from Day 1, and weirdly, the turkey baster. I mean, I only used the turkey baster one time for slurping old gas out of a lawnmower and now I’m banned for life? I don’t get it.
Say it ain’t sew
Oh, it’s sew. Sew, sew, and more sew. That gentle encouraging voice came from a fella on this website called sailrite.com. They make all kinds of a crazy sewing things that you can use to literally make sails for a sailboat, or box cushions for our bus project. Steph watched the video a couple of times, then soon we had pro-level, custom cushions for our mattress and dinette, complete with hidden zippers, so we can wash the covers if someone chooses to put muddy rally tires on them. I don’t know why Steph would do something like that, but you never know.
We ended up using this foam (paid link) for the cushions, in the high-density version so it should hold up well. The fabric Steph found is also thin and semi-soft, but also high strength and water resistant. When she finished those masterpieces, she also Scotchgarded (paid link) them against sloppy puppy feet.
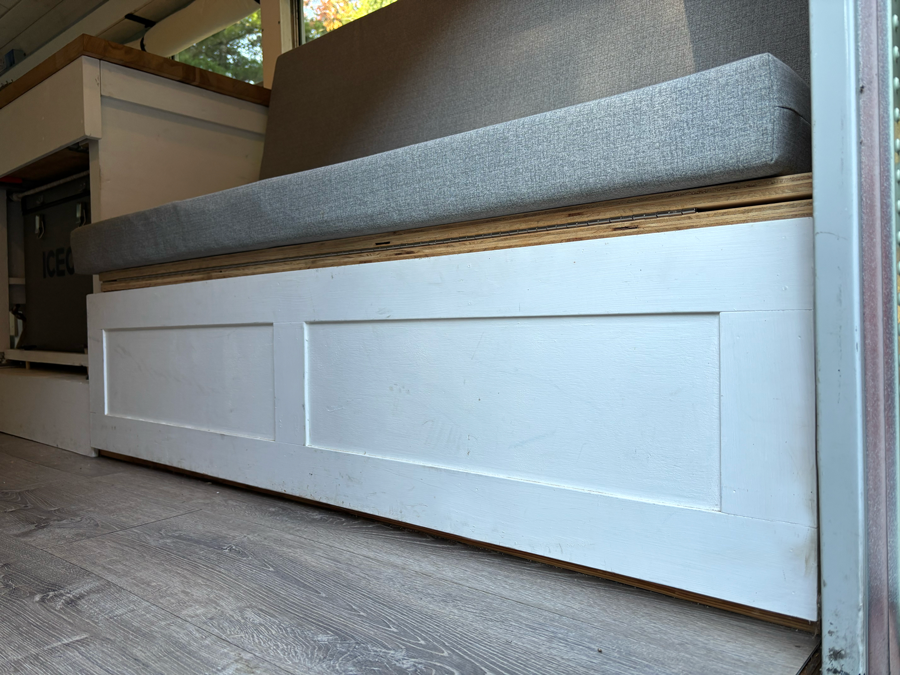
The flippy bedroom / dinette scenario ended up being a truly custom design right down to the cushions, which also had to be math’d into place on account of the odd cut sizes we had to use for the bed base. This actually worked out pretty well since the cushion-splits in Mattress Mode landed in between our hips and shoulders, so there’s no discomfort like that old pull-out couch forever consigned to the basement. Steph also math’d in a ‘squish factor’ on the cushion sizes, so in Mattress Mode, we sort of have to wedge the cushions into place using the driver and passenger side walls as impromptu bookends. This extra squeeze prevents the cushions from wandering overnight, so we don’t wake up sleeping on cold hard plywood. Pretty snazzy.
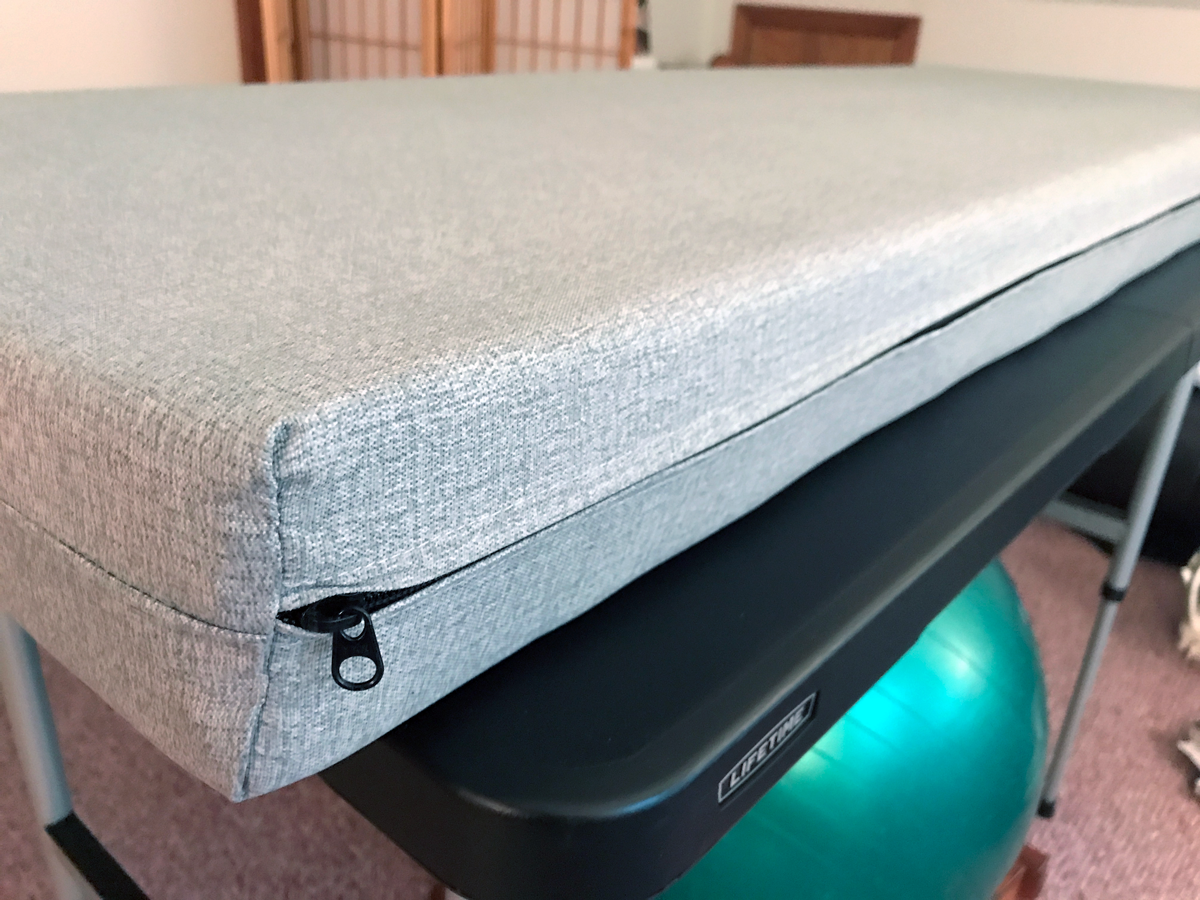
Here’s the finished cushion complete with hidden zipper and sweet fabric. The table underneath is our bus table, that folds in half, but also has adjustable heights for indoor/outdoor situations. The cushions are extremely comfortable.
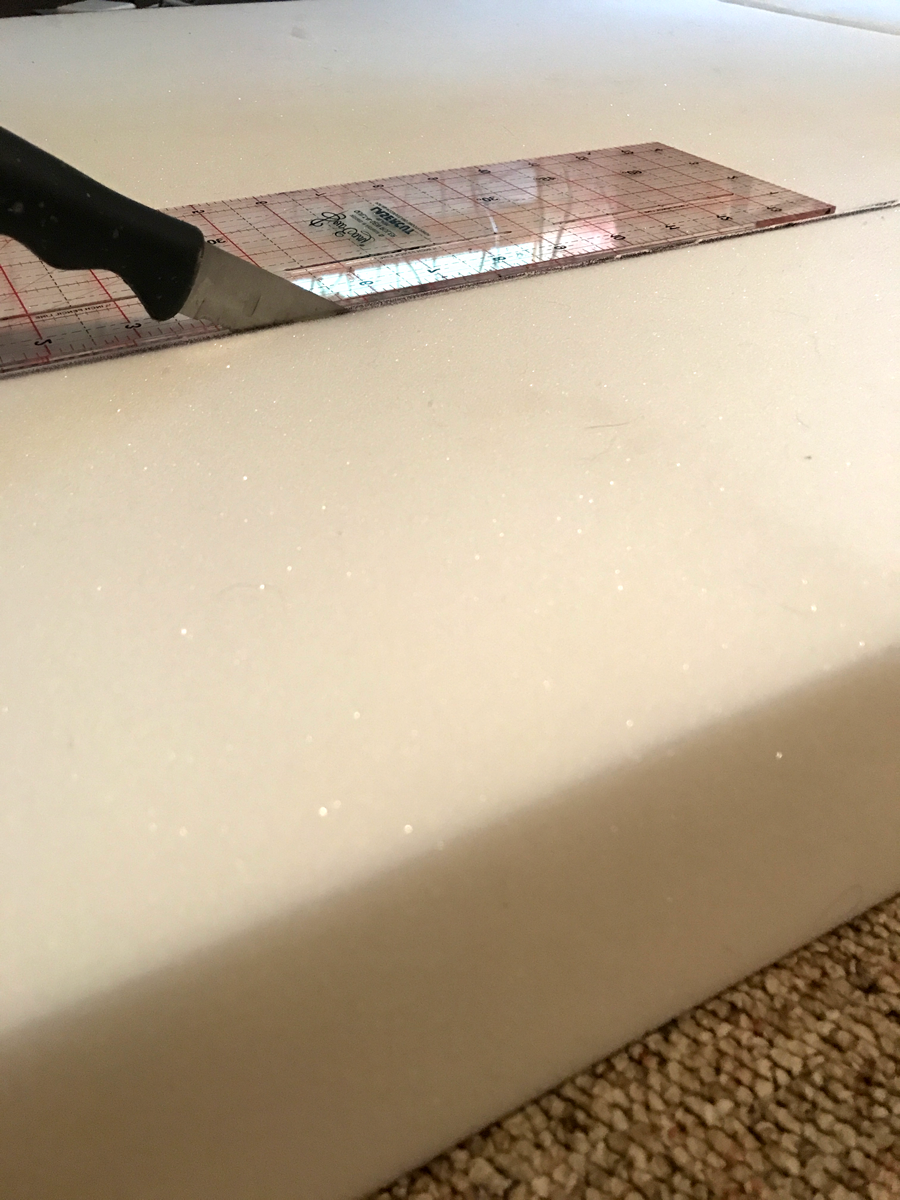
High-density foam is the way to go. The easiest way to cut this is with a bread knife! Wait a minute… how come SHE gets to use house tools?!?
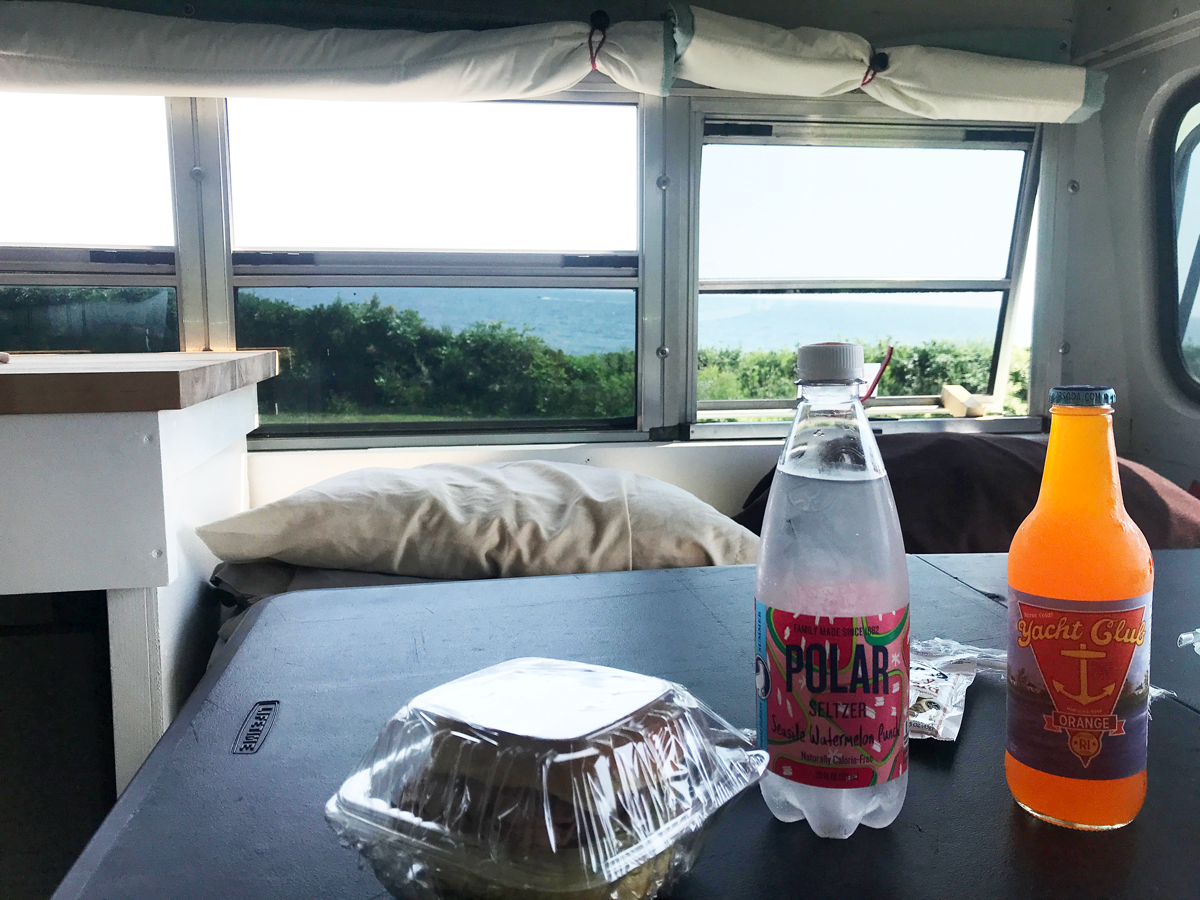
We took the cushions for a quick shakedown at Beavertail in Jamestown, RI.
So that’s how we made a bedroom, dining room, and two closets in a short bus in just 302 easy steps!

-30-
Leave A Comment